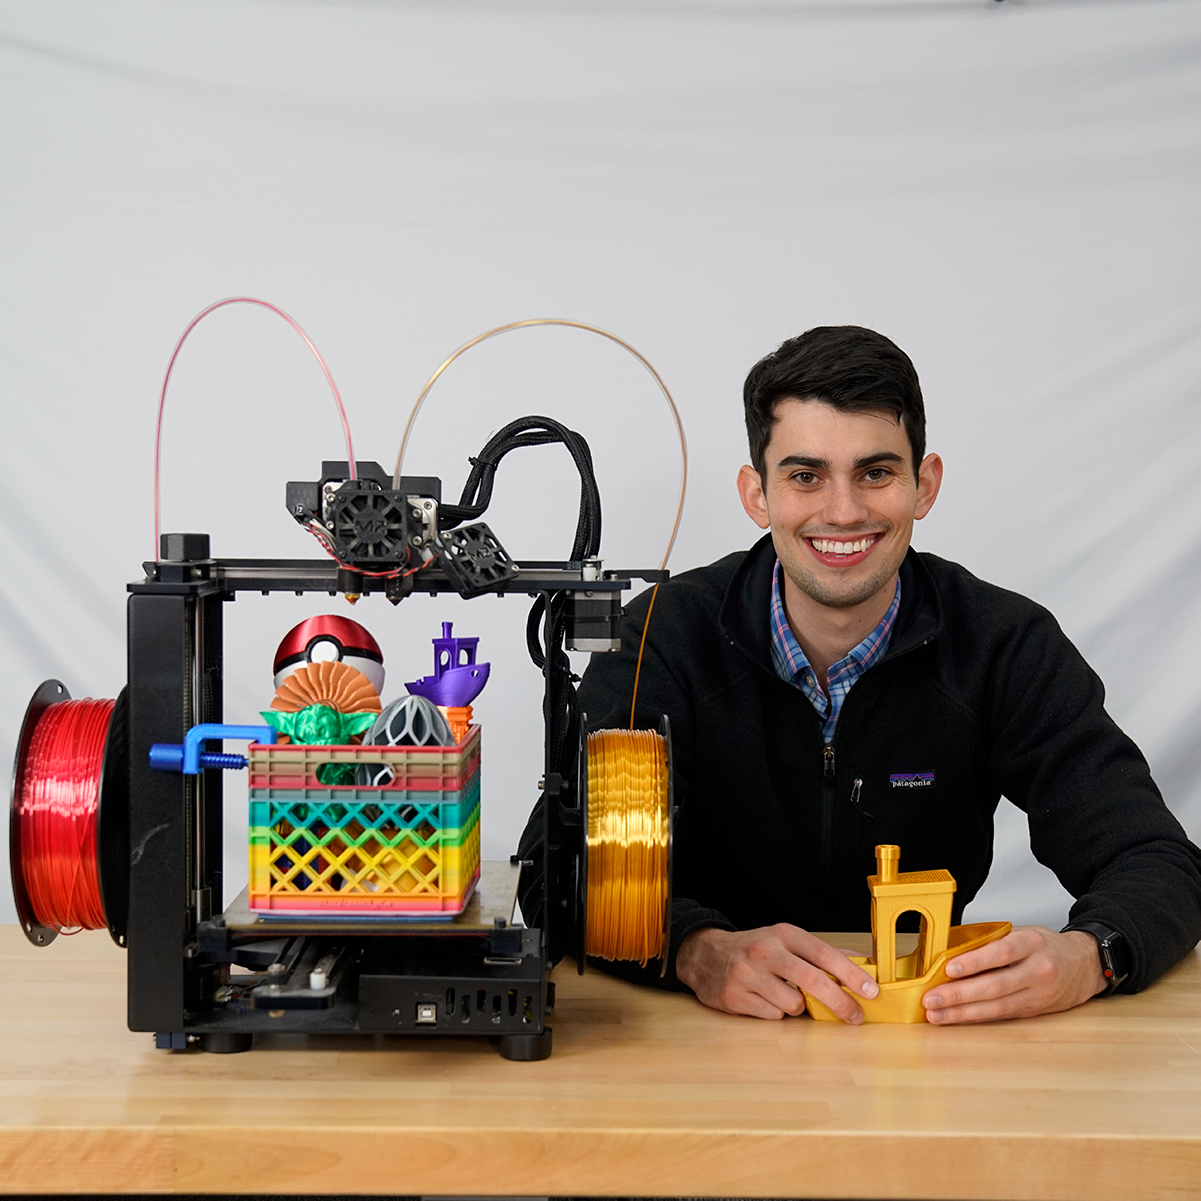
Dr. D-Flo is a 3D Printing Fanatic
Hey everyone! Dr. D-Flo here. Unless you have seen my YouTube videos, then there is a good chance that you have no idea who I am. Before jumping into the guide let me provide some of my additive manufacturing credentials to convince you that I am knowledgeable in this field. I am a huge 3D printer enthusiast. I have 3D printed well over 100 kilos worth of knickknacks and prototypes. I built and programmed an independent dual extruder, known as Zidex. For fun, I 3D printed a 3D printer (yes, you read that right!). I have laid my hands on many of the 3D printers that are commercially available today, and let me tell you not all 3D printers are created equally. Some of the high-end features that are available are gimmicks that allow companies to charge absurd amounts for their printers. For this reason, a guide such as this one is a valuable resource for buying a printer that fits your needs within your budget.
How much is this going to cost?
If you are technologically inclined then you can get away with spending $300 or less to buy an imported 3D printer. Usually, these printers require some TLC and upgrades for reliable and quality printing. If you have a small budget and some electrical tools (wire snips, soldering iron, etc.), then I recommend building your own 3D printer. Check out my Top DIY 3D Printers guide for a list of my favorite printer designs.
If you are new to 3D printing and want a printer that works after a little assembly, then a budget of $500 to $1000 is recommended. At this price range you may not have all the bells and whistles, such as dual extruders, but this is a great entry point for those looking to do a little 3D printing on the side. If you expect to be printing all the time, then it is best to increase your budget to $1000 to $2000, where you can purchase a 3D printer that is designed to be a workhorse. And finally, if you want a tricked out 3D printer that can print multiple objects simultaneously or print high temperature filaments then expect to spend north of $2000. Please keep in mind that these are just guidelines, and great printers can be found at many price points, which is especially true when a printer is on sale.
FYI
This post will only include 3D printers that I have used before (unless otherwise stated), so there is a chance I have not experienced the ultimate 3D printer. If there is a glaring omission please let me know over on the forum, and I can make adjustments to this guide. This roundup will only include Fused Filament Fabrication (FFF) 3D printers. I hope to make a guide for SLA printers in the near future. Finally, the Amazon and MatterHackers links are connected to my affiliate account, and therefore, provide a small kickback to keep this website up and running. These links may not be the cheapest price, so shop around before purchasing!
Featured Printers
Let me save you some scrolling by highlighting my favorite 3D printers from a couple different price points. It is still worth your time to read through the whole list as there are a lot of awesome printers available.
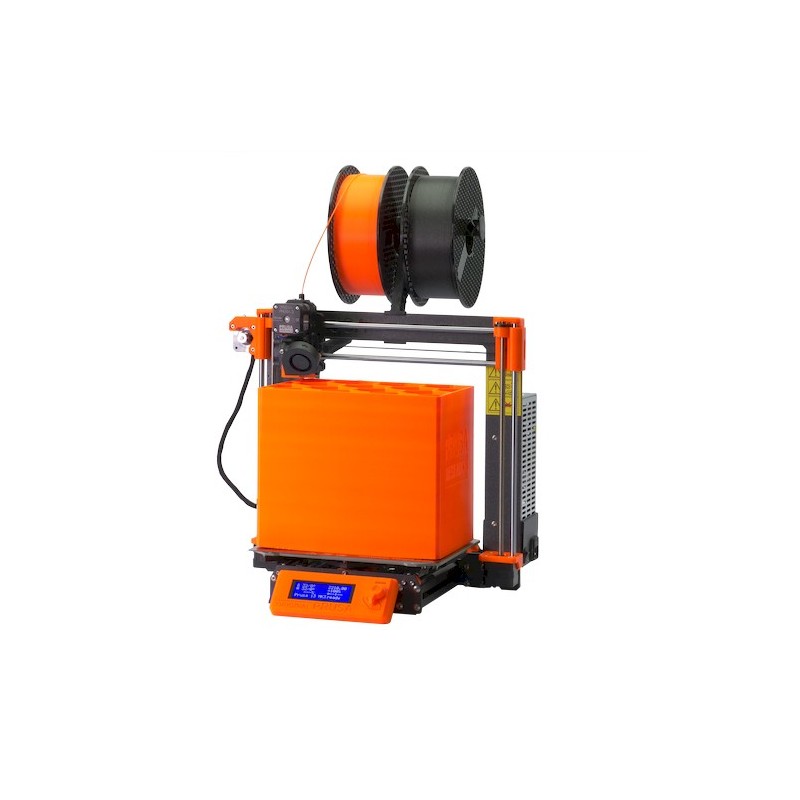
Best Overall: MakerGear M3
MakerGear M3-SE
- Reliable but also quickly repairable
- Aluminum and steel frame is robust
- Wifi connectivity
- Onboard computer
- Optional dual independent extruders
- No enclosure
- The 203 x 254 x 203 mm print volume is comparatively small
- Very expensive for a single extruder
A Closer Look at the MakerGear M3
Low-Priced Printers (<$500)
This $500 or less category is going to be a little tricky for me to navigate. The communities that surround these affordable printers are very passionate, and I don’t want to step on any toes by throwing too many criticisms at these printers. Most of my problems with these imported printers stem from their unreliability and inexistent customer support. I want you to enjoy 3D printing, which is difficult to do when your prints keep failing. If you have some electrical and coding experience as well as some free time, then you will be capable of tweaking and upgrading the printers found in this category to produce reliable prints at a quality that rivals printers that cost ten times the price. However, if you're not mechanically or electrically inclined, then I strongly recommend buying a printer that is ready to go out of the box from a more expensive tier.
#1 Low-Priced Printer: Creality Ender 3 Pro
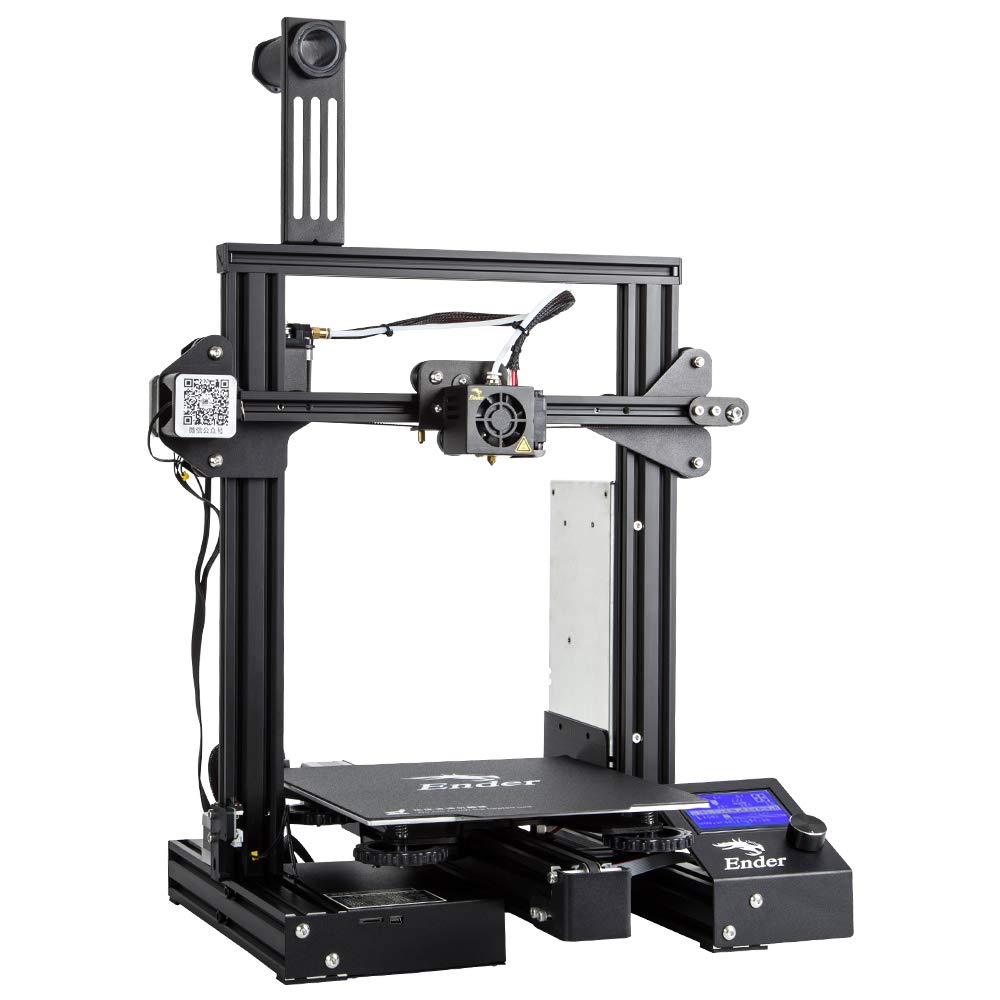
Creality Ender 3 Pro
- Great community
- Cheap!
- Large build volume (220 x 220 x 250mm)
- Heated bed and LCD
- Can print flexible filaments
- Must be assembled
- Poor quality control
- Bed leveling is time consuming
A Closer Look at the Creality Ender 3 Pro
#2 Low-Priced Printer: Monoprice Maker Ultimate 2
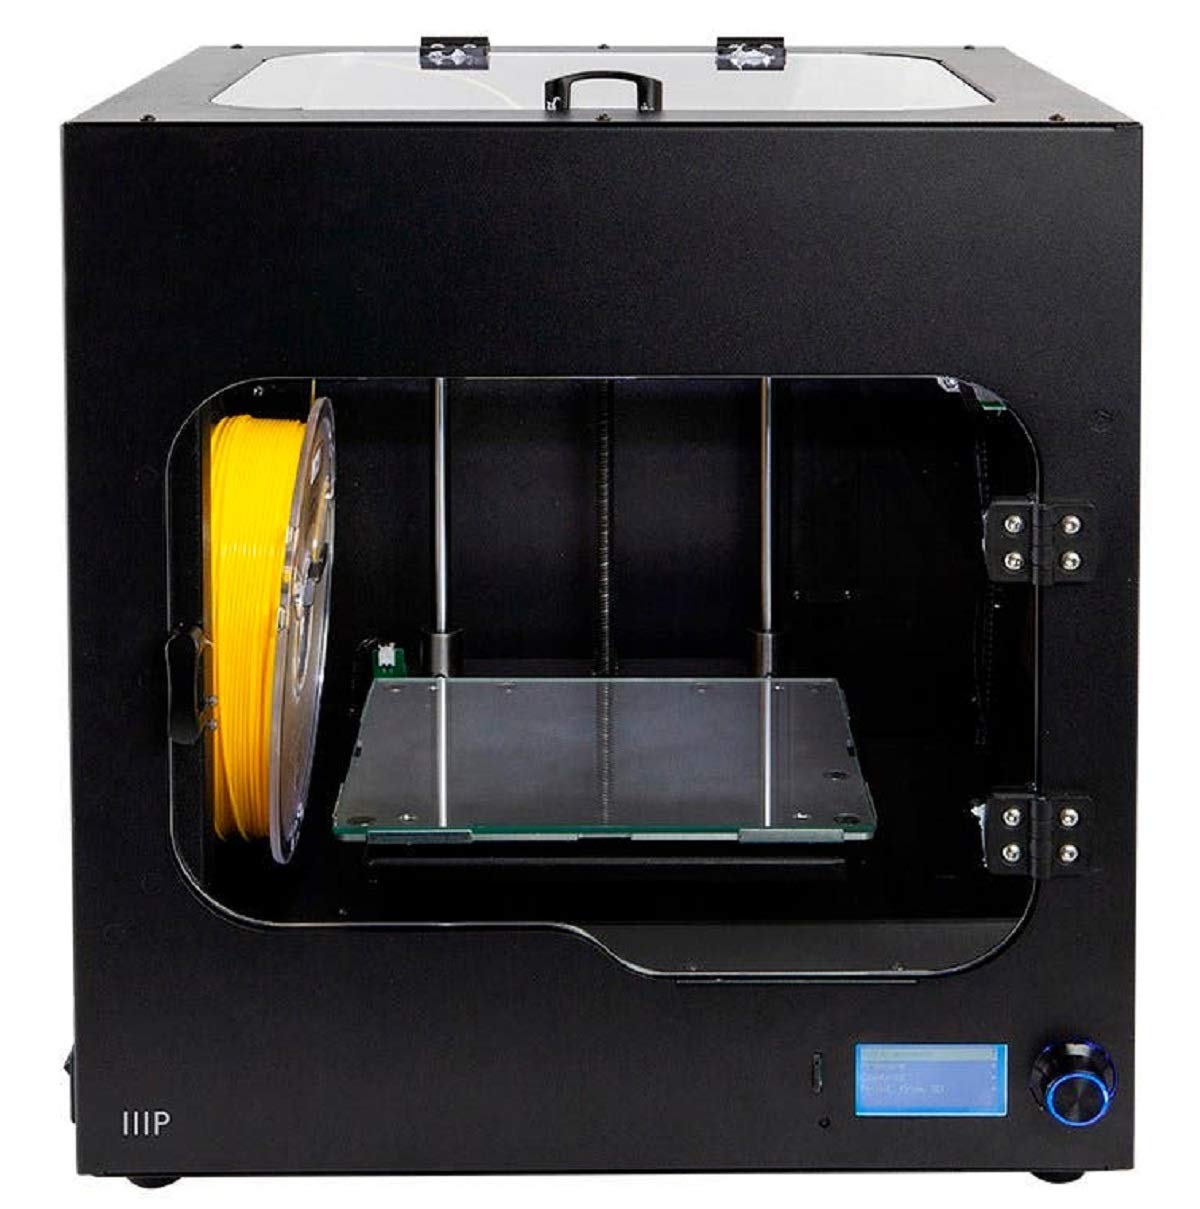
Monoprice Maker Ultimate 2
- Fully enclosed
- Factory-assembled
- Auto bed leveling
- Filament sensor and LED lighting
- Small build volume (200 x 150 x 150mm)
- Poor quality control
- Loud
A Closer Look at the Monoprice Maker Ultimate 2
Budget Printers (<$1000)
$1000 is the perfect budget to score a reliable single extruder printer with some bells and whistles. This is also the price point where you can purchase entry-level dual extruder printers for multi-material or color prints.
Please note that the Prusia I3 MK3S falls within this price range and is definitely at the top of this list. Because it is already mentioned in the Featured Printers section it will not appear below.
#1 Budget Printer: FlashForge Creator Pro
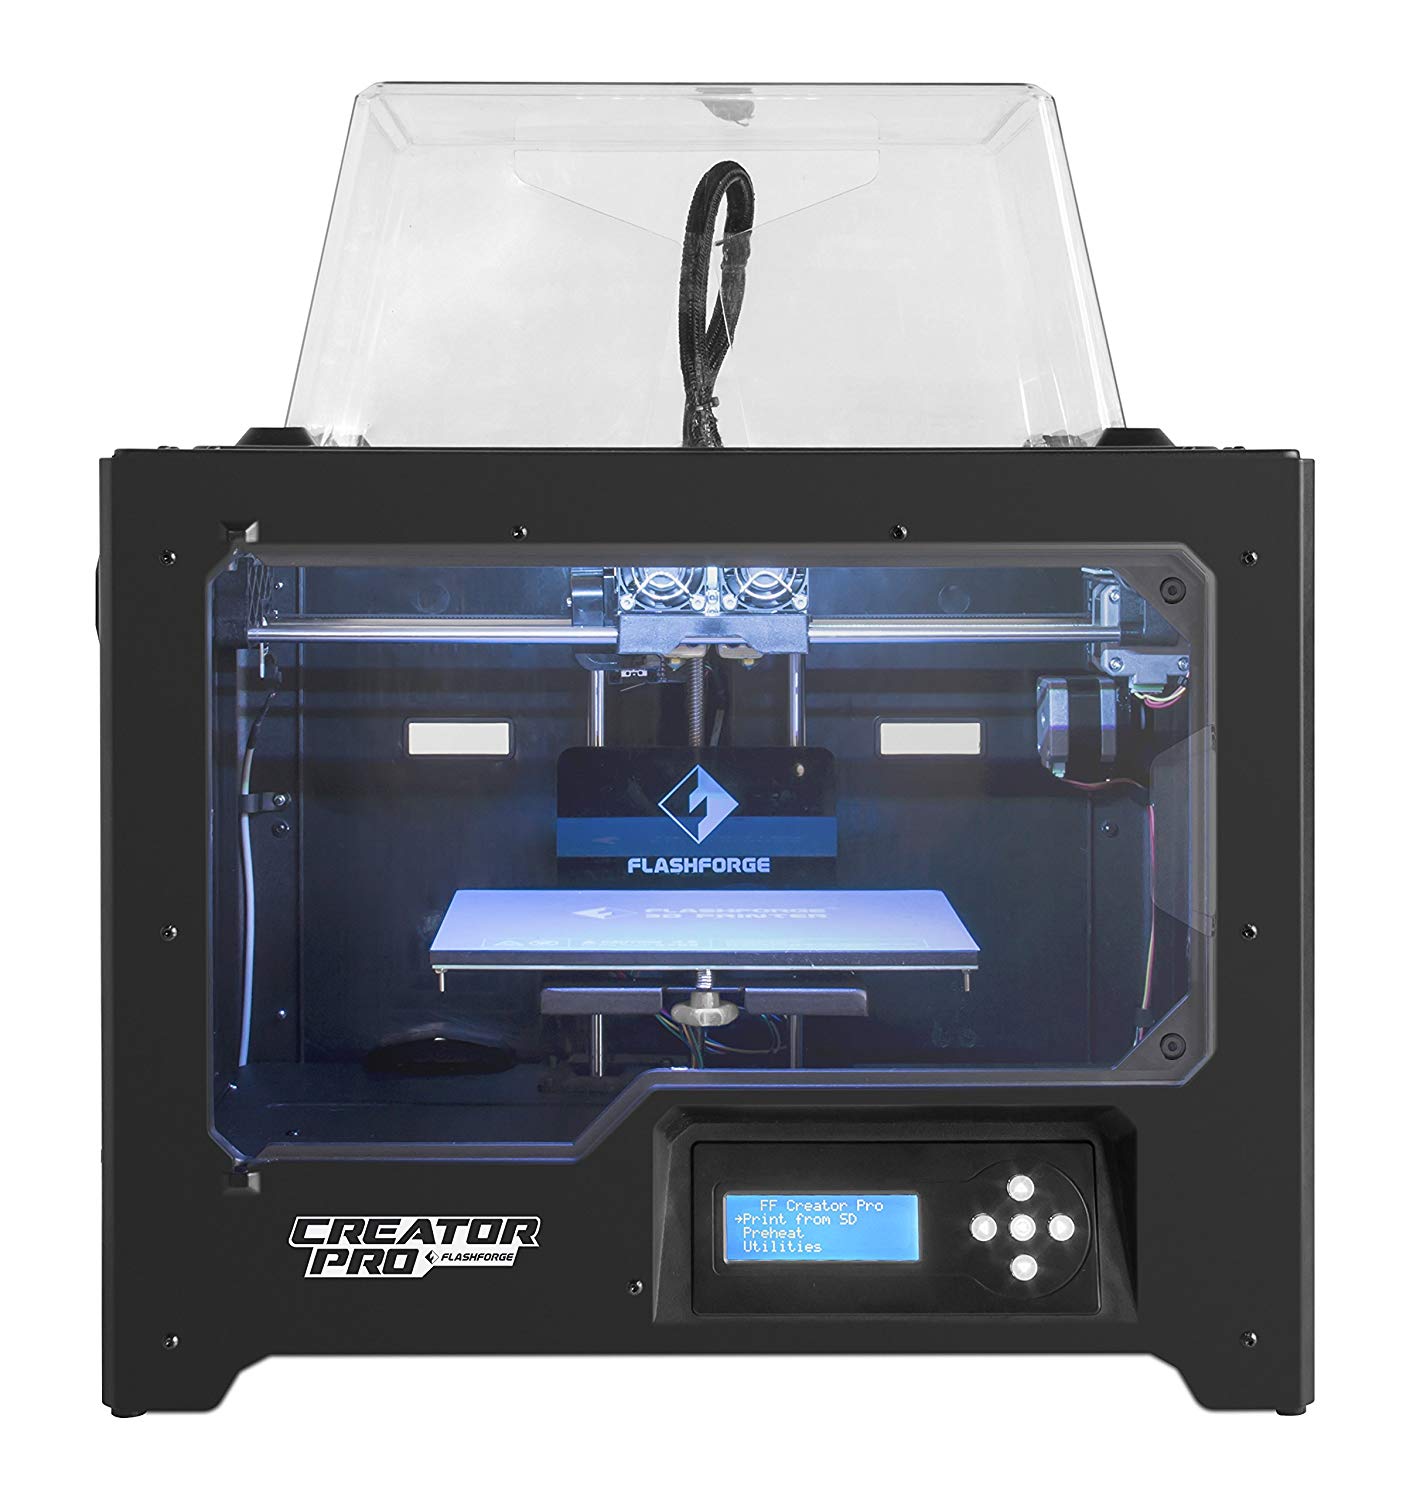
FlashForge Creator Pro
- Capable dual extrusion on a budget
- Can be fully enclosed
- LCD for computer independence
- Sturdy case and build platform
- 227 x 148 x 150 mm Build volume is small
- Hard to service
- Extruders are not as reliable
A Closer Look at the FlashForge Creator Pro
#2 Budget Printer: Pulse XE
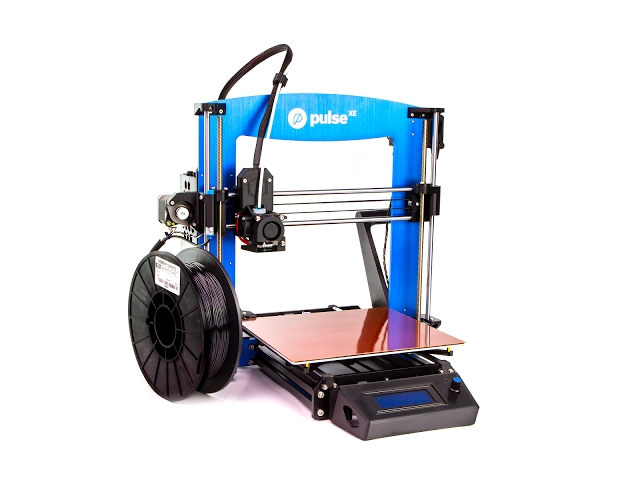
Pulse XE
- Ready for exotic and abrasive filaments
- BMG extrusion drive eliminates ghosting
- Auto bed leveling
- Fully assembled and factory calibrated
- Noisy
- Enclosure is not standard
- Cannot save money by purchasing a kit
A Closer Look at the Pulse XE
#2 Budget Printer: Rostock MAX
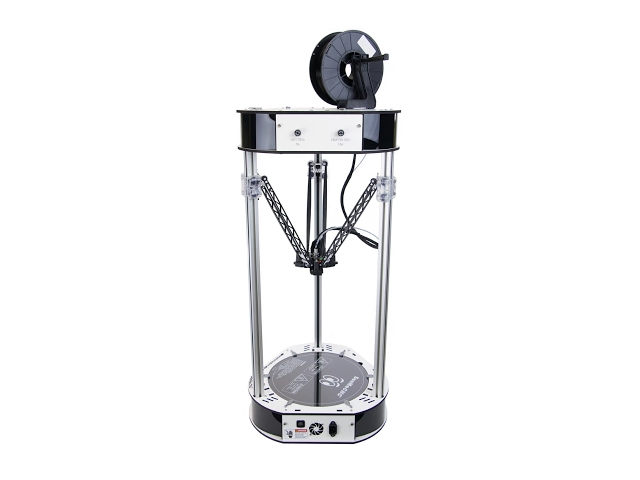
Rostock MAX
- Tall Print Volume (Diameter: 280mm & Height: 385mm)
- Premium Duet Wifi motherboard
- Extruder strain sensor
- Quick prints with the Bowden extruder
- Must be assembled
- Bowden extruder is less responsive
- Inherent limitations of Delta Printers
- LCD does not come standard
Prosumer Printers (<$2000)
A couple of years ago if you spent $2000 on a 3D printer you would be considered a high roller. But printers that had existed in this price range those few short years ago have been upgraded and released at higher price points, which makes this “pro-sumer” category a little difficult to define. $1k to $2k in the domestic market will get you a premium single extruder printer or a fixed dual extruder printer. If you purchase an import (e.g. Chinese) printer, then really any feature is possible, including independent dual extrusion. $2k is a lot to gamble on an off-brand Chinese 3D printer, but many people have found success with these machines. My tendency to play it safe with domestic 3D printers that have a long track record is reflected in this lineup of 3D printers.
#1 Prosumer Printer: Lulzbot Mini
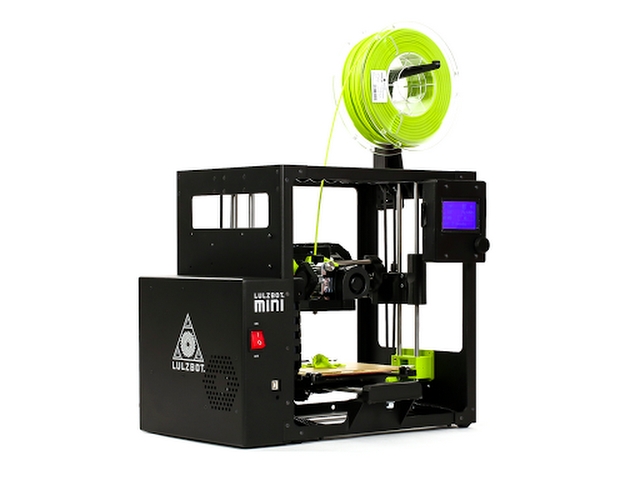
Lulzbot Mini
- Small and rigid form factor
- Nozzel cleaning apparatus
- Great bed adhesion
- Warranty and customer support
- Small build volume 152 x 152 x 158 mm
- Non-upgradable to dual extruder
- Enclosure has to be purchased seperately
A Closer Look at the Lulzbot Mini
#2 Prosumer Printer: VIVEDINO T-Rex 3
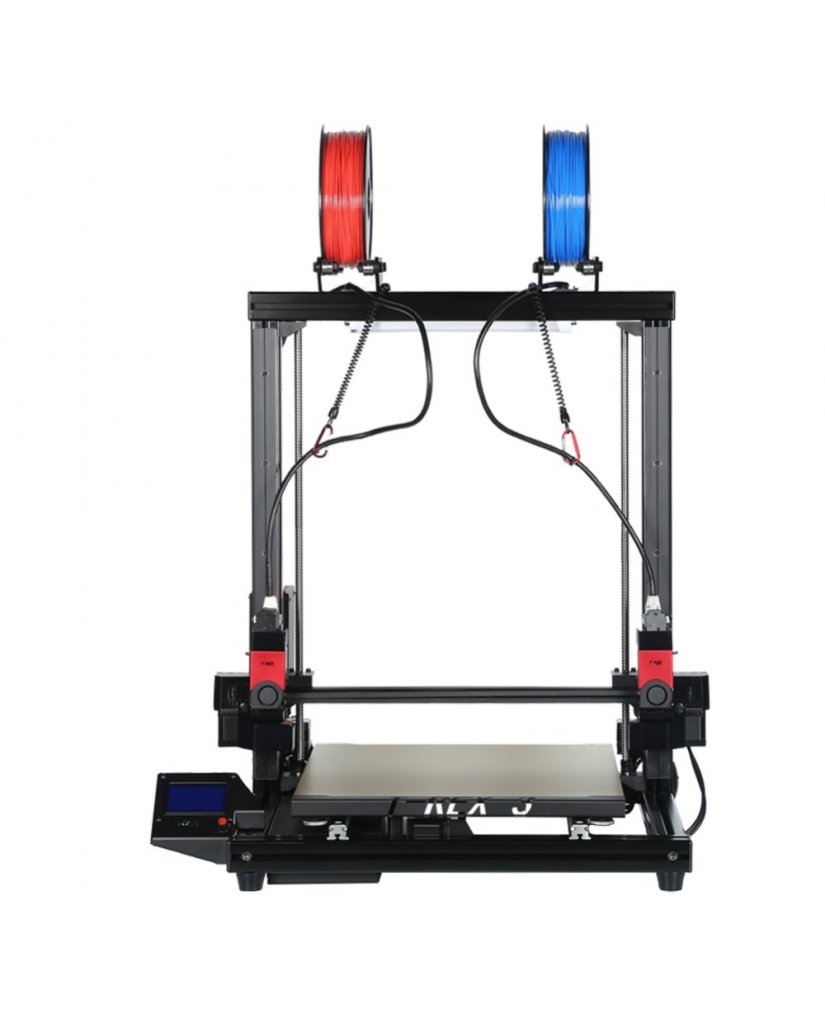
VIVEDINO T-Rex 3
- Dual independent extruders (IDEX)
- Massive build volume 400 x 400 x 500mm print volume
- Trinamic stepper drivers
- AC heated bed
- Underpowered 8-bit microcontroller
- Extrusiond drive is prone to jamming
- Some assembly required
- No enclosure
A Closer Look at the VIVEDINO T-Rex 3
Enthusiast Printers (<$5000)
If you have over $3000 to spend then the 3D printing world is your oyster. At this price point you can purchase a printer with nearly any feature that your heart desires. Even better, these features are brought to you by genuine components not some unreliable knockoffs. You do have to be careful at this price tier because you can start to pay for aesthetics or as I say paying for plastic. Paying for plastic is not necessarily a bad thing, such as in the case of running a company or makerspace, where having good looking 3D printers can possibly draw in more customers. However, it can lead to unrealistic expectations. One might assume that a $5K printer is 5x as good as a $1k printer, but this is rarely true.
Please note that both the MakerGear M3 falls within this price range and tops this list, but Because it is already mentioned in the Featured Printers section the M3 will not appear below.
#1 Enthusiast Printer: Lulzbot Taz Workhorse
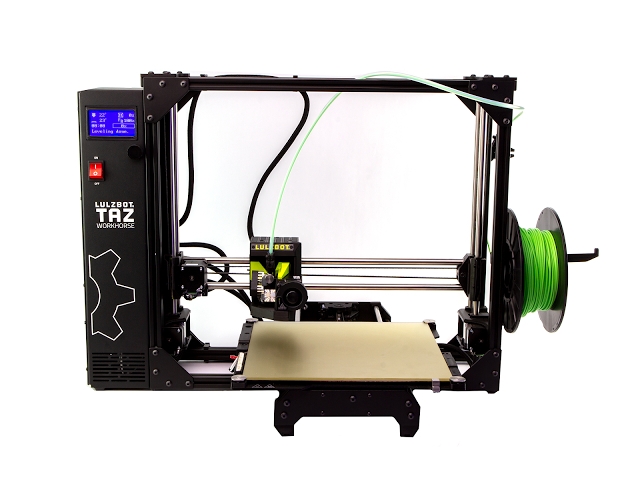
Lulzbot Taz Workhorse
- Generous build volume 280mm x 280mm x 285mm
- E3D Titan Aero hotend
- Easy to use
- Auto bed-leveling
- Nozzle wiper
- Single extruder fitted with 0.5mm nozzle
- No wireless capabilities
- Missing an enclosure
- Dated RAMBo motherboard with 8-bit microcontroller
A Closer Look at the Taz Workhorse
#2 Enthusiast Printer: BCN3D Sigmax
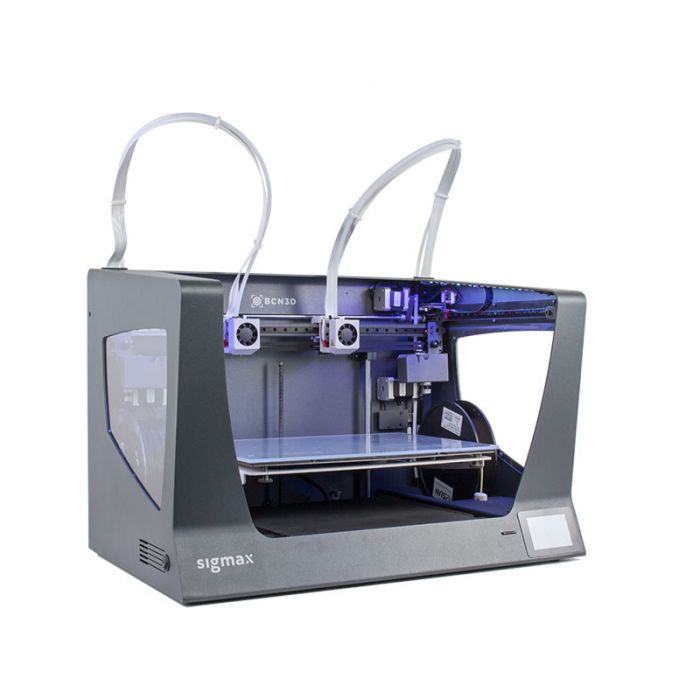
BCN3D Sigmax
- Dual independent extruders (IDEX)
- Large build volume 420 x 297 x 210mm
- Easy to use
- Great Aesthetics
- Bowden extrusion drive
- Cantilevered bed could be prone to damage
A Closer Look at the BCN3D Sigmax
Industrial Printers (>> $5000)
I should point out that I am not qualified to review industrial printers. I have been to trade shows and national labs and have seen these printers in action, but my hands on experience with them is limited. Further, I have never used 3D printing in any kind of production capacity, where the failure of a 3D printer could lose my company money and possibly customers. In these scenarios it might make sense to buy a 3D printer that is twice as reliable as a hobbyist 3D printer even if it cost ten times the price. For these reasons, let’s just admire but not be too critical of these next couple of tricked out 3D printers.
#1 Industrial Printer: Intamsys Funmat HT
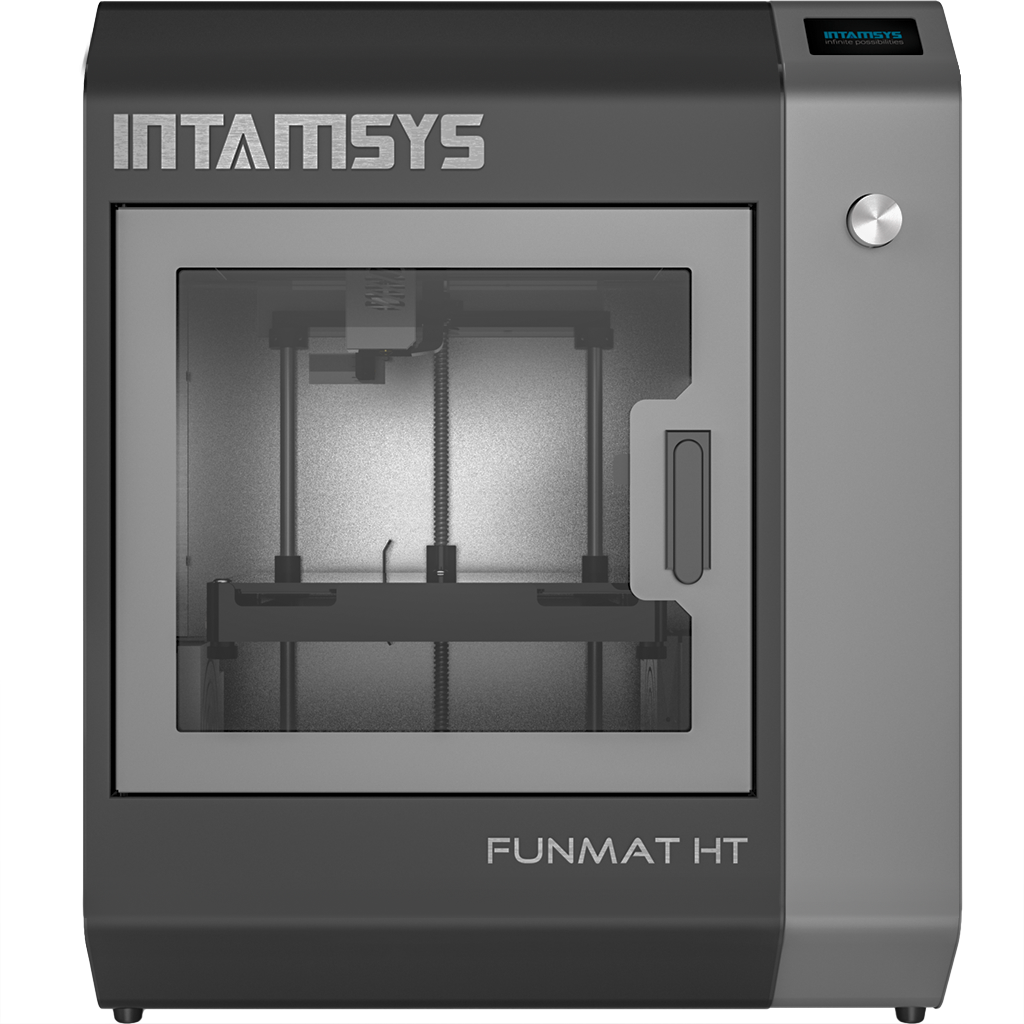
Intamsys Funmat HT
- High temperature extruder (up to 450C)
- Heated chamber (up to 90C)
- Can print: PEEK, PEKK, ULTEM (PEI), PPSU, PC, PA
- Auto bed leveling
- Single extruder
- Small build volume for the price (260 × 260 × 260mm)
A Closer Look at the Intamsys Funmat HT
The Intamsys Funmat HT is a hot printer, literally. It is capable of extruding plastics at 450C, which unlocks the ability to print aerospace grade polymers like polyether ether ketone (PEEK). PEEK is strong and very resistant to both chemicals and heat, hence why it requires a blistering 400C nozzle temperature to be extruded. PEEK and other high temperature polymers, like PEI and PEKK, need to be printed in a heated chamber to prevent rapid cooling after being extruded which would cause the printed part to warp. These heated chambers in combination with the high temperatures of the extruders means that these printers need to be engineered to a higher standard as they pose a significant fire and safety risk. It’s difficult to find a high temperature 3D printer for under $5000. The Funmat HT is on the affordable end with a price tag of about $7k.
#2 Industrial Printer: BLACKBELT
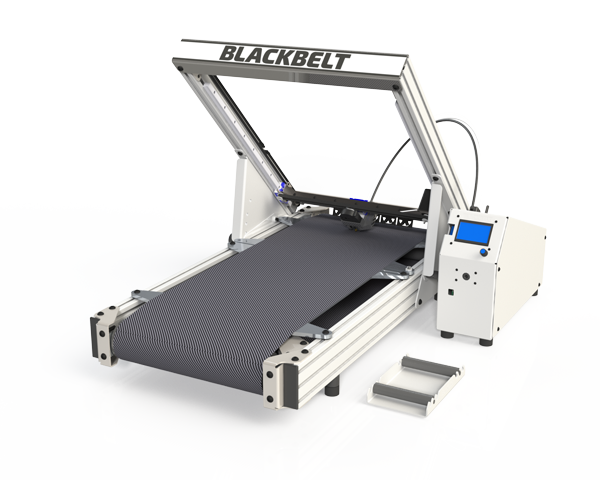
BLACKBELT
- Infinite build volume: (340 x 340 x ∞ mm)
- Fan array for part cooling
- Automatically eject parts
- Single extruder
- Requires a special slicer to generate g-code
- Bowden extrusion drive
A Closer Look at the BLACKBELT
#3 Industrial Printer: BAAM
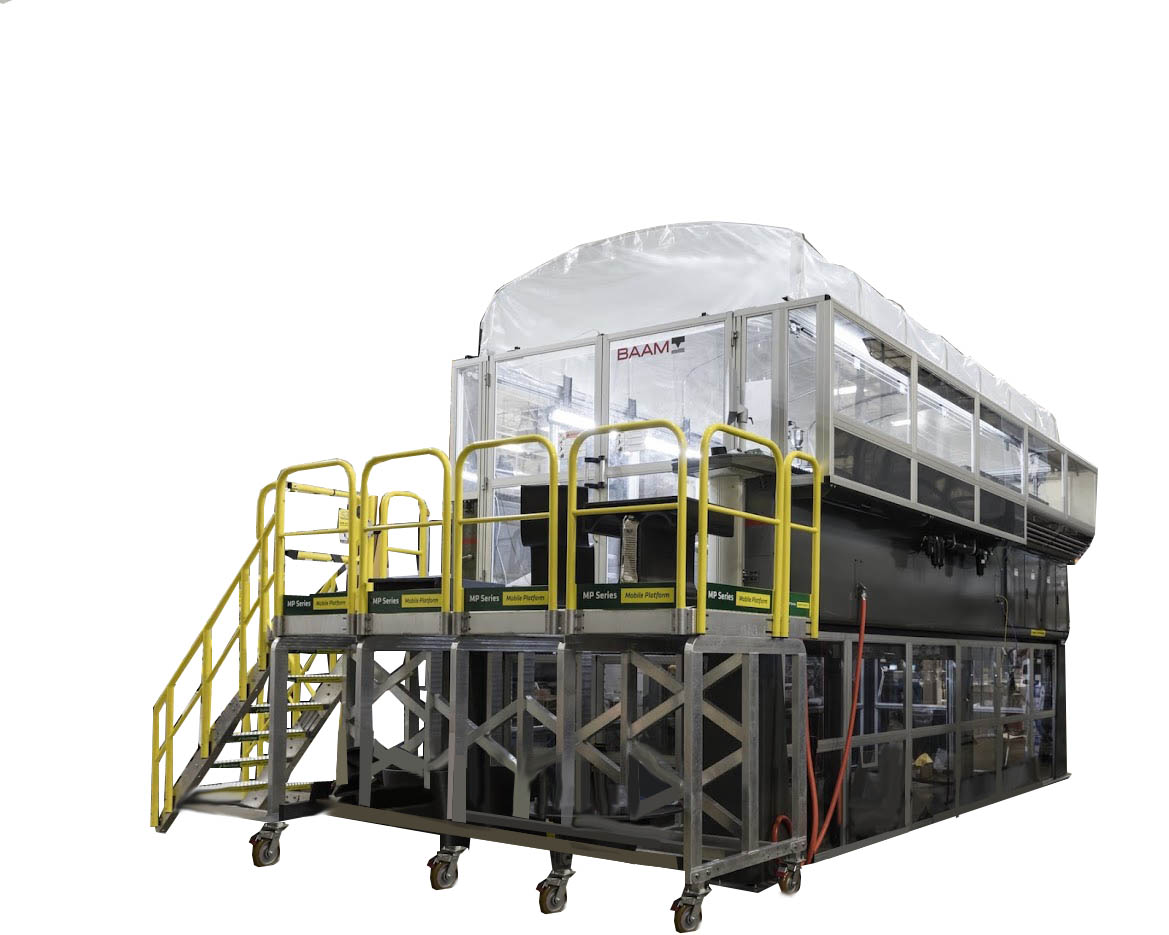
BAAM
- Insane build volume: (240 x 90 x 72 inches)
- 80 lbs/hour feedrate
- Pellet based extruder
- So it cost almost a million dollars...
- Consumes as much power as a small house...
- Requires a lot of space...
A Closer Look at the BAAM
You bought a printer. Now what?
It's time to print! Check out my article on How to Calibrate a 3D Printer to make sure your printer is working as it should. Next check out my list of The Most Useful Prints that you can do on your shiney new printer.