Cost:
$4000
Time:
24 Hours
Skill:
Expert


Project Overview
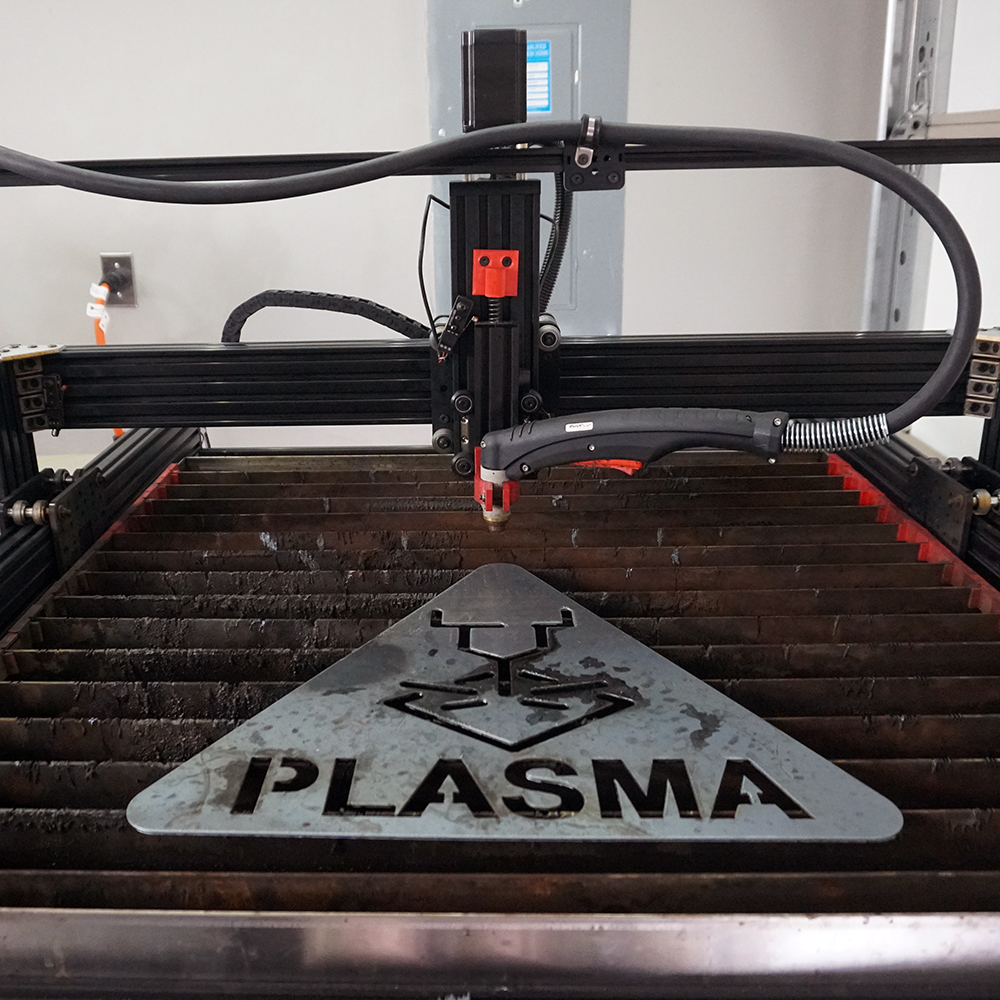
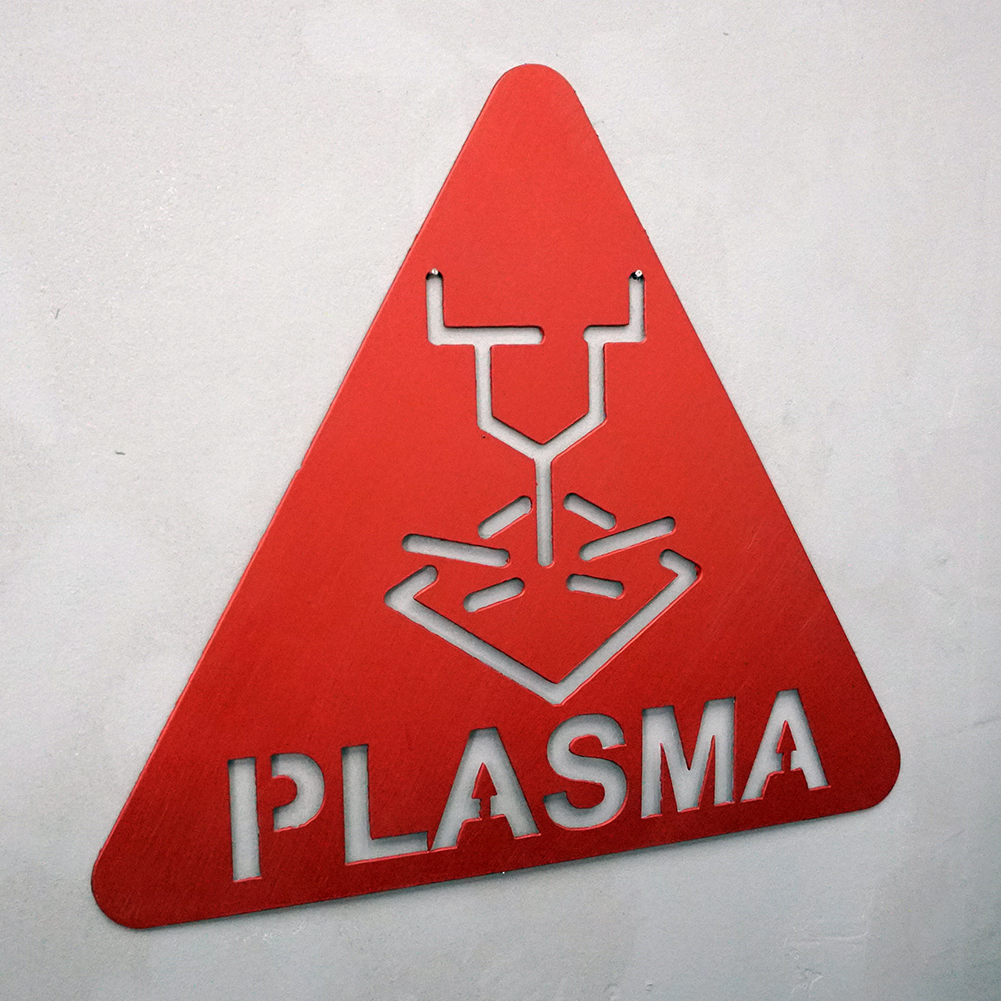
I had always thought that a CNC plasma table would either be too dangerous or too expensive to run in my home shop, where I don’t actually build anything for profit. While a plasma table presents some unique challenges, like dealing with the metallic fumes that are generated, I can officially say that I was able to “affordably” (<$4k) and safely build one. And boy am I glad that I did! Plasma cutting designs out of mild steel has been the most fun that I’ve had in a while. I might even say that I enjoy plasma cutting more than 3D printing (shocking, I know). Unlike the mill, plasma cutting parts does not require careful planning. I just load in a .DXF file into my favorite CAM program, generate some G-code, and the plasma cutter is off to the races.
While there are a lot of affordable CNC plasma tables on the market, it’s important to remember that you get what you pay for. I am usually able to squeeze a little bit more mileage out of my money by sourcing my own parts and building the device/machine. However, this is not always true, especially when you break components while building or you purchase the wrong parts. What I can promise you is that building your own plasma cutting table will give you superior knowledge on how your instrument works, which will allow you to quickly troubleshoot and fix problems.
This CNC plasma table was built in collaboration with OpenBuilds, a company that sells open-source linear actuators, CNC machines, and so many other tools that support the Maker community. We were able to adapt their existing Lead Machine, which is typically used for CNC routing, for plasma cutting. This required a couple more changes than just swapping the router for a plasma torch, so make sure you watch the video and read the supplemental information below to learn about all the steps that are needed for this conversion. Because this plasma table is based off the Lead Machine, it is informally been dubbed the Lead Plasma.
For full transparency, the parts required to build the Lead Plasma were given to Dr. D-Flo by OpenBuilds for him to beta test. This project precedes the official release of the Lead Plasma kit, so you will have to source the parts individually from the BOM below. I will update this project when the kit is released.
Resources
| Base Machine | ||||||
|---|---|---|---|---|---|---|
| # | Part Name | Vendor | Part Number (SKU) | Unit | Quantity | Link |
| 1 | Lead Machine 1010 | OpenBuilds | 2660-Bundle | Kit | 1 | |
| 2 | CNC Electronics Bundle (w/ NEMA 23) | OpenBuilds | 2925-Bundle | Kit | 1 | |
| Floating Head | ||||||
| # | Part Name | Vendor | Part Number (SKU) | Unit | Quantity | Link |
| 1 | V-Slot® 20x40 Linear Rail | OpenBuilds | 285-LP | 250mm | 1 | |
| 2 | Slot Washer | OpenBuilds | 185 | 15x5x2mm | 1 | |
| 3 | Endcap | StepperOnline | 715 | Cap | 4 | |
| 4 | Black Angle Corner | OpenBuilds | 540 | Connector | 4 | |
| 5 | Quad Tee Nut | OpenBuilds | 2115-Pack | 10 Pack | 1 | |
| 6 | Solid V Wheel | OpenBuilds | 480 | Kit | 4 | |
| 7 | 6mm Aluminum Spacer | OpenBuilds | 90-Pack | 10 pack | 1 | |
| 8 | Xtension Limit Switch | OpenBuilds | 2805-Kit | Kit | 1 | |
| 9 | Rubber Feet | OpenBuilds | 2645-Set | 4 Pack | 1 | |
| 10 | 25mm Bolt | OpenBuilds | 20-pack | 10 pack | 1 | |
| 11 | 8mm Bolt | OpenBuilds | 946-pack | 10 Pack | 1 | |
| 12 | 3 Conductor Wire | OpenBuilds | 2870 | 13' | 1 | |
| Table | ||||||
| # | Part Name | Vendor | Part Number (SKU) | Unit | Quantity | Link |
| 1 | 20x60 Linear Rail | OpenBuilds | 180-LP | 1000mm | 10 | |
| 2 | 40x40 Linear Rail | OpenBuilds | 60-LP | 1000mm | 4 | |
| 3 | Black Angle Corner | OpenBuilds | 540 | Connector | 24 | |
| 4 | Triple L Bracket | OpenBuilds | 785 | Bracket | 24 | |
| 5 | Double L Bracket | OpenBuilds | 485 | Bracket | 8 | |
| 6 | Single L Bracket | OpenBuilds | 545 | Bracket | 6 | |
| 7 | 8mm M5 Bolts | OpenBuilds | 946-pack | 10 Pack | 24 | |
| 8 | M5 TeeNuts | OpenBuilds | 536-Pack | 10 pack | 24 | |
| 9 | Stainless Steel Pan | Amazon | N/A | 32" x 32" x 2.5" | 1 | |
| 10 | 4" Swivel Plate Caster Wheels | Amazon | N/A | 4 Pack | 1 | |
| Plasma Cutter | ||||||
| See my guide on the best plasma cutters for CNC tables. | ||||||
The BOM may contain affiliate links that provide monetary kickbacks to Dr. D-Flo. These funds are used to pay for this website and future projects.
- Metric allen key set
- Wire strippers
- Engineer's square for squaring the axes
- Ferrite chokes
- Soldering iron
- T Tap splice connectors for splicing into power supply trigger wires
- Proto-Pasta HTP31710-RED Opaque Red HTPLA, 1.75mm 1kg is temperature resistant filament for printing the torch holder.
- Shade 5 safety eyewear (<40A plasma cutting)
- Flame resistant jacket
- Flame resistant gloves
Affiliate links may be present.
- A little self-promotion here, but if you are new to CNC motion, then checkout my written guide and video on how to build a 3D printer. Many of the concepts that go into building a 3D printer translate over to a CNC plasma cutter build.
- OpenBuild's documentation provides troubleshooting to common problems, like incorrect stepper motor wiring and electromagnetic interference (EMI).
- Miller's How To Select And Operate A Hand-Held Plasma Cutter is great for resource for those who are new to Plasma cutting.
Walk Through
1. CNC Table
Building the CNC table is well documented because it is based off the Lead Machine. The assembly instructions of this machine can be found here. OpenBuilds has also published YouTube videos on the mechanical and electrical portions of this build.
Below are some tips for assembly that will improve the accuracy of the machine:
- Push and pull on the lead screws for each axis. If you feel any play in the lead screw, then recheck that the bearings are fully seated and that the collars are up against the bearings. The lead screw should only spin radially and any axial movement will be detrimental to the accuracy of the machine.
- Ensure that the axes are square to each other. An engineer’s square can be used to check that the X-, Y-, and Z- axes are at right angles to each other. Special attention needs to be paid to the two linear actuators that make up the Y-axes. When you first set up the machine and after every crash you need to make sure that the carriages are aligned with one another. If not, then the X-axis will be skewed. I typically use calipers to check the distance of each Y-axis carriage from the end of its respective linear rail. I will make adjustments by spinning one of the lead screws until both carriages are the same distance from one end of the rail.
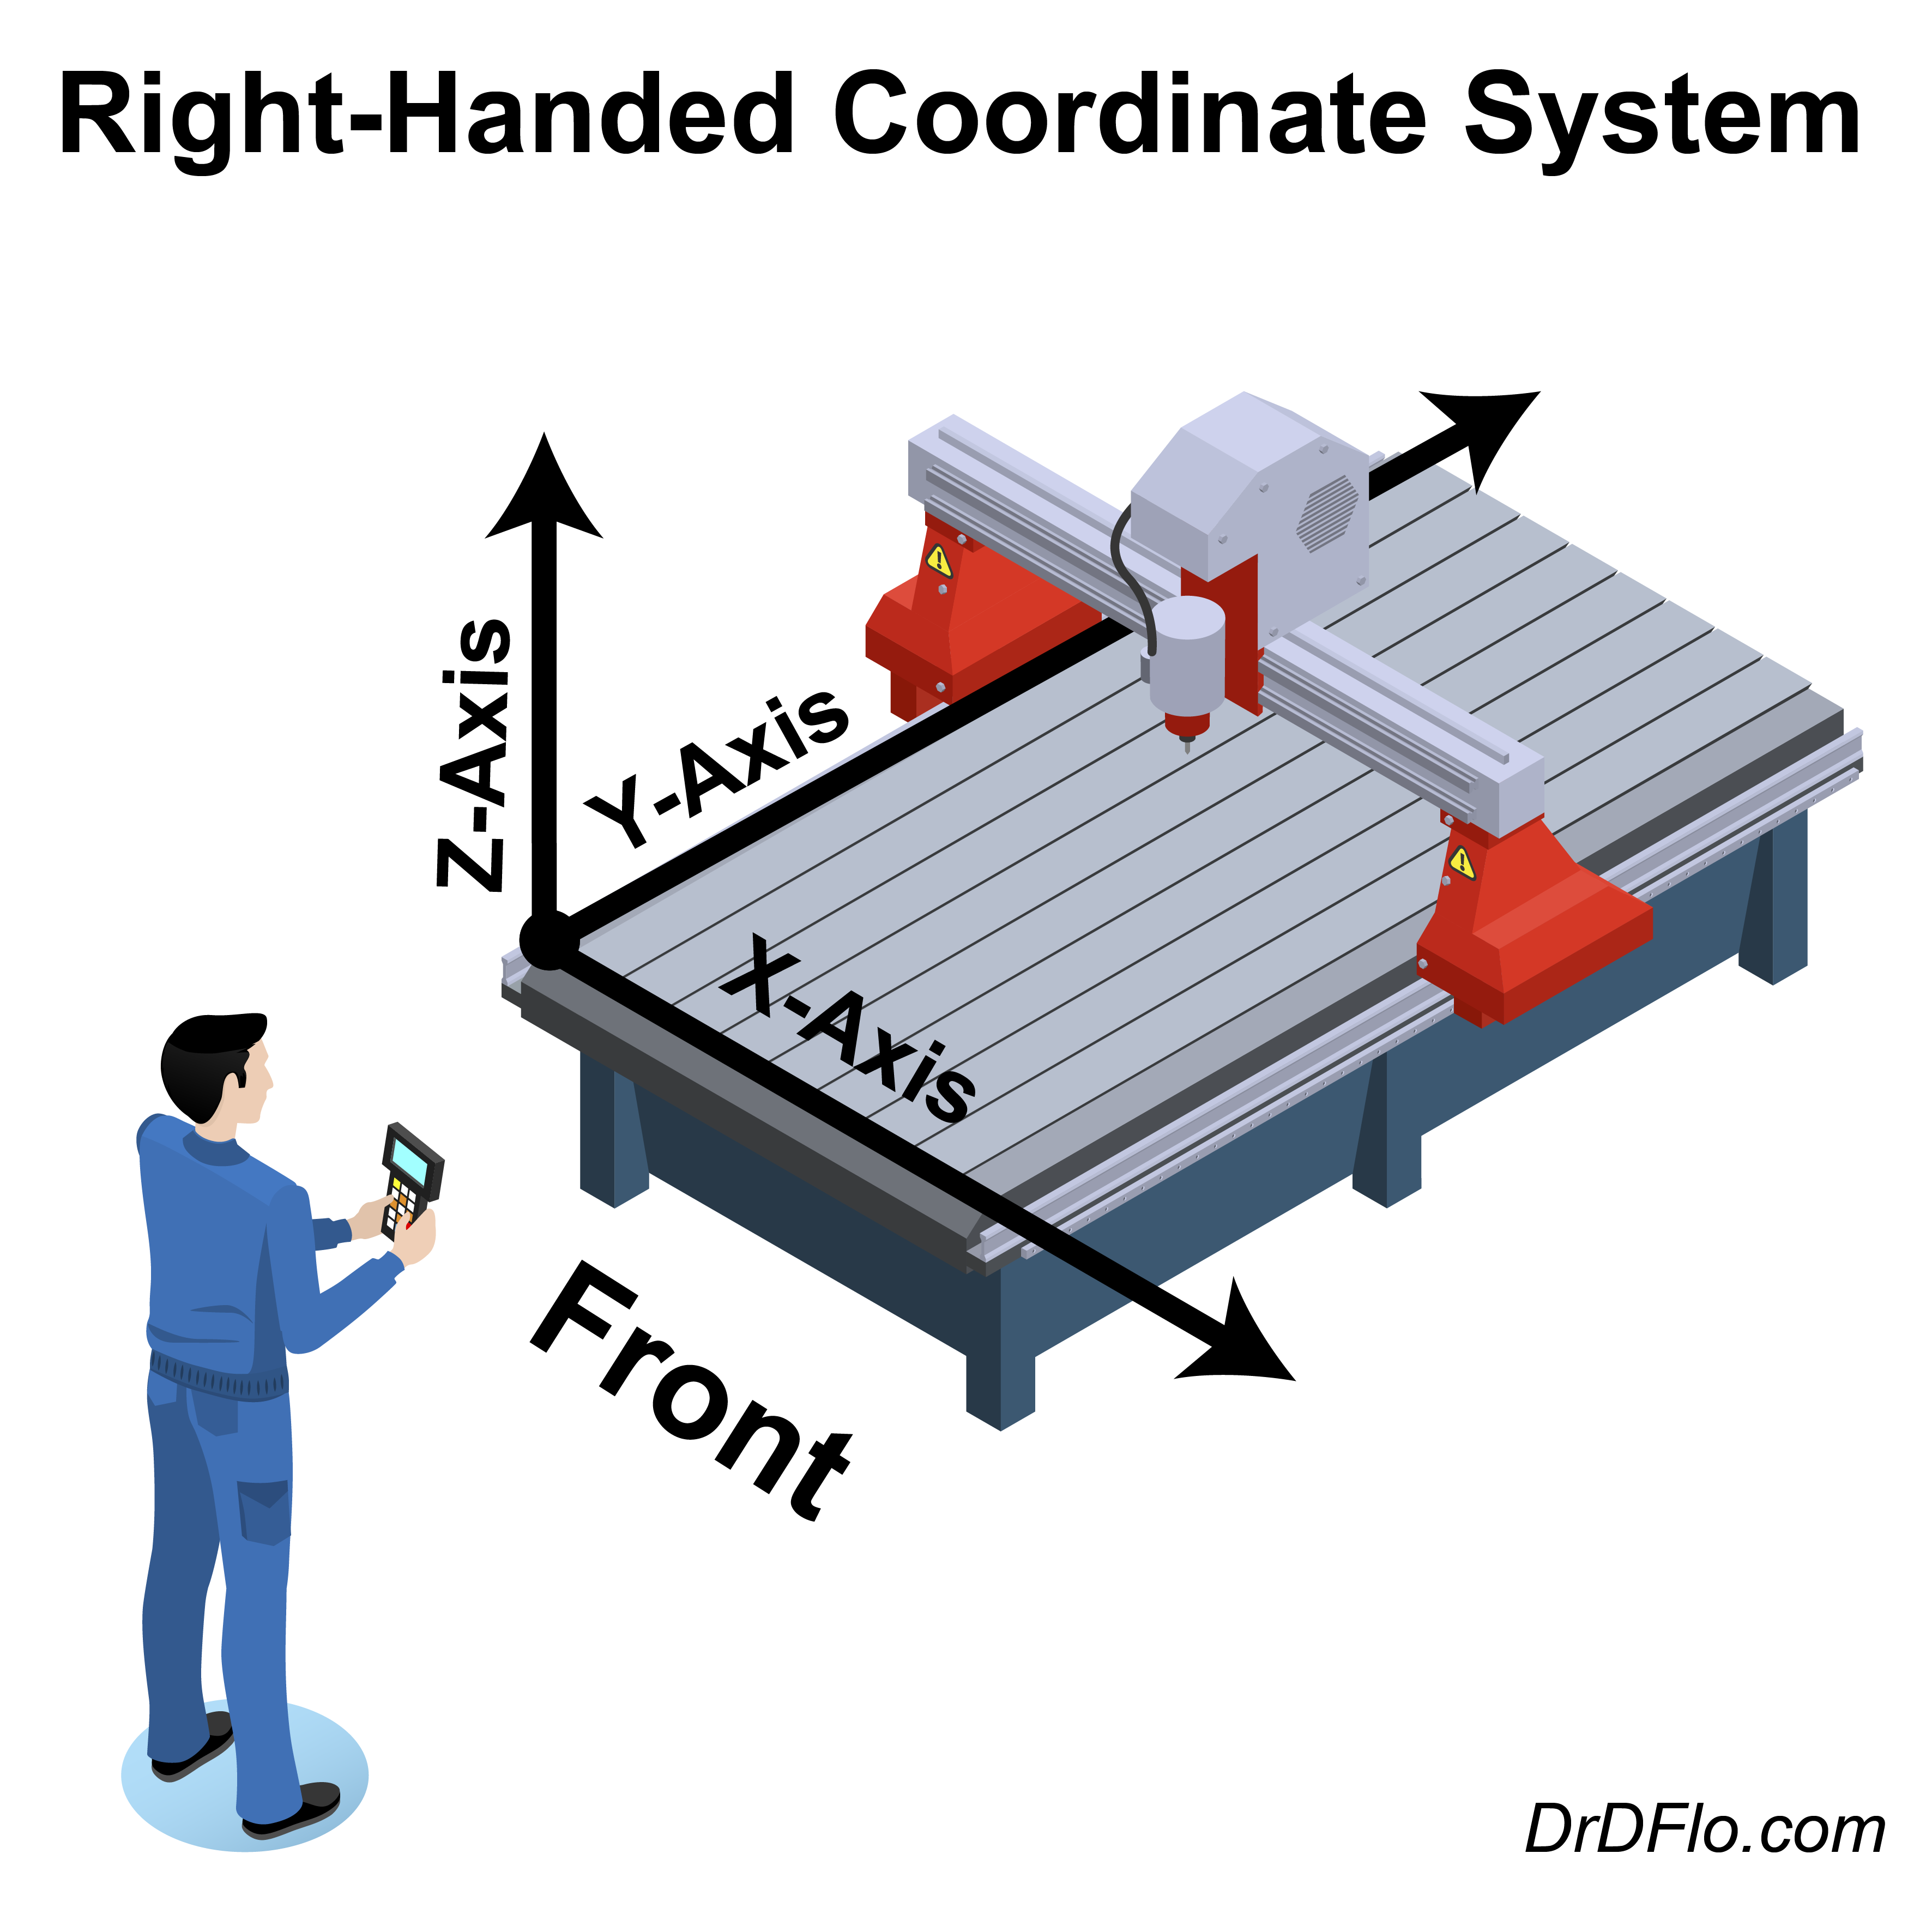
- It’s critical that the positive and negative directions for the axes obey the right-hand rule or else your plasma cutter will behave unexpectedly because most CAM software expect a right-handed machine. If you are experiencing “mirrored” cuts, then chances are you do not have a right-handed coordinate system. The direction of each axis can be changed within the OpenBuilds CONTROL GUI. Consult the figure to determine which way the axes should move (arrows indicate positive direction)
2. The Floating Head
Plasma cutting is a 2D process because you cannot control the depth of the cut (on hobbyst level machines). You either cut through the material or you do not. For this reason, a motorized Z-axis is not necessary for the functionality of a plasma cutter. A manual slide that allows you to adjust the distance of the torch to the material would suffice and many budget plasma cutters forgo a Z linear actuator. However, this manual torch height adjustment needs to be made at the beginning of each cut because not all material is the same thickness or flatness. Also, material can become warped during the cutting process, so you may have to pause the plasma cutter in-between toolpaths to adjust the torch height.
A floating head is a simple assembly that automates the initial height setting of the torch, but it does have the added expensive of requiring a motorized Z-axis. In an ideal world, a switch would be located at the very bottom of the nozzle. When the Z-actuator moves the torch closer to the material, the switch would eventually be triggered, signaling to the computer that the nozzle is close to or touching the material. Unfortunately, with this setup the switch would be obliterated as soon as the plasma stream is started. This is a leap from the last scenario but what if the plasma torch was placed on a spring loaded carriage and the aforementioned switch was placed immediately above this assembly. In this setup, if the Z-actuator continues to force the torch down after the nozzle is touching the material, then the torch will move upwards because it is on the spring loaded carriage. This upward movement of this carriage would then trigger the switch. When the Z-acutator moves upwards to retract the plasma torch the spring (and gravity) will force the torch down to its original location. Its best to study the accompanying animation to fully understand how the floating head works if you are still confused.
3. Torch Holder
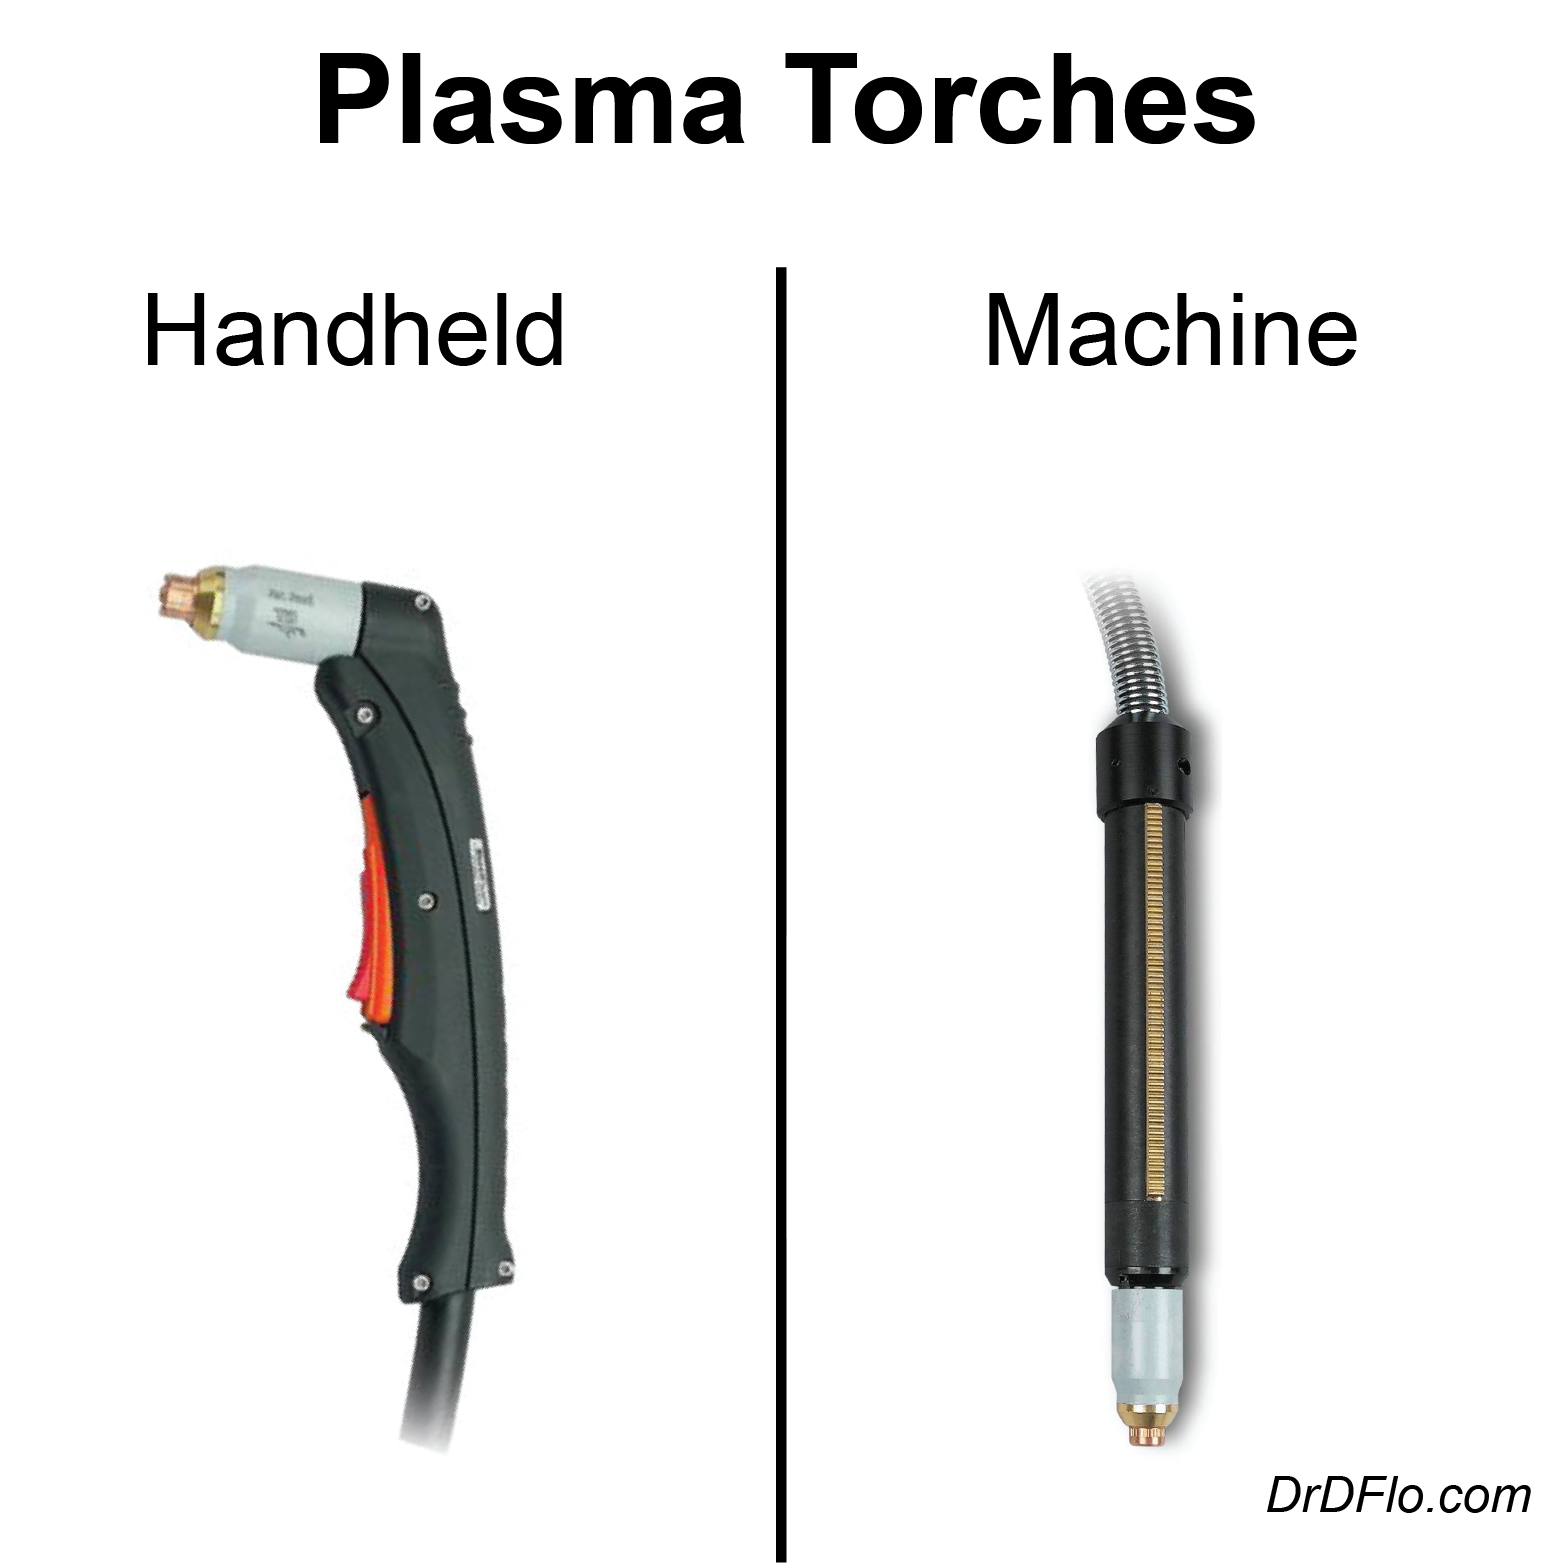
Attaching the plasma torch to the floating head can be tricky business, especially when you are attempting to use a handheld torch. If possible, I always recommend using a machine torch (sometimes referred to as a pencil torch) because the straight body of this torch type makes it easier to attach to the floating head. Most of the time you can zip tie the torch to the floating head. I prefer to use a 3D printer to make the holder. However you choose to mount the torch it’s important to leave a way for it to pop out if you crash the Z-axis into the table or else you risk snapping the torch in half. For those with expensive machine torches a magnetic breakaway torch mount is a great investment.
For many people it is not in their budget to buy a machine torch. It is more cost effective to use the handheld torch that comes standard with most budget plasma cutters. The problem with this approach is figuring out how to grip this torch while keeping the nozzle perpendicular to the work material. The most common mounting point is right above the shield cup (the ceramic part that protects the internals from the heat of plasma stream). The holder that grabs the torch at this point needs to be heat resistant. As you saw in the video, I used a heat treatable PLA for the holder, which has worked well thus far.
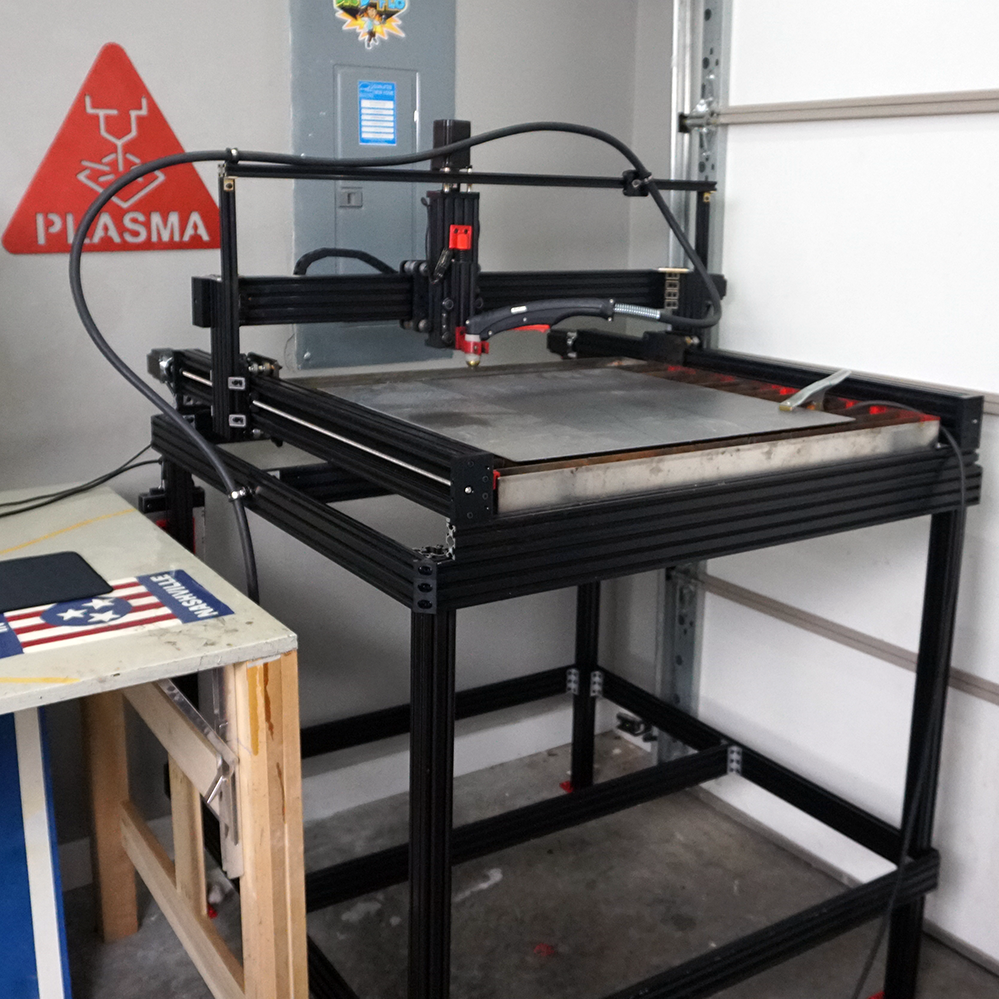
4. The Stand
Plasma tables are typically so large that they require their own stand. They also need a wide berth from other shop tools because they throw off sparks and metallic powder. When building a stand, it’s important to select a sturdy design that can support not only the weight of the CNC frame but also the material that will be cut. I have already cut a couple pieces of mild steel that were > 100 lbs (45 kg). My garage doesn’t have a hoist, so I have to slide the material onto the plasma table and the stand has to resist these shear forces.
I’ve found that OpenBuild’s stand that uses 40x40 aluminum extrusion for the legs and 20x60 aluminum extrusion for the crossbeams to be very supportive and rigid. The stand design is located in the SketchUp file in the downloadables section. I added casters, so that I could roll the plasma cutter outside of my garage whenever I am cutting material dry. I created an STL file that allows a standard caster to be attached to the bottom of 40x40 aluminum extrusion, which is also in the downloadables section.
5. The Water Table
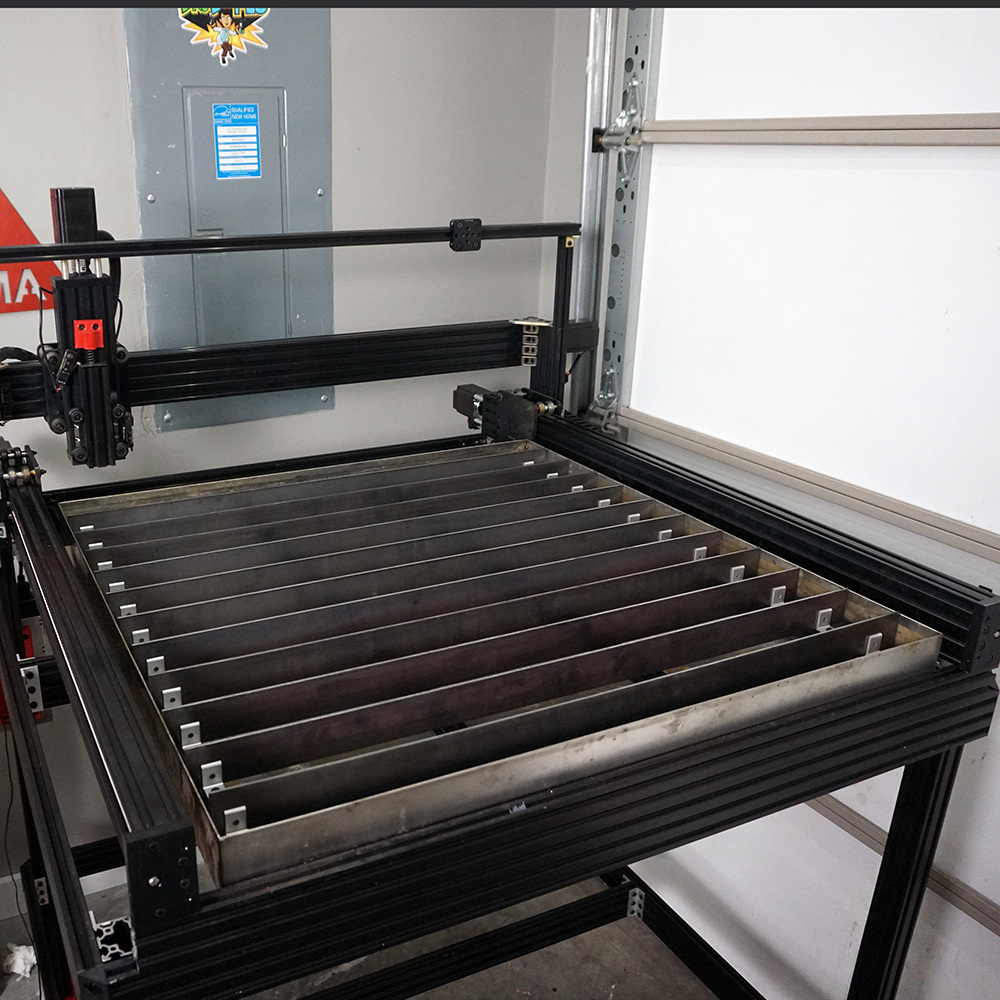
The plasma cutting process generates fine particulates that can be harmful to you and nearby electronics. If you are operating in a small shop, like a garage, it’s imperative that you take measures to prevent metallic dust from contaminating your shop air. The two options for fume management are a downdraft table or a water table. Downdraft tables use a blower to suck fumes into ducting below the work table before expelling them outside. Downdraft tables are expensive and usually are only found in large fabrication shops. The other option for fume management is the water table. When the compressed air from the torch blows the molten metal downward it comes into contact with a pan filled with water. Instead of become aerosolized, the metallic dust is trapped in the water. The water table is simple, cheap, and effective, which I why I used it for this build.
To contain the water I used a stainless steel drip pan, which is meant to sit under a washing machine and collect water, but it has worked great for the plasma cutter. The only issue with this pan is that I have to use a siphon to drain it. Welding a drain on the bottom is definitely a future project. The material that I will be cutting rests on sacrificial slats, which are 1 3/4" mild steel flat bar (1/8" thick). To hold these slats upright I used right angle brackets attached to an aluminum extrusion platform. Its best to avoid using aluminum or stainless steel for the slats because both produce hazardous gas when they are plasma cut.
Future Upgrades
Whenever I really enjoy a project, like this CNC plasma cutter, I immediately start making plans on the future upgrades that I will make to this machine to expand its capabilities. Below are a couple of the upgrades that I have in mind, so make sure you check back on this webpage and subscribe to the YouTube channel so you don’t miss any plasma cutter related content.
- Torch Height Control or THC is a feature that moves the torch up or down during the cutting process depending on the arc voltage. As the torch gets farther away from the work material the voltage increases. In this scenario the microcontroller would know to lower the torch slightly. The opposite is true when the arc voltage decreases. Why is it important for the microcontroller to be able to adjust the torch height during the cut? Well, most material does not remain flat during the cutting process or even starts off flat. Recall from the video that the torch height dictates cut quality, so this is a very powerful feature
- I know that I already own the Cutmaster 40, which is a phenomenal plasma cutter, but if I ever were to upgrade I would want a plasma cutter with a CNC interface and machine torch. This makes the wiring and holding the torch much easier.
Discussion and Feedback
Do you need more help? The best way to get your questions answered by Dr. D-Flo and other DIYers is to post a question on the forum. Click here for the forum topic specific to this project.
Rate this Project: or
Did you encounter broken links or misinformation while reading this article? Please bring these issues to our attention by providing your feedback below.