Overview
Have you ever wanted to 3D print in multiple colors? Or print a part that incorporates two distinct materials (e.g. flexible and rigid)? Maybe you are just tired of removing support structures and wish to use a material that is designed to be printed as support to then later be dissolved away when placed in hot water. If any of these cases apply to you then keep reading! There are different ways to achieve multi-material prints. The most common and in my opinion, the best way to achieve this feat is to use multiple extruders. To keep it simple, we will focus on printers with two extruders.
Fixed Extruders
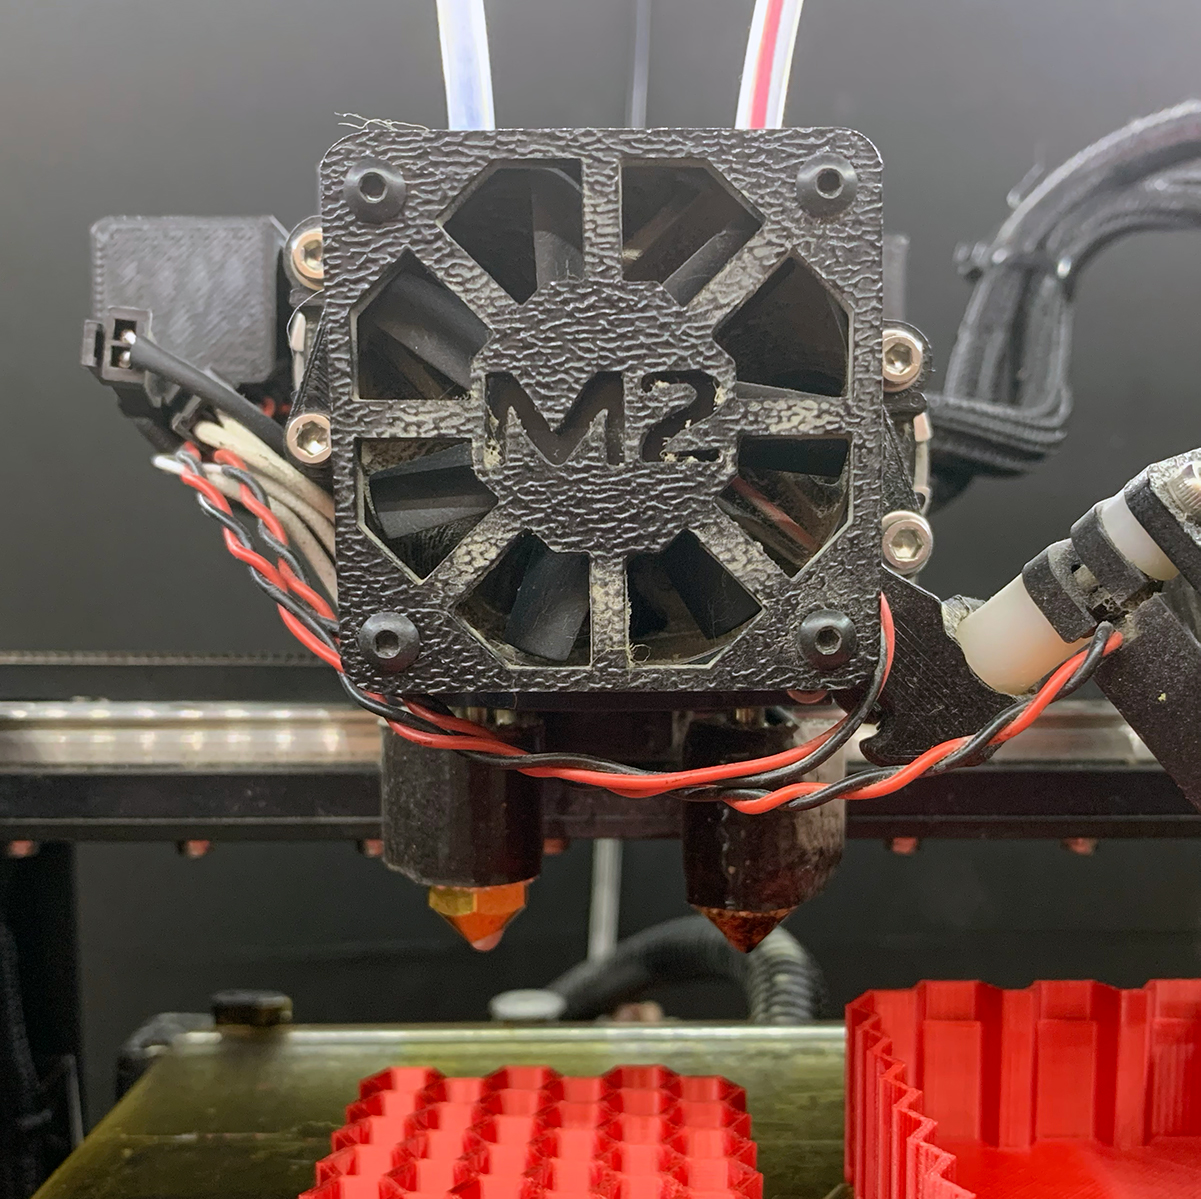
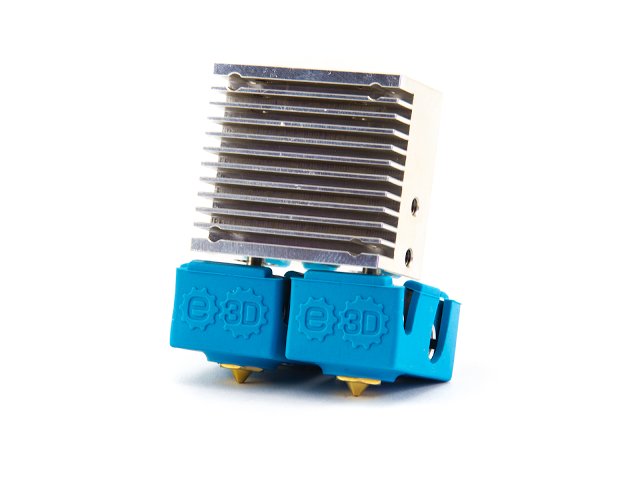
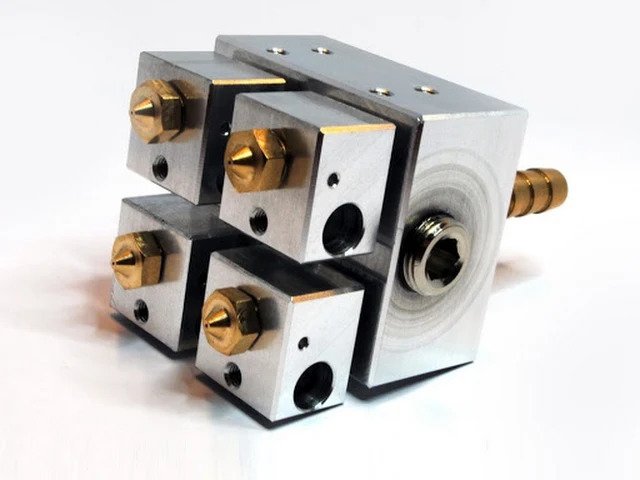
When two extruders share a carriage (i.e. when the first extruder moves so does the second) this is a called “fixed” setup. A fixed dual extruder is only slightly more complex than a single extruder. You have to connect the extra stepper motor for the extrusion drive, as well as the second thermistor and heating element, to the motherboard. There are no changes required in the linear mechanics of the printer. For this reason, many single extruder printers can be readily upgraded to fixed dual extrusion. I converted my MakerGear M2 from single extrusion to dual extrusion some years ago. The Chimera by E3D is a popular fixed dual extruder that is compatible with many existing printer builds. If you are looking for something a little more exotic, then consider the Kraken, which is a quadruple fixed extruder. However, in my eyes, there are two issues with fixed extrusion:
- Only 1 extruder can be printing at a time.
- The unused extruder can bump into the printed part or unintentionally leak material which is known as oozing.
These flaws with fixed dual extruders are not deal breakers and can be overcome with a little patience and an ooze shield. However, for those with deeper pockets or more technical knowhow one can purchase/build a 3D printer with two Independent Dual EXtruders (IDEX).
Independent Dual Extruders (IDEX)

As their name suggest, IDEX printers have an extra linear actuator for the second extruder, which typically runs parallel with the x-axis linear rail/rod of the first extruder (Figure 2). IDEX printers can print with both of their extruders simultaneously or during multi-material prints the unused extruder can be moved out of the way to prevent it from knocking over or leaking on the part. The need for an additional linear motion setup to move the second extruder means that IDEX printers are more expensive/complicated and the frame needs to be slightly larger to achieve the same build volume as a single extruder. If you opt for building a IDEX design, like Zidex, then keep in mind that only a few motherboards can support the extra linear actuator motor and limit switch. The Duet Wifi is my motherboard of choice for IDEX builds.
Extruder Offset
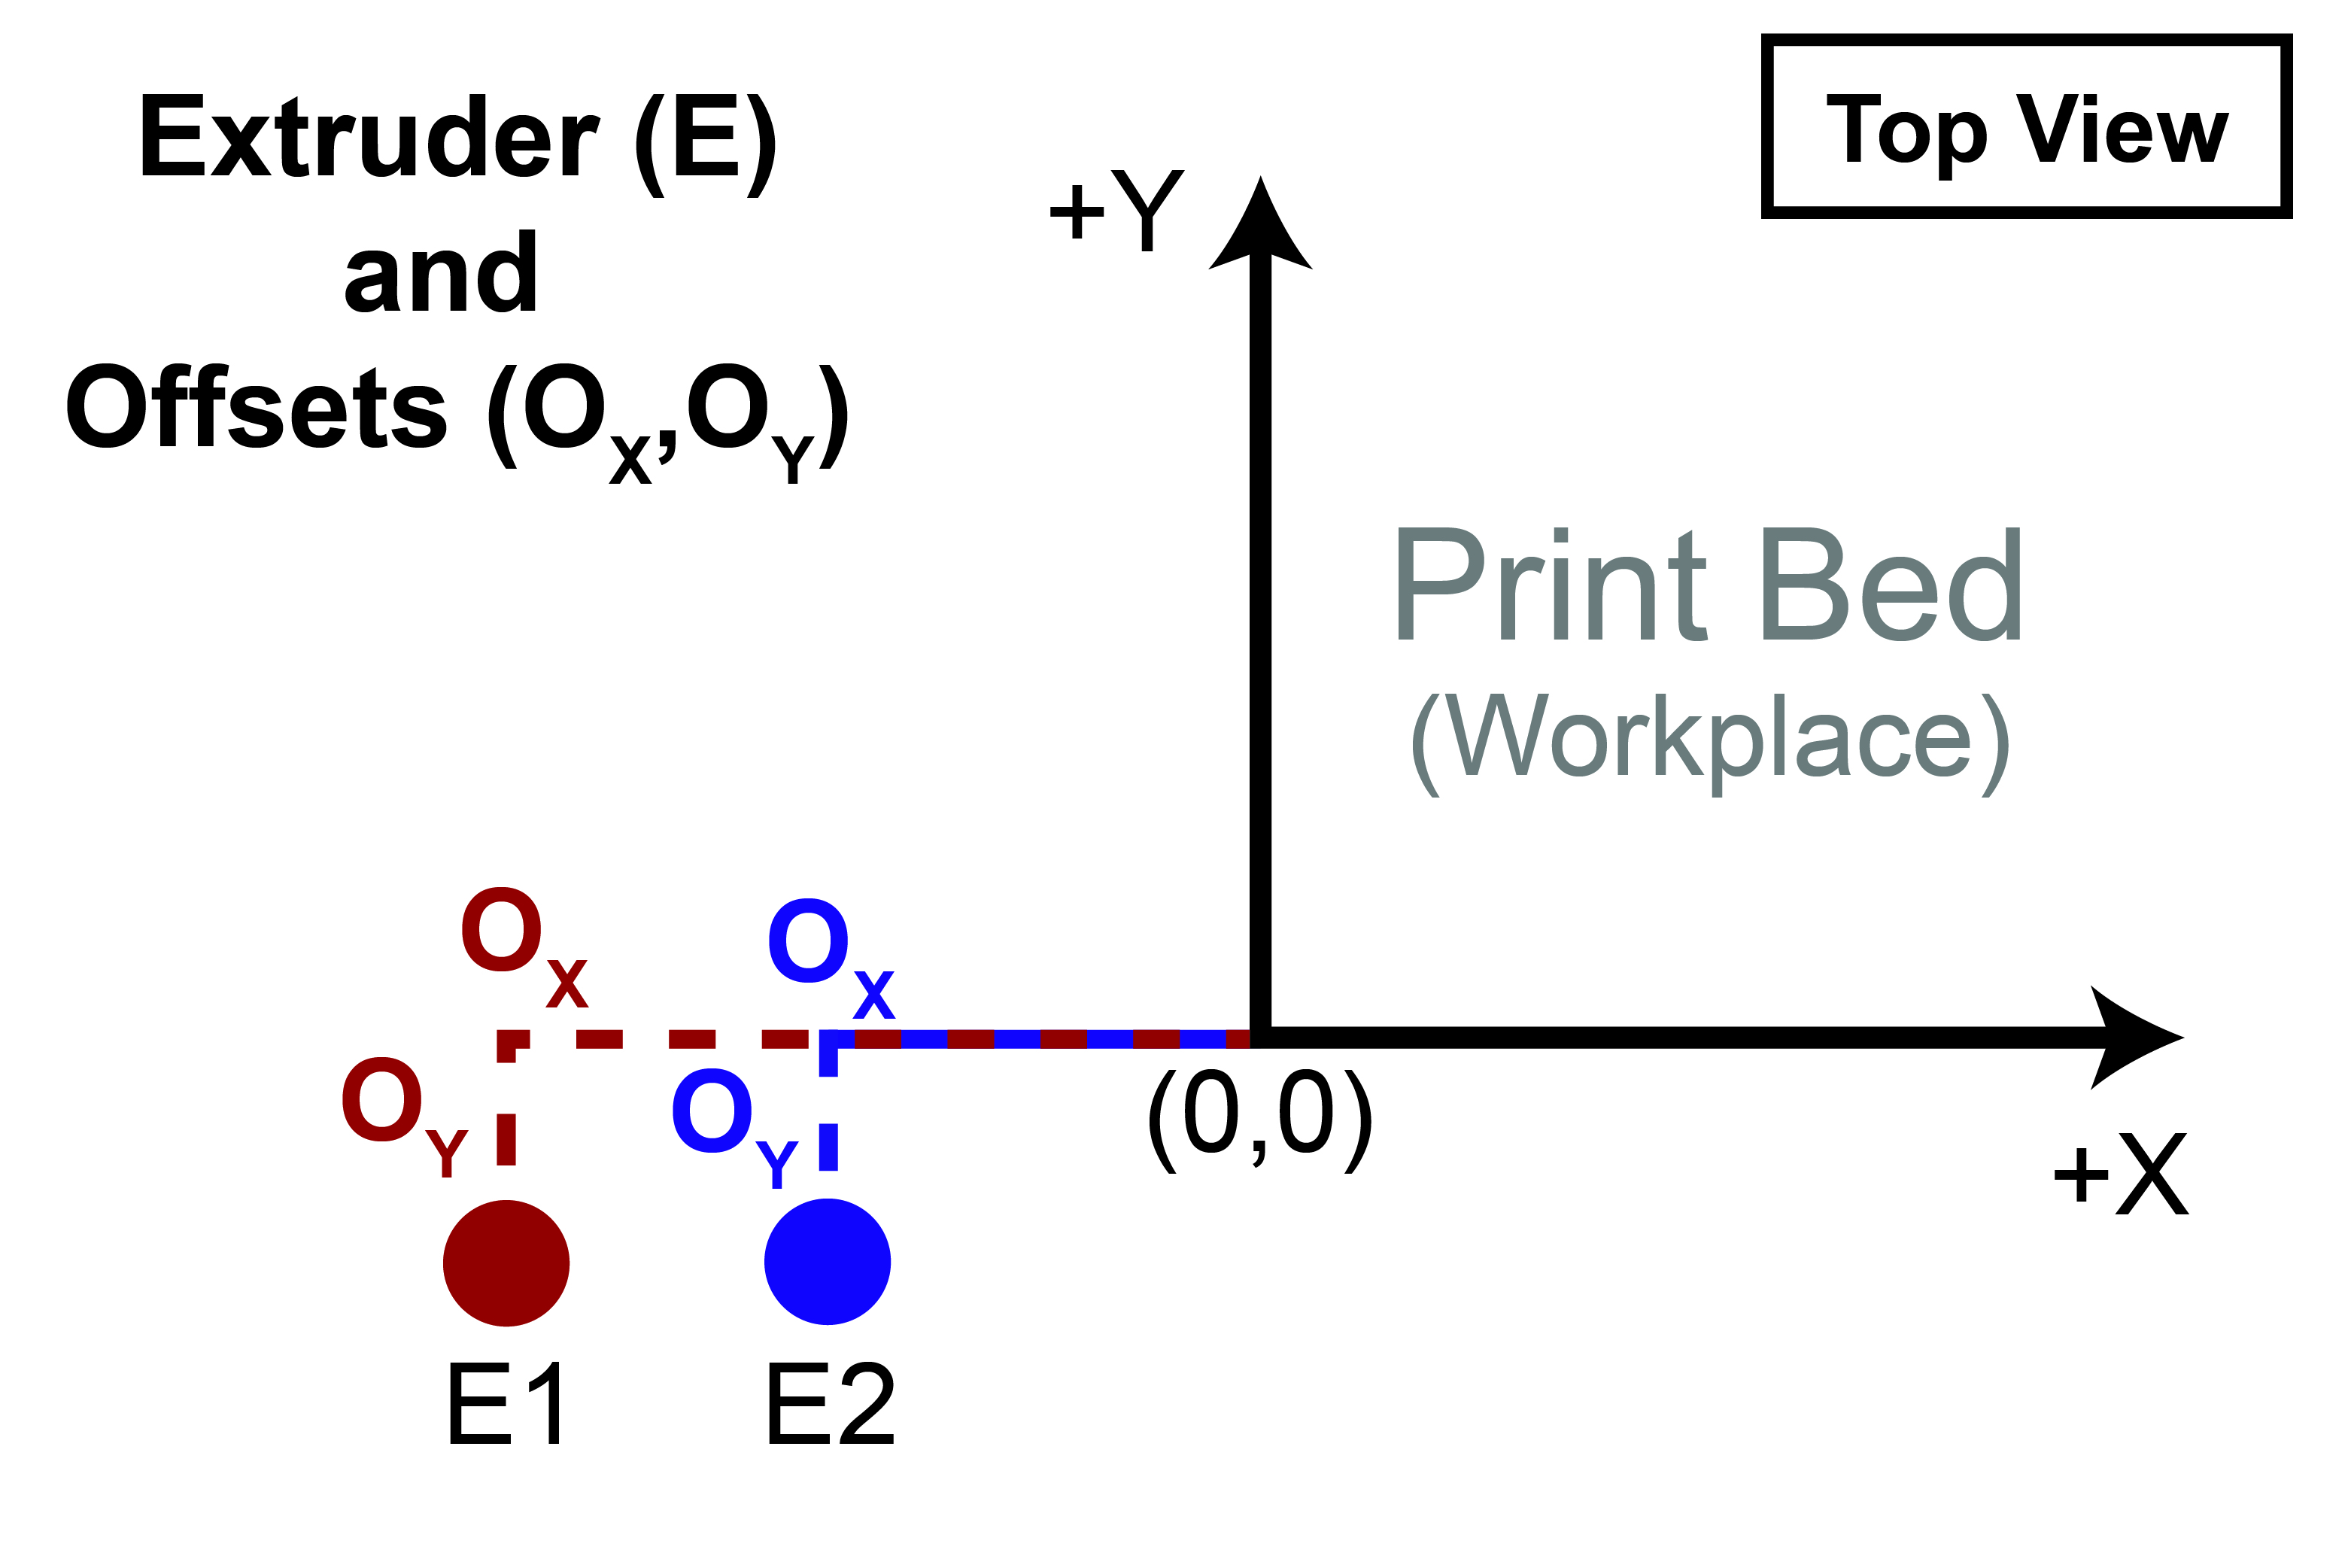
Whether your printer uses independent or fixed extruders, its imperative to know the position of each extruder in relationship to the workplace coordinates. The workplace is everything within and above the print bed. After homing the extruders, it is unlikely that that the nozzles are at the (0,0,0) coordinate or origin of the workplace. In fact, it is impossible for both extruders to be at this location. Further, most printers are built such that the rails are long enough for the extruders to home to a position that is not over the print bed. This allows the extruders to prepare for printing by purging and wiping the nozzle. Clearly, the firmware needs to know how far away the extruders are from the print bed. The variable that describes this distance is known as the offset and can be calculated by finding the X and Y distance each extruders is from the orgiin of the print bed/workplace (Figure 3).
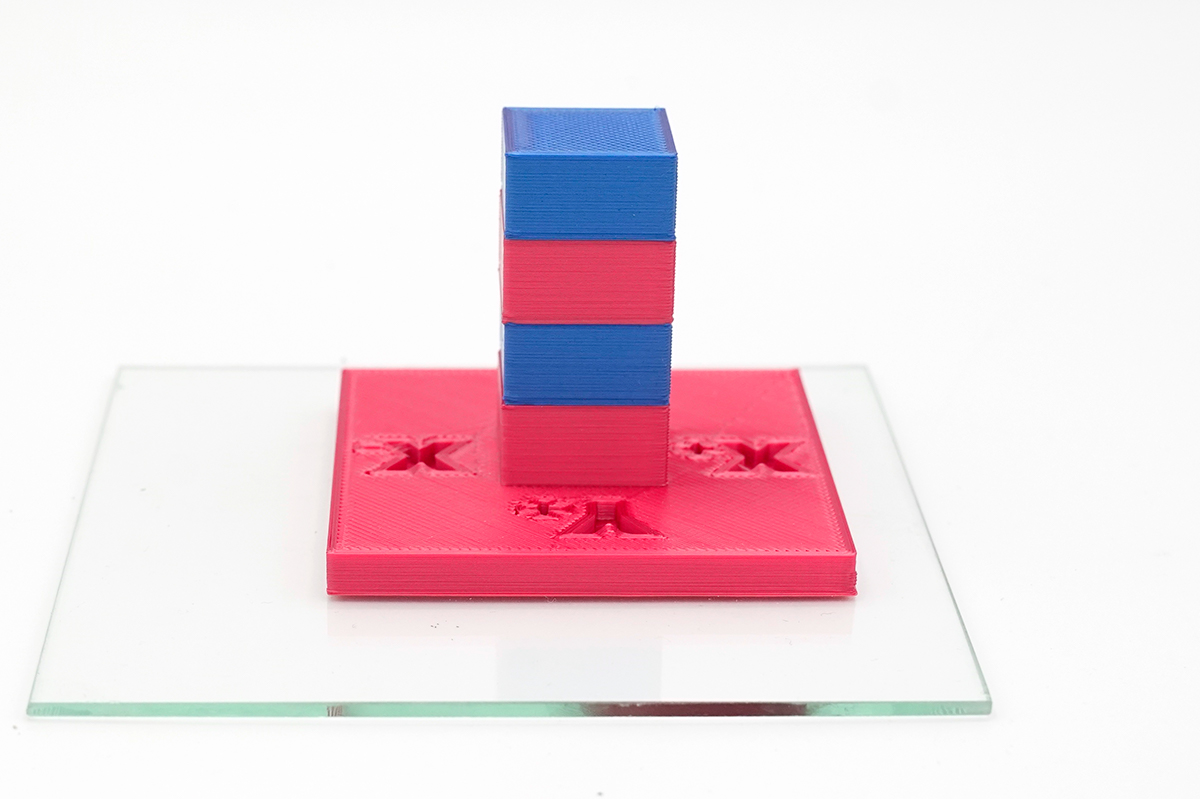
Calculating the offset can be more confusing when the print bed moves, such as in the case of the Prusa-style printers, so take your time in moving the extruders and bed in the X and Y positions until you line each nozzle up with the origin of the print bed. Transfer these numbers into the configuration file of the printer's firmware. It is recommended to print the offset calibration model (Figure 4) found here. The goal of printing this model is to finetune the offset values until the stacked cubes transition seamlessly when you run your fingers along the sides.
The "Other" Ways to Print Multi-Materials

I jumped the gun by saying that the best way to print multiple materials is through separate extruders. Let’s backtrack and take a look at two other methods that facilitate multi-material printing.
1. Filament Handler
The Prusa i3 MK2.5S/MK3S has an optional upgrade that allows their printers, which only have one extruder, to print up to five different materials. How is this even possible? Well, an automated filament handler can unload and load filament from a choice of 5 spools into a single nozzle. When I first heard about this approach to multi-material printing, I was really intrigued because you would not have to worry about extruder offsets with there being only 1 extruder. However, I also was concerned about the complexity of this approach. A printed part will have hundreds of layers, and most likely, this filament handler would have to unload and load different filaments many times during a single print. How robust could a system like this be? I speak from experience when I say that the first iteration of this design was a downright failure. The Prusa i3 MK2 that I worked with had the multi-material upgrade, and I can’t say that I made it through more than 10% of my prints without a fatal jam. Instead of throwing in the rag, Prusa redesigned the whole system to be more reliable. I have heard that this second iteration is more refined than the first, but there are still inherent limitations of this approach. First off, there is residual filament left over in the hot end from the prior filament after a new filament is loaded. To get rid of this extra filament, the printer has to purge the hot end by printing a large throw-away tower next to the part that is being printed. This is not only a waste of time but also filament. Prusa has said that instead of printing this tower the infill of the part will be filled with this transitionary material, but that leads us to my second critique of this system. No other printer is using a filament handler, so there is little motivation for slicers like Simplify3D and Cura to incorporate features like the aforementioned purge infill.
2. Filament Splicer
The other way to turn a single extruder printer into a multi-material machine is through loading a spool of filament that changes material (or color) along the length of the filament. Such a spool could be made by cutting and splicing together filament from different spools. This technology was first brought to market by company known as Mosaic. An external device called a Palette cuts, melts, and welds filament strands together (Figure 5). This is fairly complex process, and it’s much easier to watch than to read, so I recommend checking out this YouTube video if you want to learn more. The best part about this method is that there is no unloading and loading of filament from and into the extruder, which will always be a source of print failure. However, this process still requires a large purge tower to be printed alongside the part, and proprietary software is needed so that the Palette can predict what filaments need to be spliced together to make sure that the part is printed to specification.
External Resources
There are a lot of different ways to successfully build a 3D printer, many of which are not covered on this website. If you want to learn more about firmwares, then click through some of the links below to external websites and forums.
Recommended Products
The table below contains parts specific to this section that Dr. D-Flo uses and recommends. Depending on your printer build these parts may or may not be compatible. It is best to use the products below as a launching point to explore similar products on the linked websites. Affiliate links may be present below (depending on the vendor).