Must have more printers!

3D printing is an addictive hobby. This addiction is made worse by the fact that 3D printers can print parts to build another 3D printer. One day you purchase your first 3D printer off of the commercial list and the next thing you know you have 15 printers mass producing Star Wars figurines. I’m not judging. In fact, I am all for owning multiple printers. While Fused Filament Fabrication or FFF is a relatively narrow subset of additive manufacturing the printers that make up this category vary greatly in capabilities. Some 3D printers are setup to print large objects quickly while some are setup to print small high resolution parts. Further, some printers are able to print exotic materials and other printers can print multi-material parts. The point here is that there is a not a one size fits all printer, and in my opinion, the best way to get a printer that fits your needs is to source your own parts and build it!

Build it yourself.

Now I am not saying to come up with your own 3D printer design. There are a lot of great designs available online, and the point of this guide is to put those designs in front of your eyeballs. However, what makes these designs fall under DIY is that not only do you have to assemble it yourself, but more importantly you have to buy the parts individually (i.e. the parts don’t come in a kit). Purchasing your own parts gives you incredible flexibility to pursue accuracy by selecting the best-in-class components or to pursue savings by procuring cloned or used components. This process may seem intimating, but fortunately, most of these printers come with a bill of materials and links to vendors. However, it is a common occurrence for product links to be broken, so check out my video on How to Build a 3D Printer to learn how to pick the right parts.

FYI

It is strongly recommended to have access to a 3D printer prior to going down the DIY route. All of these builds call for a handful of 3D printed components. Unfortunately, I have had neither the time nor the money to build all of these printers. But from the printers that I have built, I have a feel for what designs are inherently flawed and what features are a must.


DIY 3D Printers

The below printers are ranked by the following criteria:

  • Features– Designs that call for large build volumes, multiple extruders, 32-bit motherboards, and other premium features will result in a higher ranking. It’s important to keep in mind that even if the instructions don’t call for a certain feature that doesn’t mean you can’t modify the design to include it. This is one of the reasons why it is hard to rank DIY designs because the final 3D printer is what you make it.
  • Difficulty – How hard is it to assemble the printer? This category is fairly self-explanatory. Keep in mind that the more capable the printer the more difficult the physical build and programming will be. If this is your first printer build then it is best to pick a simpler design (e.g. one extruder and a small to medium build volume).
  • Community – When building a DIY printer no one is obligated to help you. Even worse, most printer designs lack an official manual. The community that surrounds the 3D printer can make up for this lack of documentation because it will be easier to get answers to your questions. A 3D printer with a designated sub-Reddit is usually a good indicator of a strong community.

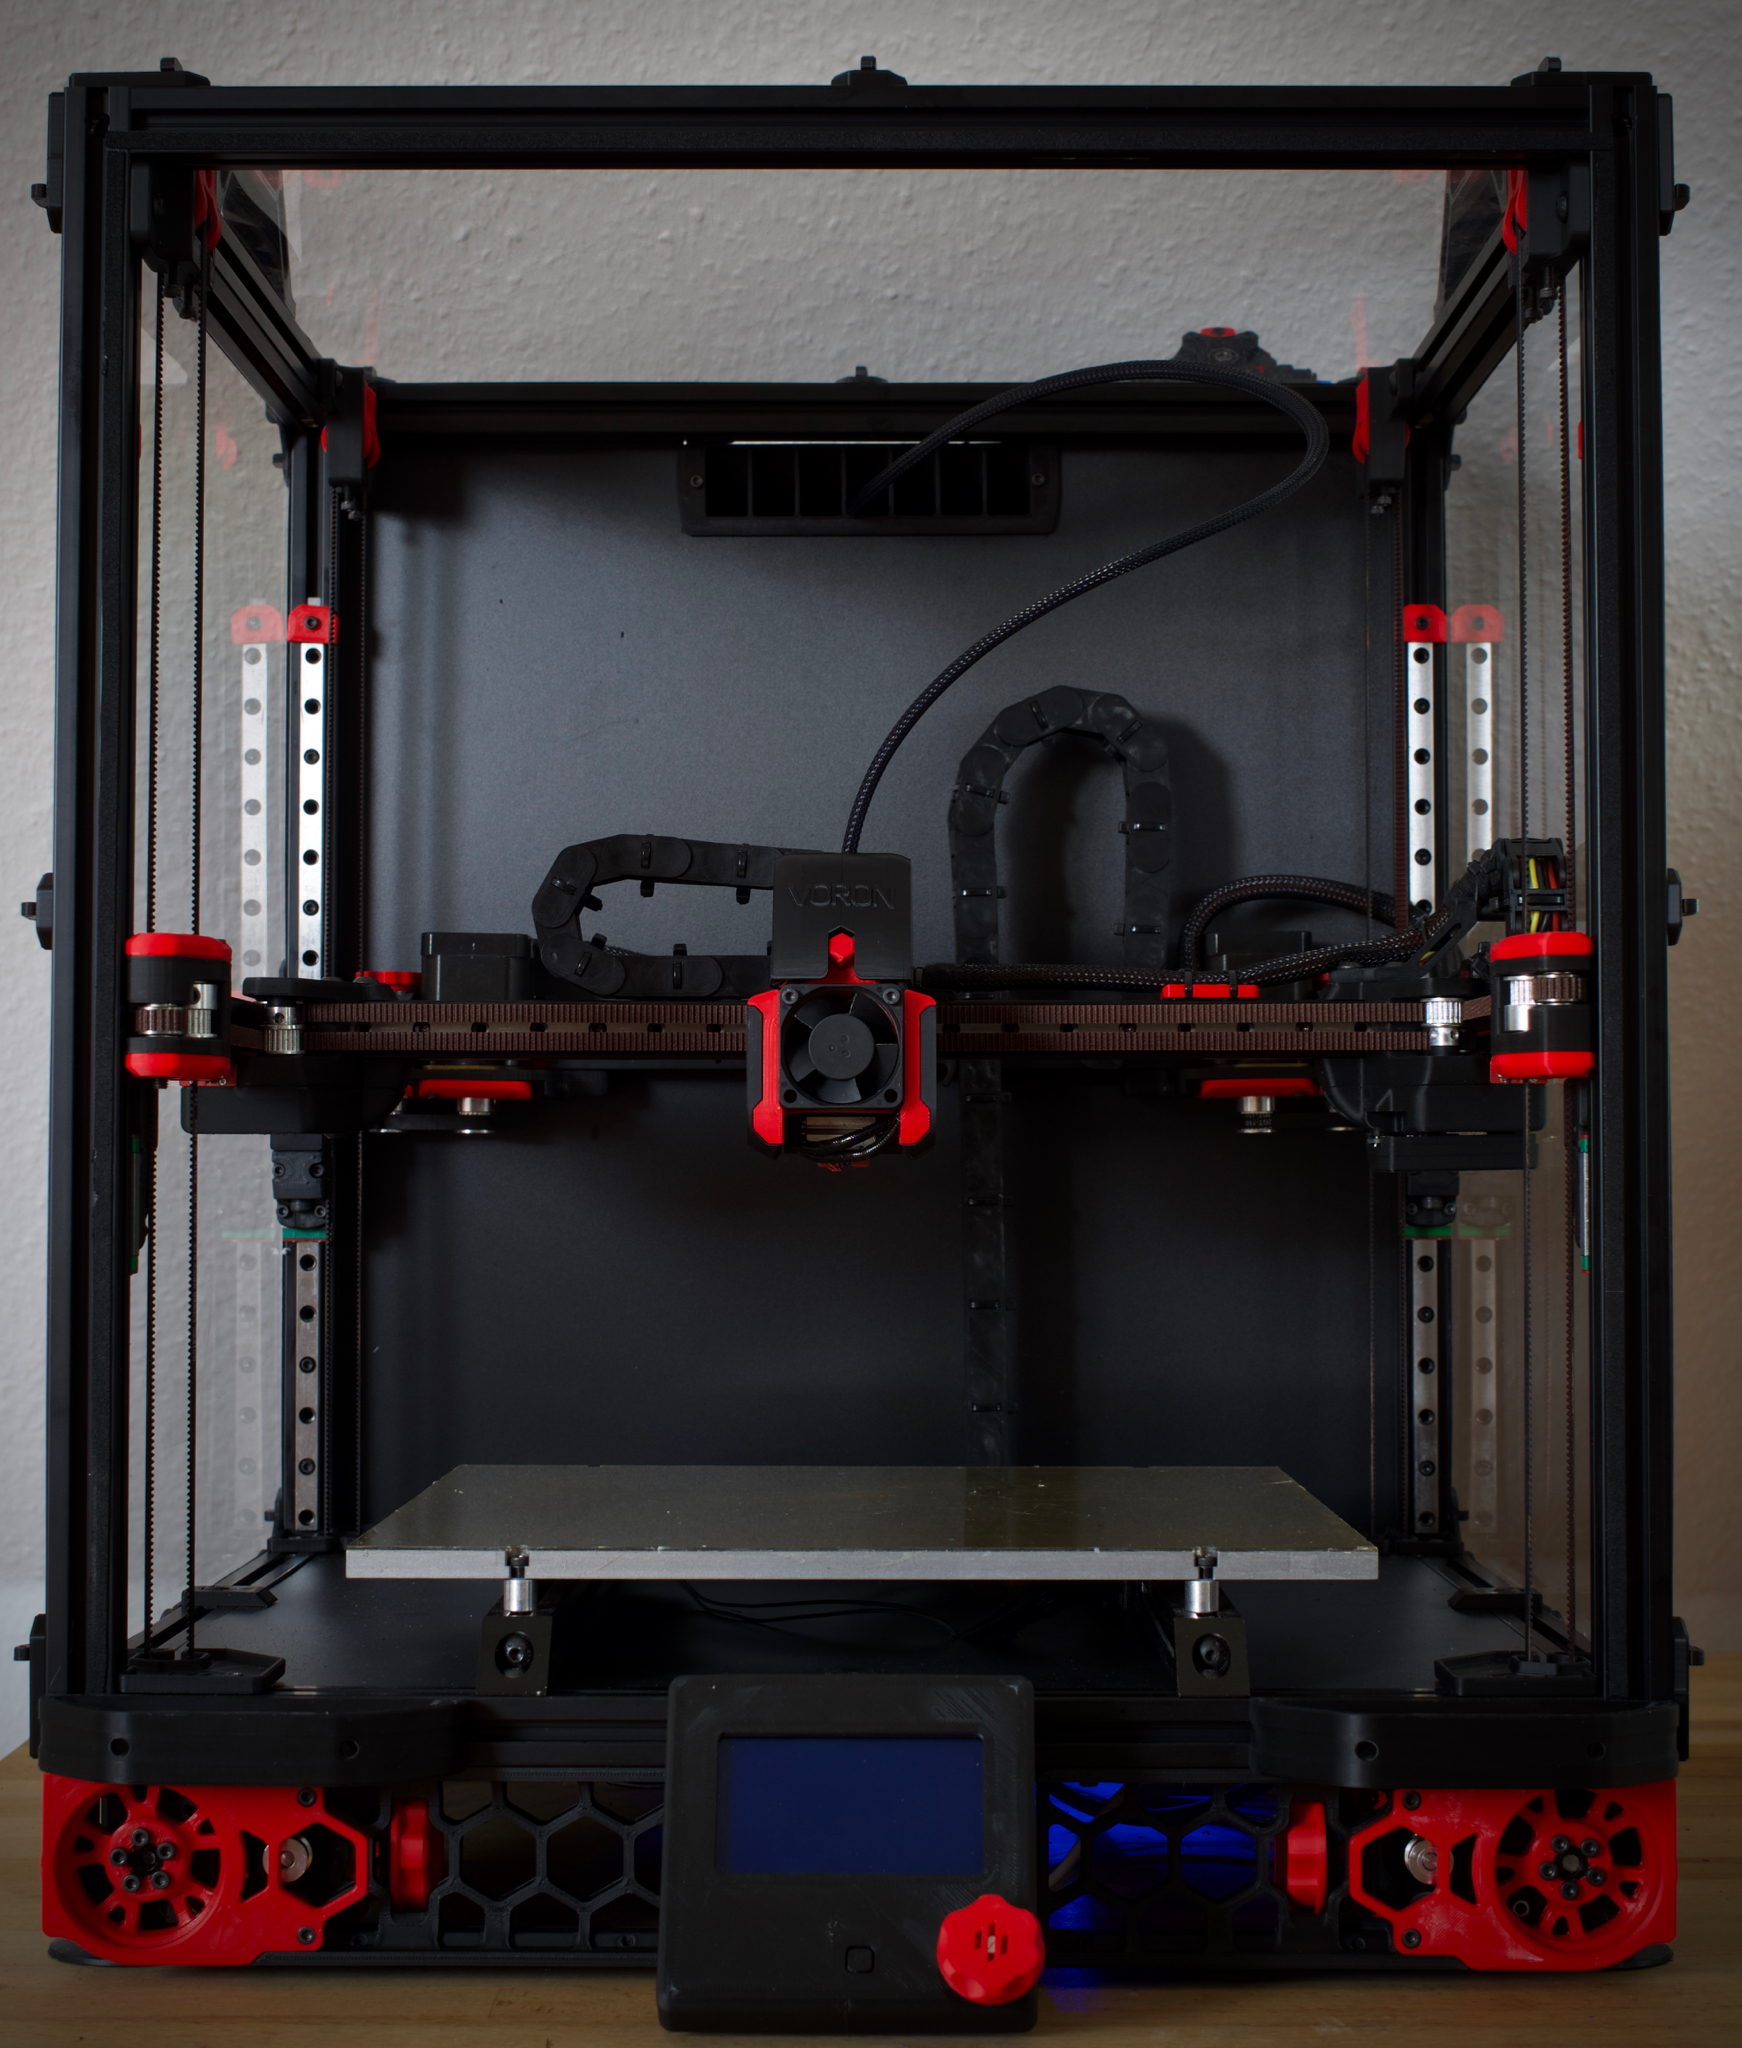
#1 DIY 3D Printer: Voron 2

Features


Difficulty


Community


Cost

>$1200

† More (brains) = more difficult

Features

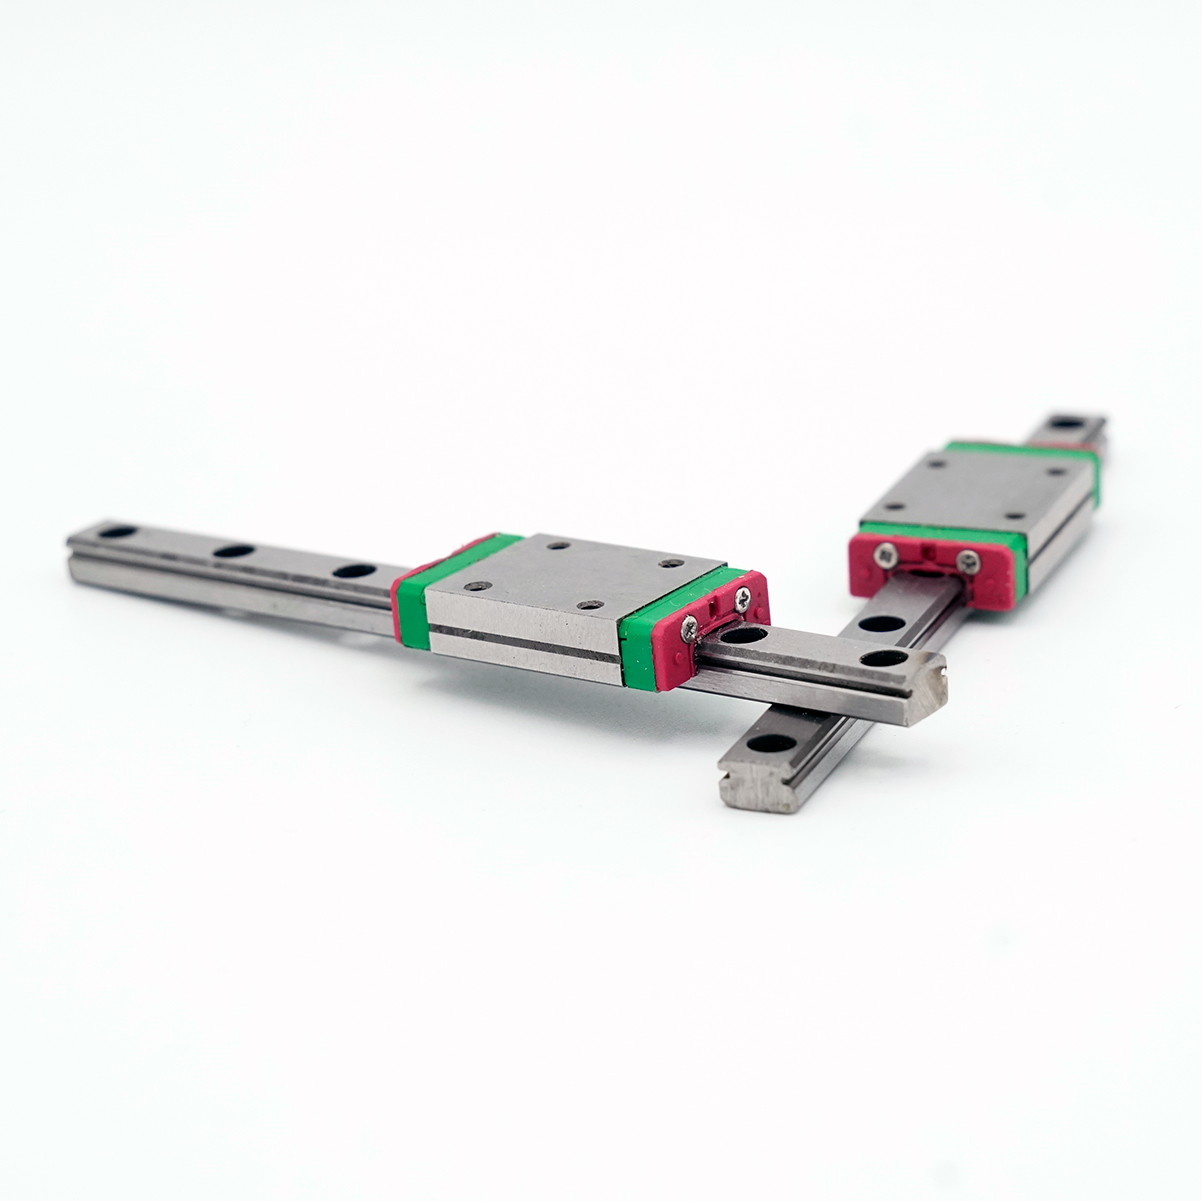
  • CoreXY design with linear rails
  • Auto leveling gantry
  • Support for multiple build volumes: (250mm)3, (300mm)3, and (350mm)3
  • Extruder can be quickly swapped
  • Stationary build platform
  • Enclosed
  • Klipper Firmware running on a Raspberry Pi + 2 RAMPS

Difficulty

Unfortunately, building Voron is no small feat. This beast has seven stepper motors, which means there are a lot of belts, pulleys and rails that need to properly assembled and attached to the aluminum extrusion frame. The supported firmware for the printer is Klipper, which is probably the least user-friendly of the firmwares. A little experience with Arduino Megas and Raspberry Pi’s would go along way.

Community

The Voron community checks all the boxes: active reddit community , discord chat with users who are online during the middle of the night , and more than a couple examples of successful builds on forums and YouTube .
A Closer Look at the Voron 2

The Voron 2.2 is the evil genius of 3D Printers. It would be a sin to not carry over the red and black color scheme when printing out the parts to this printer. At a first glance this 3D printer looks difficult to build and to be honest, it is one of the more challenging printers to put together on this list. However, there are a lot of systems in place to help you succeed, including a thorough manual, a discord community, and many forum posts about this build. The time and energy the Voron team put into this design and supporting material deserves a standing ovation and a donation if you feel so inclined.

Let’s run through the features of this menacing printer. Linear rails dominate all the axes, which suggest that this printer, once configured, will be able to print day in and day out. The linear motion mechanics for Voron (and many other printers on this list) follow a CoreXY design, where some trickery with the belting allow for both the X and Y motors to be mounted on the frame. I recommend reading this article if you want to learn more about CoreXY, but to skip over the details, this configuration allows for the extruder carriage to be super light and consequently, able to change directions quickly. There are other benefits to a CoreXY design such as a stationary build platform and the ease at which these printers can be enclosed. With all these advantages it’s no wonder that most new DIY designs are CoreXY.

Timing belt is also found on the Z-axis of Voron. A unique but complex feature of this build is the use of a separate z axis motor for each of the 4 corners of the print bed. You heard me right. This printer uses as many motors for its z-axis as a normal 3D printer uses for all of its axes plus extruder. The purpose of these motors is to not only lift and lower the print head gantry but also to physically level the gantry over the fixed build plate. This feature puts all the companies to shame that claim their printers have auto bed leveling, when really they are using a software trick to move the extruder up and down when encountering high and low spots on the build platform, respectively.

Perhaps the most controversial part of this printer is how much it costs to buy all the parts. I have seen some users claiming that it only cost them $800 while other say they spent $1500 to source everything. I estimated the cost of this printer to fall in the middle of these two extremes (about $1200). The seven linear rails required for the build make up a large portion of the build. People always try and save money by purchasing low quality, import, linear rails, which will negate any benefits of using a rail over a rod or aluminum extrusion and wheels. Hiwin rails have sufficient quality for 3D printing while not breaking the bank.

My one issue with many CoreXY printers is their use of a Bowden extrusion drive. In a Bowden setup, the stepper motor and gears that grip and force the filament down the hot end is attached to the frame and not the print head. The relocation of the extrusion drive to the frame means that the print head is very light and can make rapid movements. For this reason, CoreXY and Bowden extrusion drives go hand in hand because these printers usually have large build volumes and consequently, speed is of utmost priority. However, I still prefer a direct drive extrusion setup (i.e. the extrusion drive sit on top of the cold end of the extruder). With direct drive extrusion you do have to slow down how quickly the print head changes directions but the prints are of higher quality and printing with flexible filaments is possible. The first iteration of Voron had “third-party” designs that allowed you to switch the Bowden to a direct drive, but at the time of writing I have not seen such an option for the Voron 2. The beauty of the open source nature of Voron is that you can modify the files to make a direct drive system, and when you do please post it to the forum!

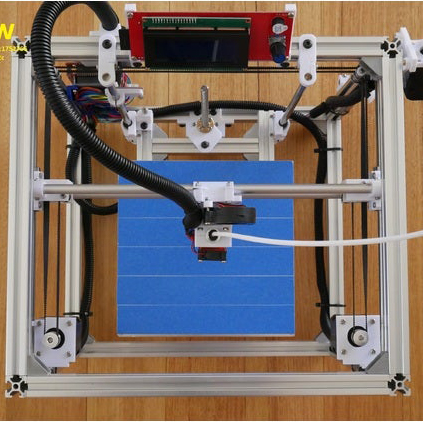
#2 DIY 3D Printer: HyperCube

Features


Difficulty


Community


Cost

<$350

† More (brains) = more difficult

Features

  • Affordable CoreXY design with linear rods
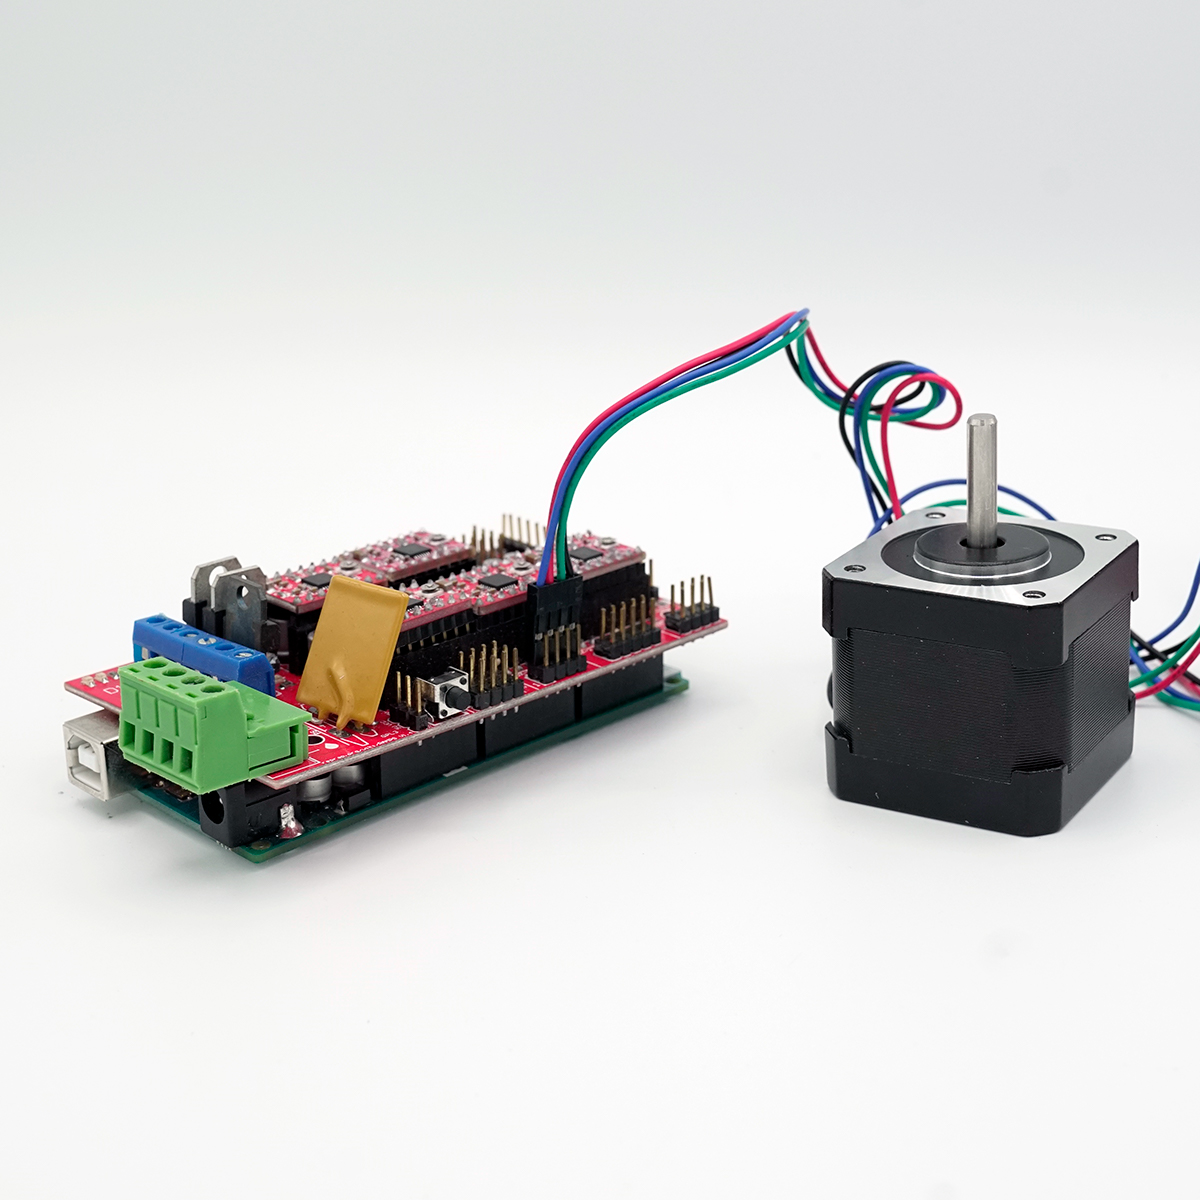
  • Requires only 4 stepper motors
  • Proximity switch for auto bed leveling
  • Can be easily enclosed
  • Modest build volume (200 x 200 x 150mm)
  • HyperCube remixes exist with more features

Difficulty

This printer took the #2 spot because of how easy it is construct. There are no superfluous features that could overcomplicate this build. The only difficult part is routing the belting for the X and Y axes, but once you have that figured out the rest of the build is smooth sailing. There is a YouTube build series of the entire printer by the creator. Also, you can purchase the frame or entire printer as a kit, which will expedite the build.

Community

The HyperCube does not have a dedicated website, but the design is posted to Thingiverse, where there is a healthy discussion of the build in the comments. There is a subReddit but it is fairly inactive. But don’t worry if you have question the 3D printing community is very familiar with the HyperCube, so it would not be difficult to find advice on a generic 3D printing forum.
A Closer Look at the HyperCube

Keep It Simple, Stupid (KISS Principle). If you are new to building 3D printers then its best to build a simple, bare-bones printer, like the HyperCube. Not only is the HyperCube easier to build than other printers on this list it is also more affordable. Depending on your retailer and whether you choose to buy the components that are not critical for 3D printing, such as the LCD and inductive sensor, you could pay less than $200 for everything. Building with cheap parts is a double edged sword. On one edge, if you fry your motherboard by mixing up the positive and negative power terminals then you can purchase another board without having to check your bank account balance. On the other edge, cheap components usually do not go through rigorous quality control, so it may be difficult for you to determine if you are making a mistake or if the component is flawed. However, these cheap components are slowly improving over time, which is why a low priced printer like the commercially available Ender 3 is able to churn out high quality prints.

There are a couple of different versions or remixes of the HyperCube available. The original was created by Thingiverse user Tech2C and is still the most popular build. But the HyperCube Evolution by Thingiverse user Scott 3D is gaining more traction due to slight design modifications that made the frame and build platform more stiff. The original and all HyperCube spinoffs use an aluminum extrusion cube as a frame, rods for linear motion, and a single E3D V6 extruder.

In the DIY community there has been a rush to throw away linear rods in favor of rails. On paper rails are superior to rods. Rails have a larger load capacity, higher accuracy, and faster maximum speeds than comparably sized rods. However, if we look at the demands of 3D printing, where the loads that need to be moved are relatively light, the accuracy is limited by the irregularities of plastic extrusion, and the print speeds don’t get anywhere close to the maximum speeds linear rods are capable of, it becomes hard to justify the premium price of rails. The HyperCube's costsavings comes from the use of rods for all three axes. It’s best not to let the presence of absence of linear rails decide which printer you are going to build

There are a couple of weaknesses of the original HyperCube design that you should keep in mind. This printer is a CoreXY design, but unlike the Voron the bed is not stationary but instead moves up and down. That in and of itself is not a flaw, but it is very important that the bed is rigidly connected to the linear rod to prevent the bed from sagging or vibrating during printing. The HyperCube supports the bed only from one end and the connection is a 3D printed part. This will be fine for the relatively small 200 x 200 x 150mm build volume of the original, but design modification will need to be made if you plan to scale up the hypercube. Other flaws of the printer such as the inexistence of a part cooling fan and lack of an enclosure can be added by the user.

The HyperCube is an affordable and friendly choice for your first DIY build.

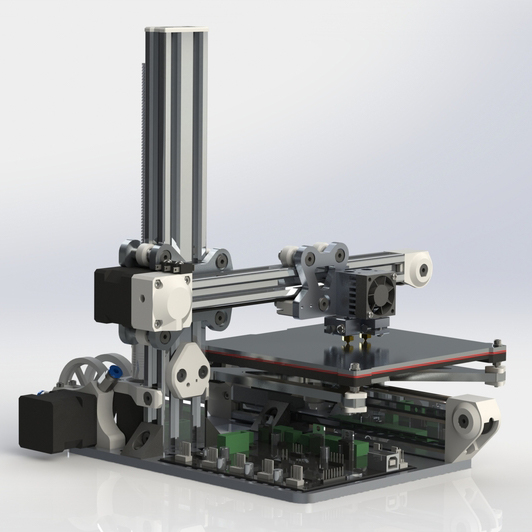
#3 DIY 3D Printer: Voxel OX

Features


Difficulty


Community


Cost

>$1100

† More (brains) = more difficult

Features

  • Built on the V-Rail platform by OpenBuilds
  • Sturdy frame
  • Can be used as a CNC router!
  • Easy to adjust build volume
  • Auto bed leveling

Difficulty

The simplicity of the V-Rails allows the Voxel OX to be assembled quickly. You will have to learn a couple new skills like how to snug up the V-Carriage wheels to the rails to prevent unwanted movement, but don’t worry the OpenBuilds YouTube channel has examples of all their different types of linear actuators. The printer operates similarly to the Prusia family of printers, so any experience with these printers will be beneficial.

Community

Unfortunately, the community around the Voxel OX is inexistent. The original forum post outling how to build this printer has not seem much activity lately. Further, there is no dedicated website or subReddit to ask questions on. This printer is a hidden gym, so not many people will have heard of it. There are a couple of YouTube videos showing the printer in action, which is comforting, but you are largely on your own. If you have any concerns with using the V-Rail then you can reach out to the OpenBuilds staff. I have emailed them a handful of times and have always received a response in less than thirty minutes (!) during business hours.
A Closer Look at the Voxel OX

A voxel is a 3 dimensional (volume) pixel, which is a fitting name for a 3D printer. Voxel OX is a little known printer that was first posted to the OpenBuilds forum. Its design is reminiscent of the Prusia but a special type of aluminum extrusion known as V-Rail is used instead of linear rods. V-rail carriages use wheels to traverse across the rails, which differs from the ball bearing carriages that ride on rods and linear rails. I am personally a huge fan of the V-rail system. It is a little pricey, but it makes total sense to have the frame function as the rails. The Voxel looks like a minimalistic design because it doesn’t have rails or rods sticking out from the aluminum extrusion.

Typically, the frames of most DIY 3D printers are made out of 2020 aluminum extrusion. 2020 refers to cross sectional area of the extrusion (20mm x 20mm). The larger the cross sectional area the stiffer the frame will be. The Voxel uses 2080 (20mm x 80mm) extrusion for all three of its axes, which means that this is a stiff little printer. So stiff that the print head can be switched out for a router and some light CNC cutting of woods, plastics, or foams can be accomplished. If you are limited on space then a printer/router combo like the Voxel would make a lot of sense.

Having to source 3D printer components from many vendors is a headache. All the parts arrive at different times, and you can’t be 100% sure that everything will fit together. Nearly all the parts for the Voxel can be purchased from the OpenBuilds store. This is going to sound like a sponsorship, but I promise I am in no way affiliated with OpenBuilds. This online store is a DIYer’s dream. It is well organized and has rails and CNC components of all different sizes. I have used these components in my DIY IDX 3D printer build as well as some prototype CNC projects that I am working on. The downside of Openbuilds is that everything is pretty expensive for the hobbyst market. But hey, you get what you pay for.

To get back on topic, the Voxel is a no-frills, down to business 3D printer. It would have been nice if this printer “lived a little” by splurging on a couple of components. For example, an Arduino Mega + RAMPS 1.4 is the brains behind the operation, which works but is a dated setup. I recommend upgrading either the stepper drivers to smooth and silent Trinamic drivers or purchasing a 32-bit motherboard, like the Duet Wifi . While you at it, it would be a good idea to replace the 3D printed extrusion drive with a BMG or E3D Hemera extrusion drive to increase print quality.

The Voxel is a great printer to build. If you ever want to expand the build envelope, then you only need to buy longer V-rails, which is cheaper than buying both the aluminum extrusion and linear rail that is required to expand a printer like Voron.

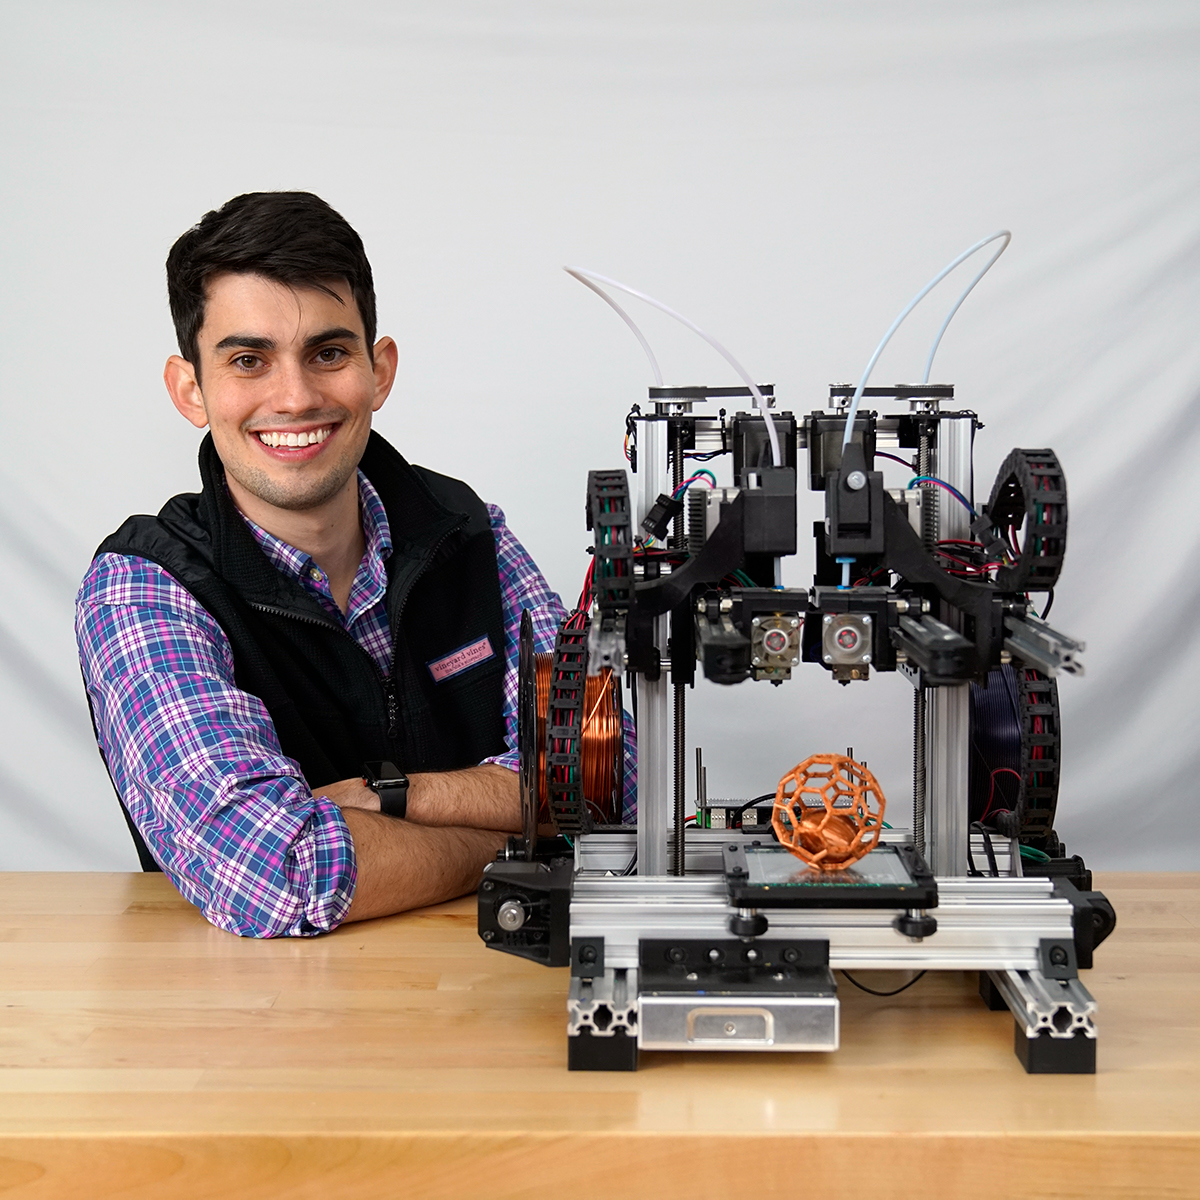
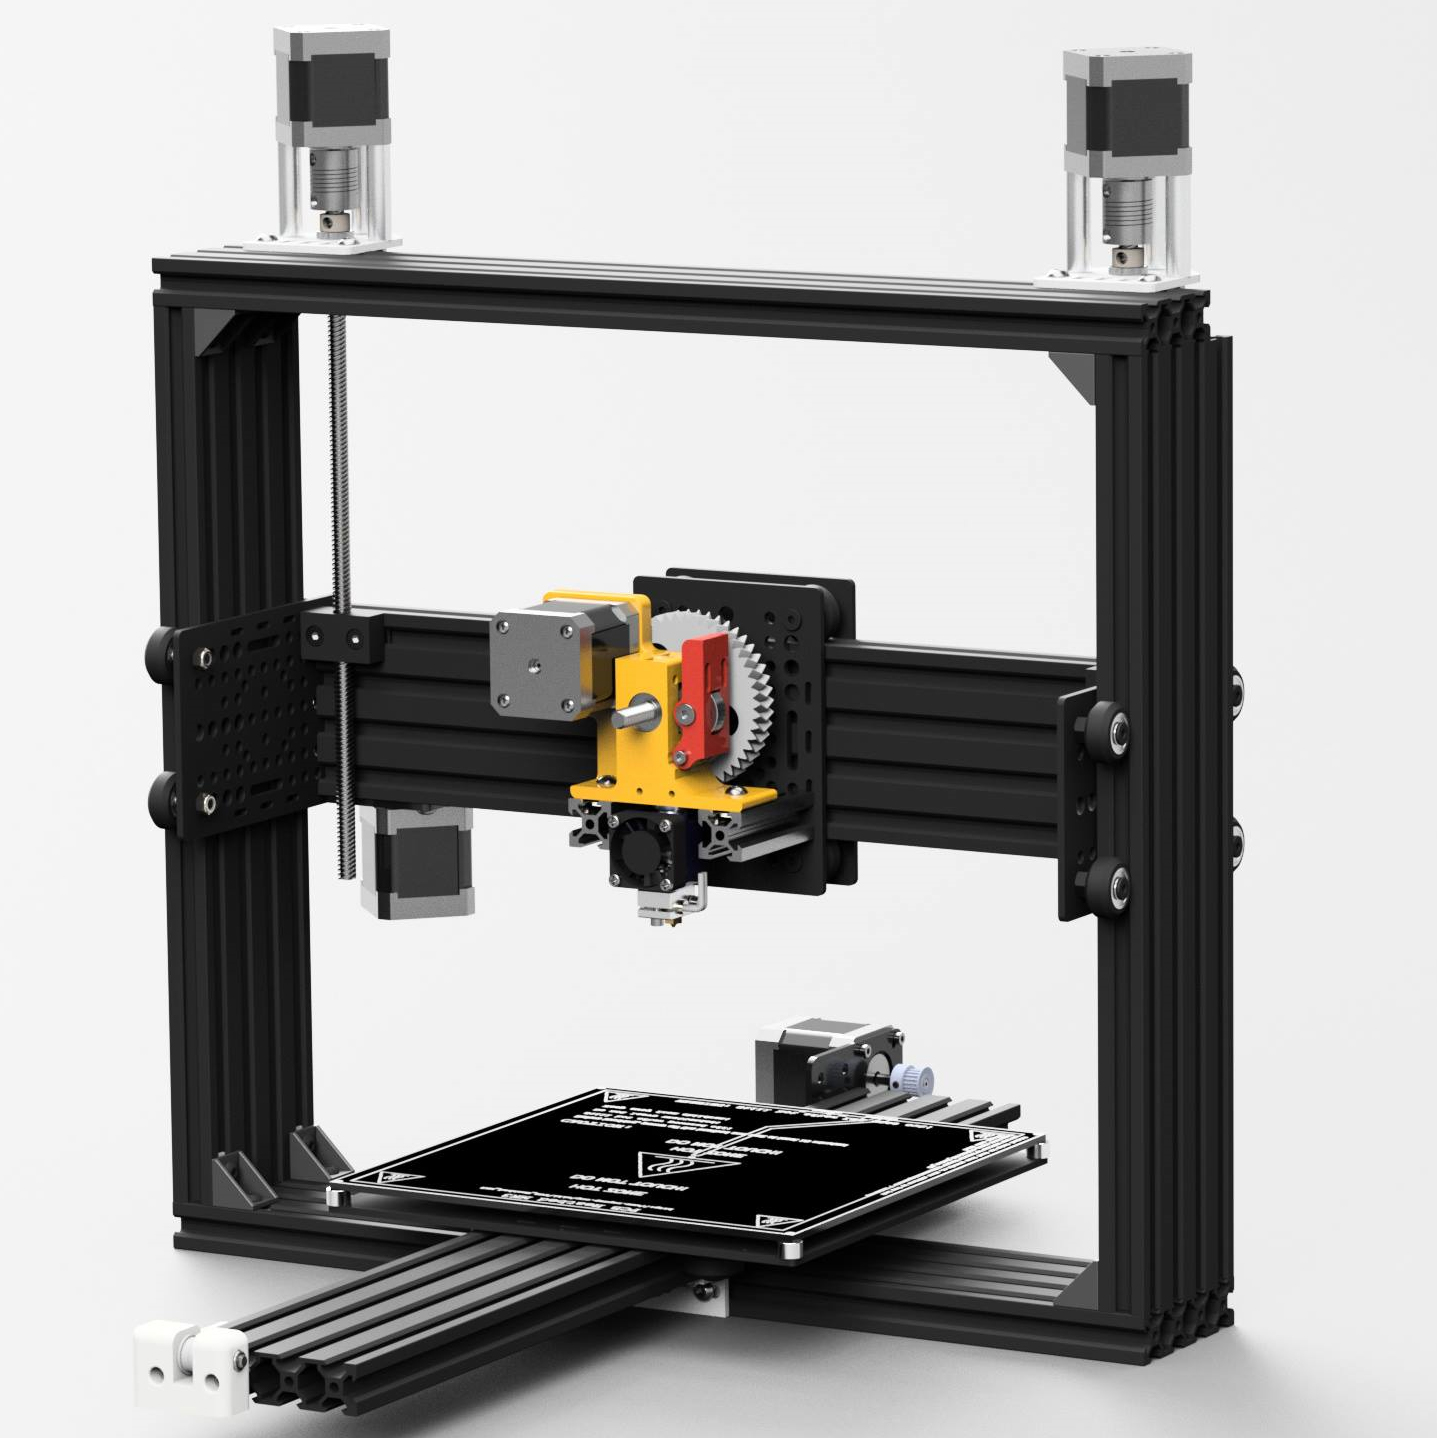
#4 DIY 3D Printer: Indie i2

Features


Difficulty


Community


Cost

>$500

† More (brains) = more difficult

Features

  • Small and lightweight
  • Requires less aluminum extrusion = more affordable
  • Native dual extrusion
  • 32-Bit Smoothieboard

Difficulty

Crane printers are typically quicker to assemble than most other printer configurations. However, once assembled these printers are harder to make square because the cantilevered axis can move if not properly tightened down. The Indie i2 calls for some custom aluminum plates that are not commercially available and need to be machined out of aluminum. These plates makes this build prohibitory to those without a CNC router/mill. I recommend replacing these plates with OpenBuilds’ universal plates or sourcing similar plates from a different crane printer design.

Community

The Indie i2 from time to time will pop up on Reddit threads, but most of the discussion about this printer is located on the OpenBuilds' forum. Simon, the creator, has taken a lot of time to answer everyone’s questions, and I strongly recommend reading all the posts related to this printer before building. Further, you can also find designs for modified Indie i2’s with larger build volumes.
A Closer Look at the Indie i2

Crane style 3D printers, like the Indie i2, are identified by their one Z tower and cantilevered linear rail that juts out from this tower. As their name suggests, these printers look like cranes. However, in this case you would have a print head on the “jib” instead of a “trolley.” Not going to lie, I had to look up that crane terminology, and I still might not have used it correctly. These are truly minimalistic 3D printers, with only one rail per dimension. With this design, crane printers are small and lightweight. The Indie i2 goes a step further in portability by being easily flat packed after disconnecting the three axes. If you travel a lot then the i2 could help you get your fix of 3D printing while on the road.

Similar to the Voxel OX, the Indie i2 relies on OpenBuild’s V-rails, but there are other crane printers that use linear rails and rods (see here). The use of only three pieces of aluminum extrusion for the frame can save you a good chunk of money, but there are also drawbacks to this minimalistic approach. Most crane printers have a small build area, which is typically less than 200 x 200mm. The larger the build area the more the cantilevered gantry has to be extended. At some length it will be impossible to prevent that unsupported rail from sagging. 3D printers are very temperamental when it comes to squareness (when two members or rails are square they are at a right angle to each other). If the Z rail and the cantilevered rail are not eactly perpendicular to each other then you will have issues with first layer adhesion and the dimensional accuracy of your printed part. As an aside, the most difficult part to building a 3D printer, in my opinion, is making sure that the frame is square. This could take a couple hours to do or even longer if you don’t have the correct tools. The appropriately named “square” is a great tool to have when building a printer.

The Indie i2 is the first printer on this list to natively support dual extrusion through incorporating an E3D Chimera, which is a fixed dual extruder. Keep in mind that a Chimera extruder could be incorporated into any of the above designs, but modifications would be required. The Indie i2 is already fitted for dual extrusion.

If you are in the market for a small and/or portable printer, then the Indie i2 or any of its closely related crane-style siblings would be a great 3D printer to have.


You built a printer. Now what?

It's time to print! Check out my article on How to Calibrate a 3D Printer to make sure your printer is working as it should. Next, check out my list of The Most Useful Prints that you can do on your shiney new printer.