Overview
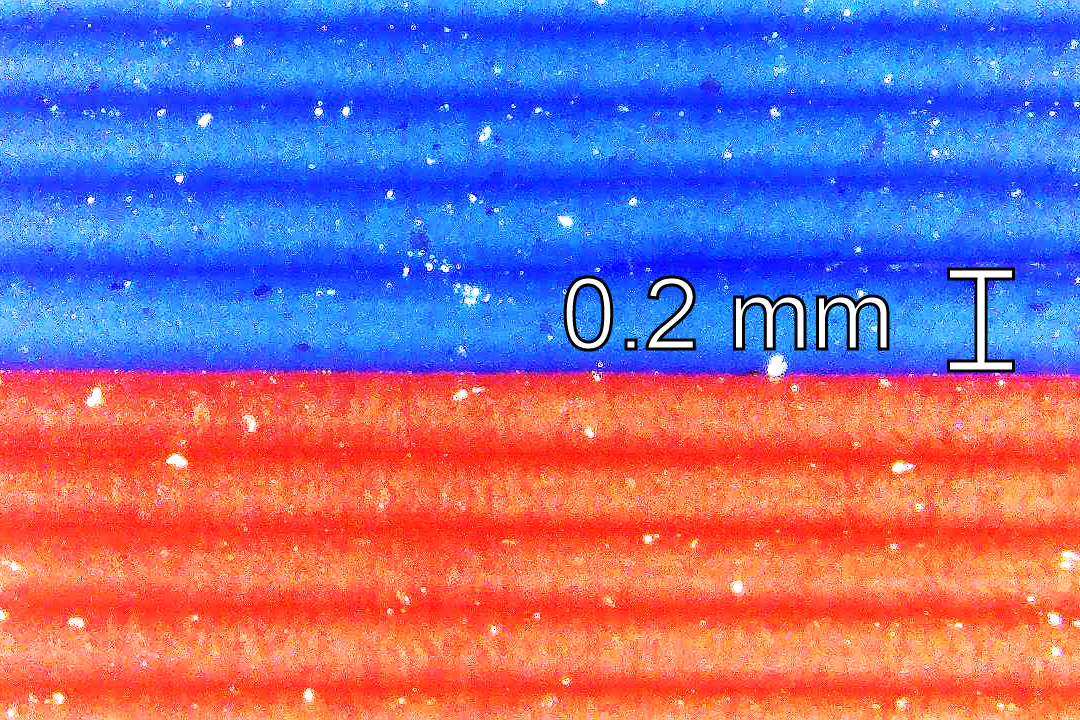
A 3D model that was created on a Computer Aided Design (CAD) program, like Fusion 360 or Solidworks, cannot be sent directly to your 3D printer. There are a couple of intermediate steps that are handled by a program known as a Slicer. If we take a closer look at how a 3D printer works we can understand why these programs are called Slicers. Fused filament fabrication and almost all other 3D printing technologies utilize a layer-by-layer approach. Printed objects are approximated by stacking 2D layers that have a set thickness known as the layer height (Figure 1). Higher resolution prints can be achieved by decreasing the layer height, which allows the original object to be divided into a higher number of layers, retaining more detail. Perhaps you have already deduced where “Slicer” comes from. Another name for a layer is a slice. The Slicer cuts up 3D objects from CAD programs into slices that approximate the original part. The program then converts these slicers or layers into G code. I don’t have the space or technical know-how to fully explain, this numerical control programming language, but basically, G code consists mostly of coordinates that the printer’s microcontroller uses to know where and when to extrude filament.
But wait, Slicers do so much more. These programs will also send code to the printer that determines everything from extrusion temperatures and print speeds to retraction distances and infill densities. There is a mind-numbing amount of changes that can be made to the printing process by adjusting settings within the Slicer. A very important feature of the Slicer is its ability to make complex parts printable. Many of the 3D models that are available online or even CAD files you generate will have features that are unprintable. Large overhands are the usual culprits. In layer-by-layer printing there must be material underneath the current layer. Slicers can identify these overhangs and add support material to bridge the gap.
Which Slicer?
If you have had any previous experience with 3D printing, then I expect you already knew the role of the Slicer. The Slicer of choice for most people is whatever was recommended with the 3D printer that they bought or whatever was on the computer at their local makerspace. When you are building a 3D, you will have to choose a slicer that will work best with your 3D printer design. The three biggest Slicers currently available are Simplify3D, Cura, and Slic3r, with the last two being free. Back in 2015, when I started taking 3D printing seriously (maybe a little too seriously), I switched from Slic3r to Simplify3D. The clean user interface and rich features far outweighed the license fee. At the time, Simplify3D was leaps and bounds ahead of all the freeware, and I honestly have not looked back since making the switch until I started writing this post. With the features that are available on Cura and Slic3r today, I would be hard-pressed to hand over $150 to gain access to Simplify3D. I don’t want to go into what features are available on which Slicer because doing so would date this guide because the development of both Cura and Slic3r has been so rapid and Simplify3D is preparing to release a complete overhaul (version 5.0). Basically, any of the three big Slicers will be able to handle most custom 3D printer configurations. I recommend reading through some of the resources below before making your decision. Remember you can always start off with Slic3r or Cura before investing in Simplify3D.
External Resources
There are a lot of different ways to successfully build a 3D printer, many of which are not covered on this website. If you want to learn more about firmwares, then click through some of the links below to external websites and forums.