Last Edited: September 14, 2021
Affiliate Links are present below.
Overview
Fortunately, building a 3D printer does not require a well-equipped shop. However, most DIY designs do not include the tools/equipment needed for assembly. Below are all the tools that I have ever needed to build a 3D printer.
Metric Hex key set
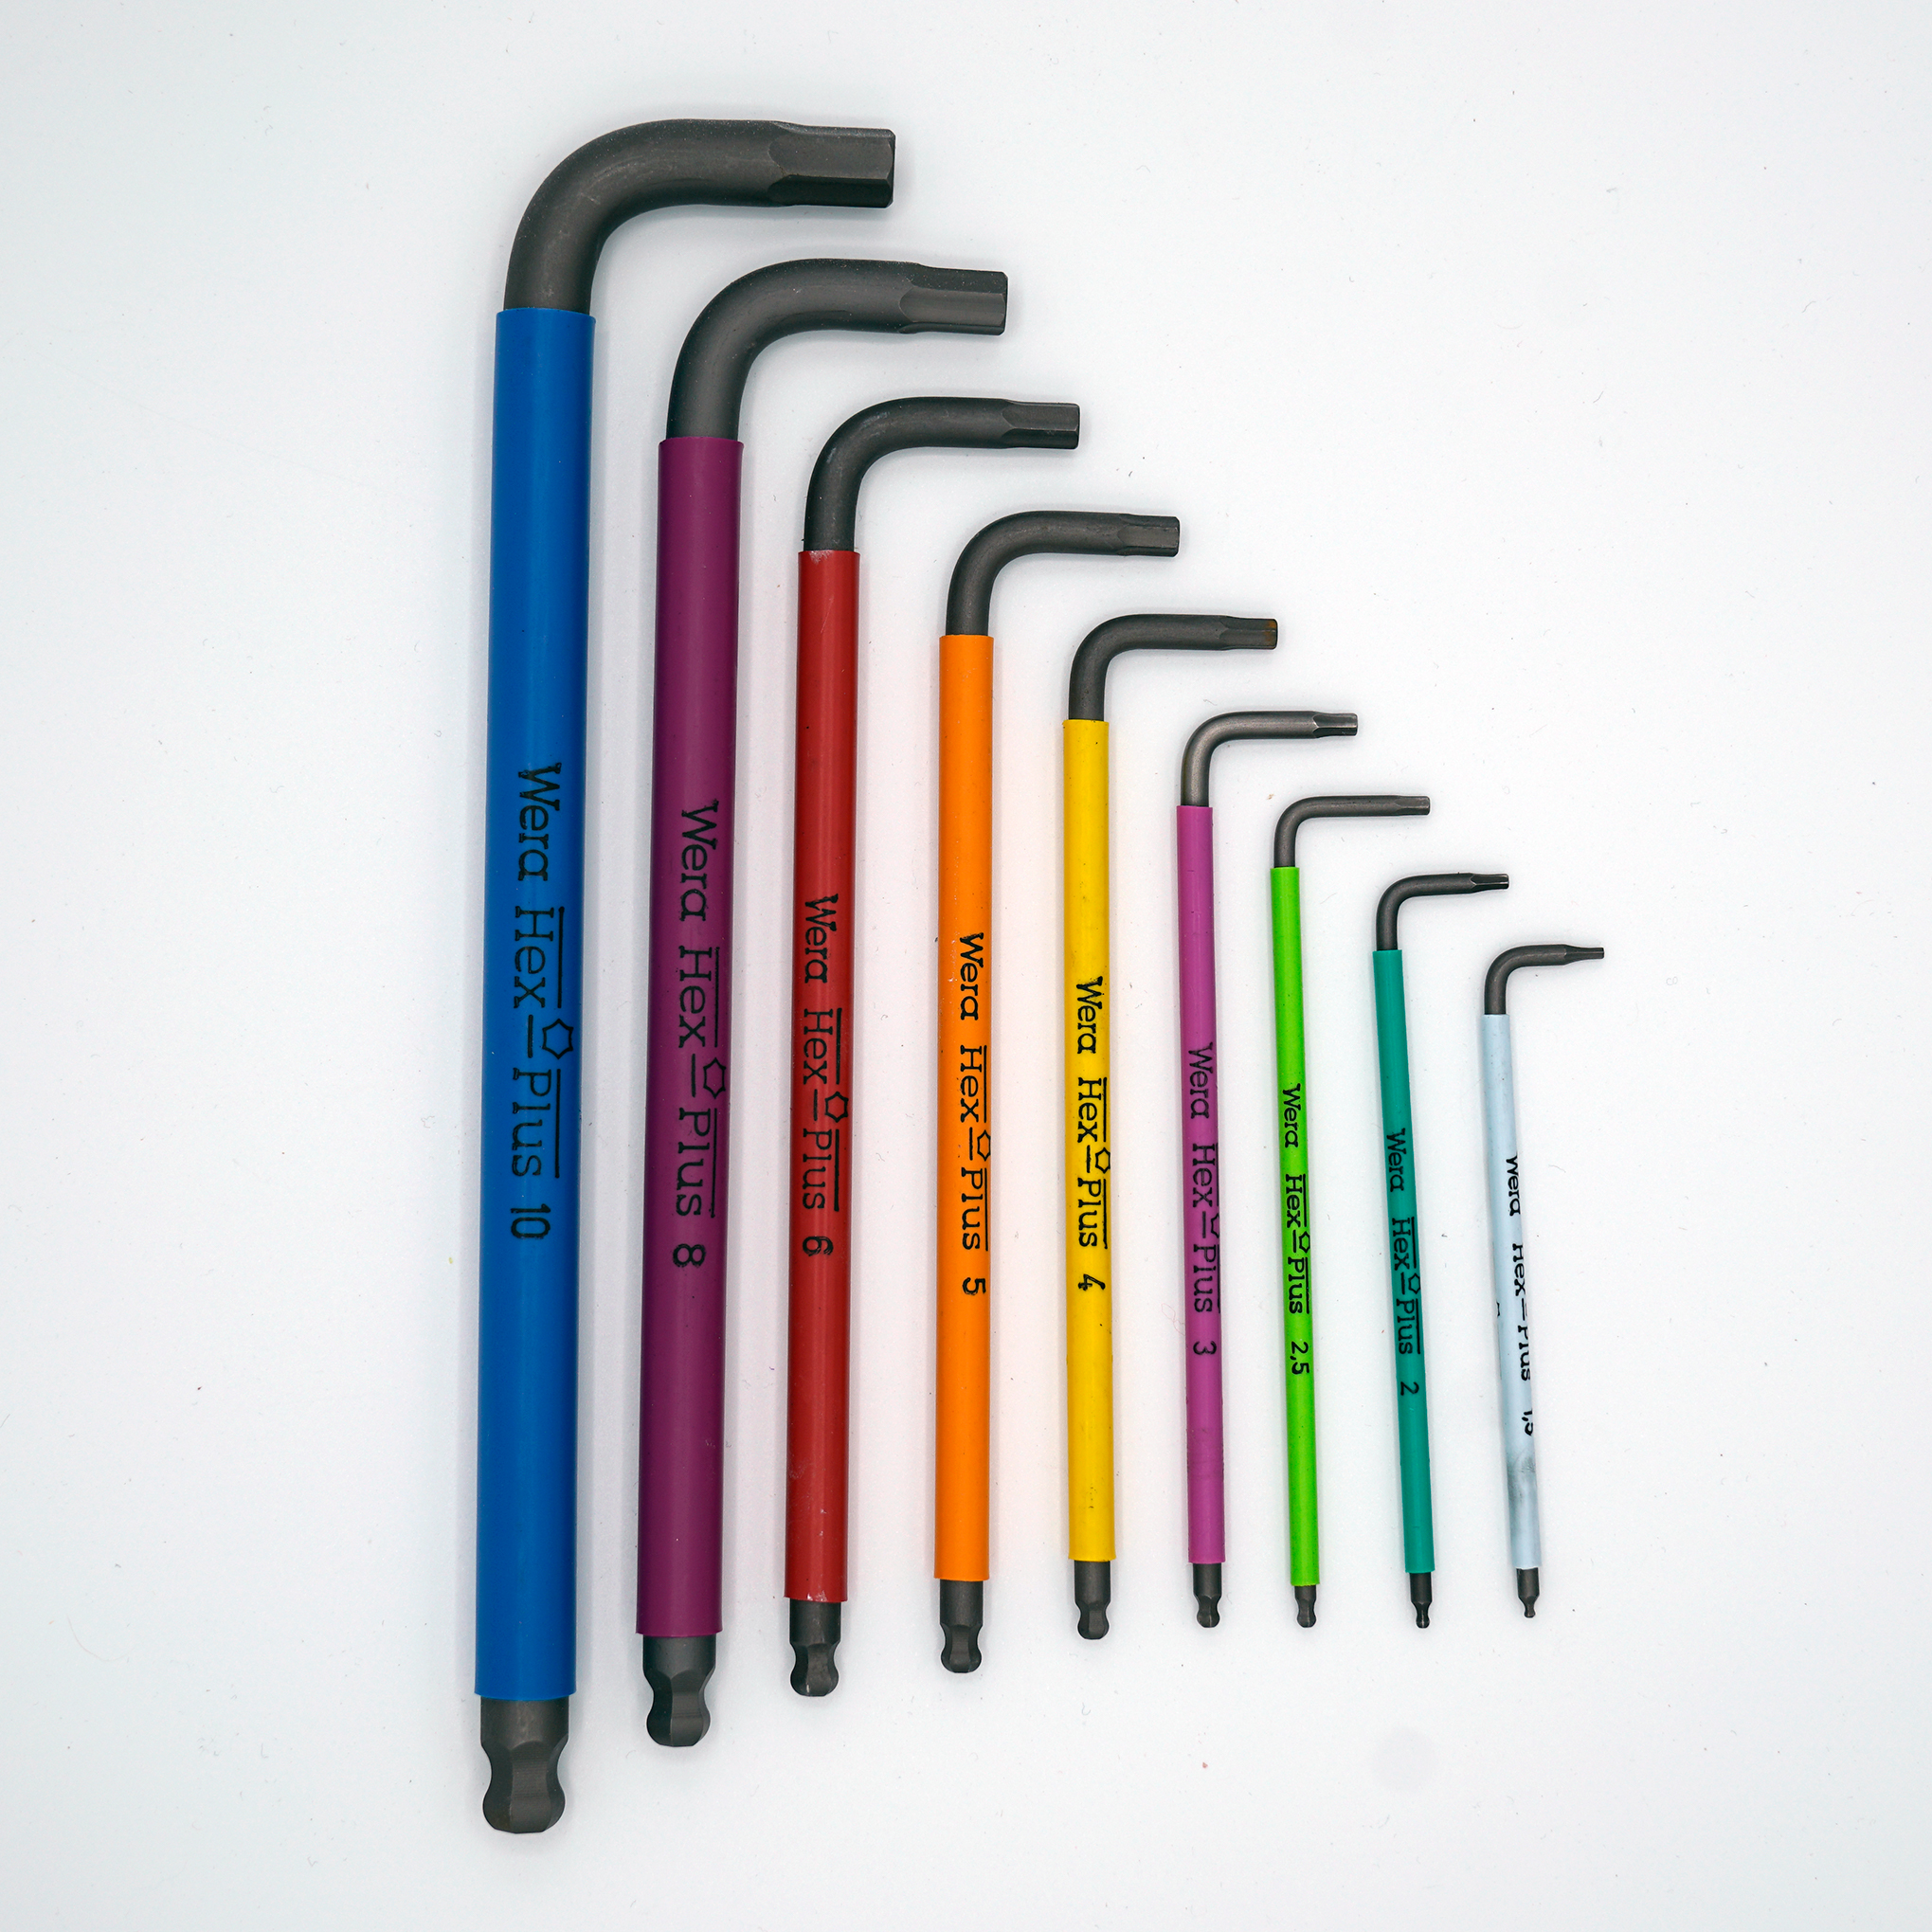
Almost all bolts used in 3D printer building have a socket head that requires either a 2.5mm or 3mm hex key. Cheap aluminum hex keys that are thrown in with Ikea furniture and other products requiring end-user assembly will quickly lose their hexagonal recesses as they round over from use. These damaged tools will strip bolts, frustrating you beyond belief.
My favorite set is the Wera’s Multicolor L-Keys. Each key features a unique bright color for easy identification. Wera’s patented geometry increases the contact surface between the tool and fastener, preventing notching and damage to the screw head.
A more budget friendly option is the Tekton hex keys with ball ends. Ball ends are great for tight spaces and quickly tightening a bolt in hard to reach spaces.
Precision Screwdrivers
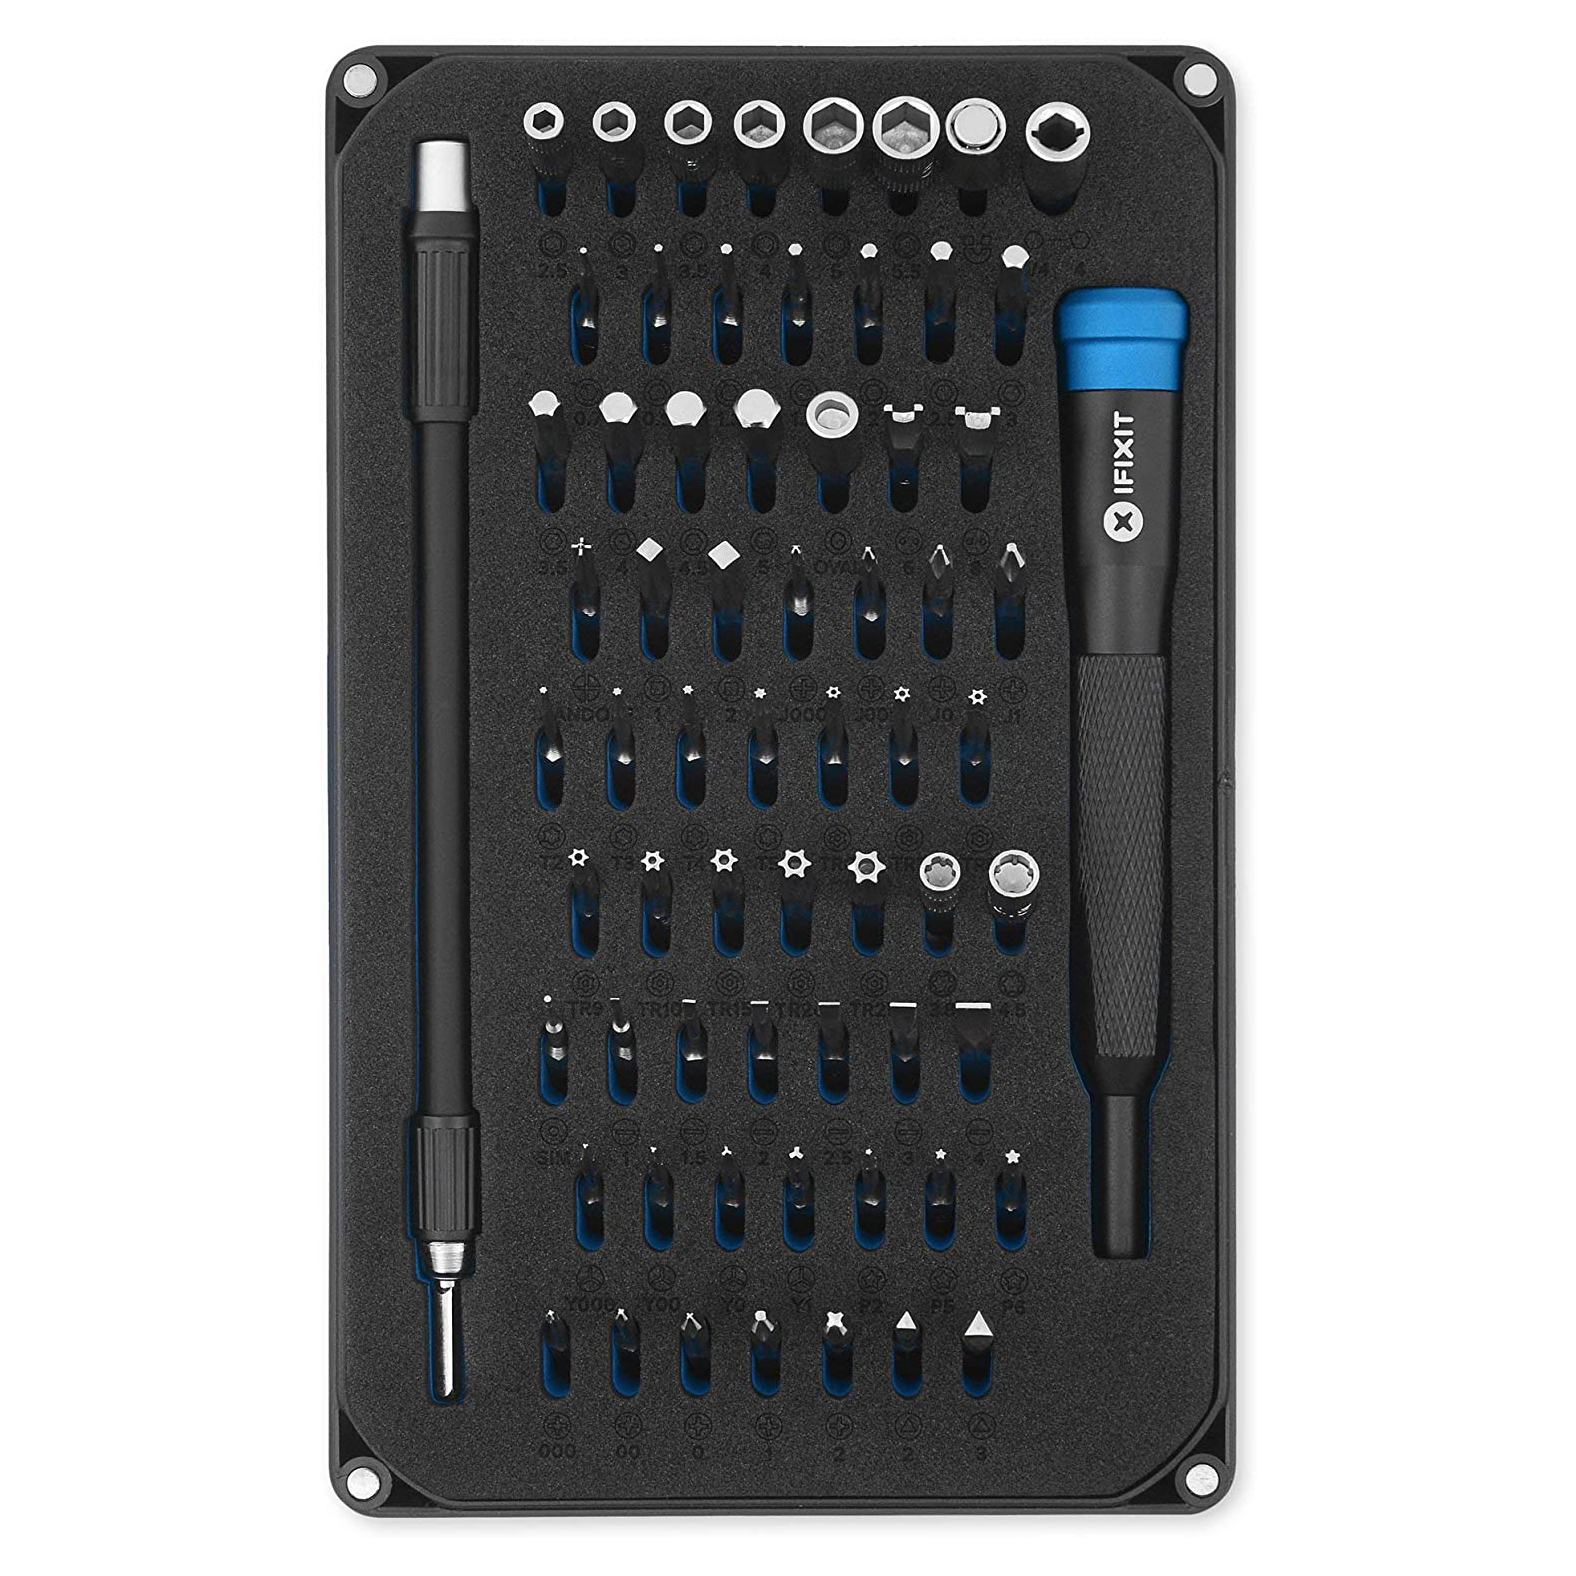
A well-equipped set of small screwdrivers and/or bits will allow you to assemble almost any electrical component. For most builds, you may only require standard bits like Phillips and Flatheads, but it’s not uncommon to see a screw or bolt with a torx head. There is nothing worse than being on a roll with your 3D printer build and coming across a fastener that you can’t install or remove. I keep the iFixit Mako Driver Kit nearby and have yet to come across a bolt it cannot remove.
Soldering Iron and Tips for Heat Set Inserts
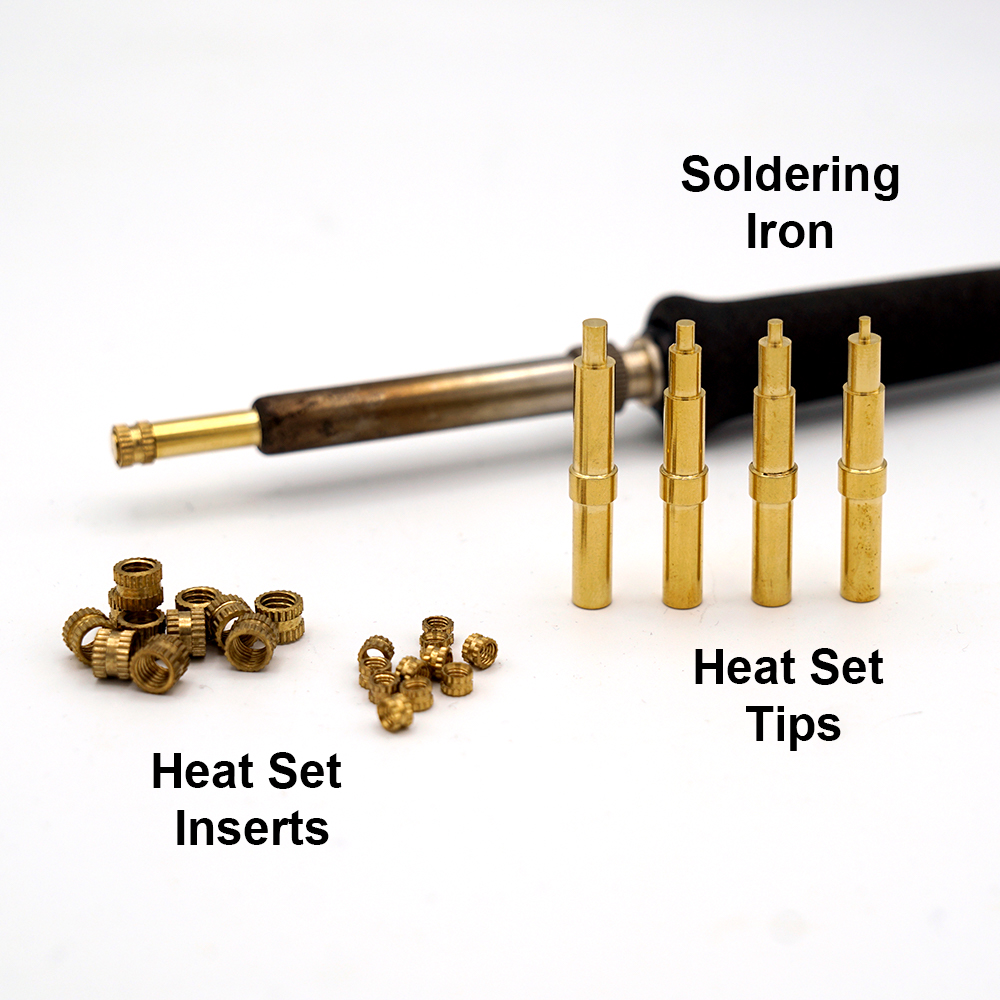
Fortunately, very little if any soldering is required for building a 3D printer. But a soldering iron can also be used to heat up threaded inserts prior to sinking them into printed parts. Threaded inserts are useful for functionalizing printed parts because 3D printers are not able to recreate small thread forms. Without threaded inserts it can be difficult to join off the shelf parts (e.g., motors, switches, etc.) to printed components. You can technically use a normal soldering iron tip to sink the inserts, but it is better practice to use a specialized tip that will keep the inserts going in straight.
The most cost effective iron and tip combination is the Weller SP40NKUS and these import Heat-Set Insert Tips . If you deviate from this combination make sure that the tip is compatible with your soldering iron. Personally, I have the Weller WE1010NA with these tips
Wire Strippers

The Klein Wire Stripper for 22-32 AWG are my go to strippers when building a 3D printer. Stepper motor wires, end stops, thermistors, and most other electrical components that make up a 3D printer use a wire gauge greater than 22. The insulation needs to be removed off of the end of those wires so that they can be connected to motherboard via screw terminals or solderless connectors. For larger wires, such as those from the power supply or extruder heater, I use the 12-20 AWG variant. If you are having a hard time stripping wires then you are most likely using the wrong notch. Keep in mind that stranded wire and solid core wire of the same gauge will use different notches.
Some people swear by the “automatic” wire strippers, like these, but I personally prefer the smaller form factor of the traditional strippers.
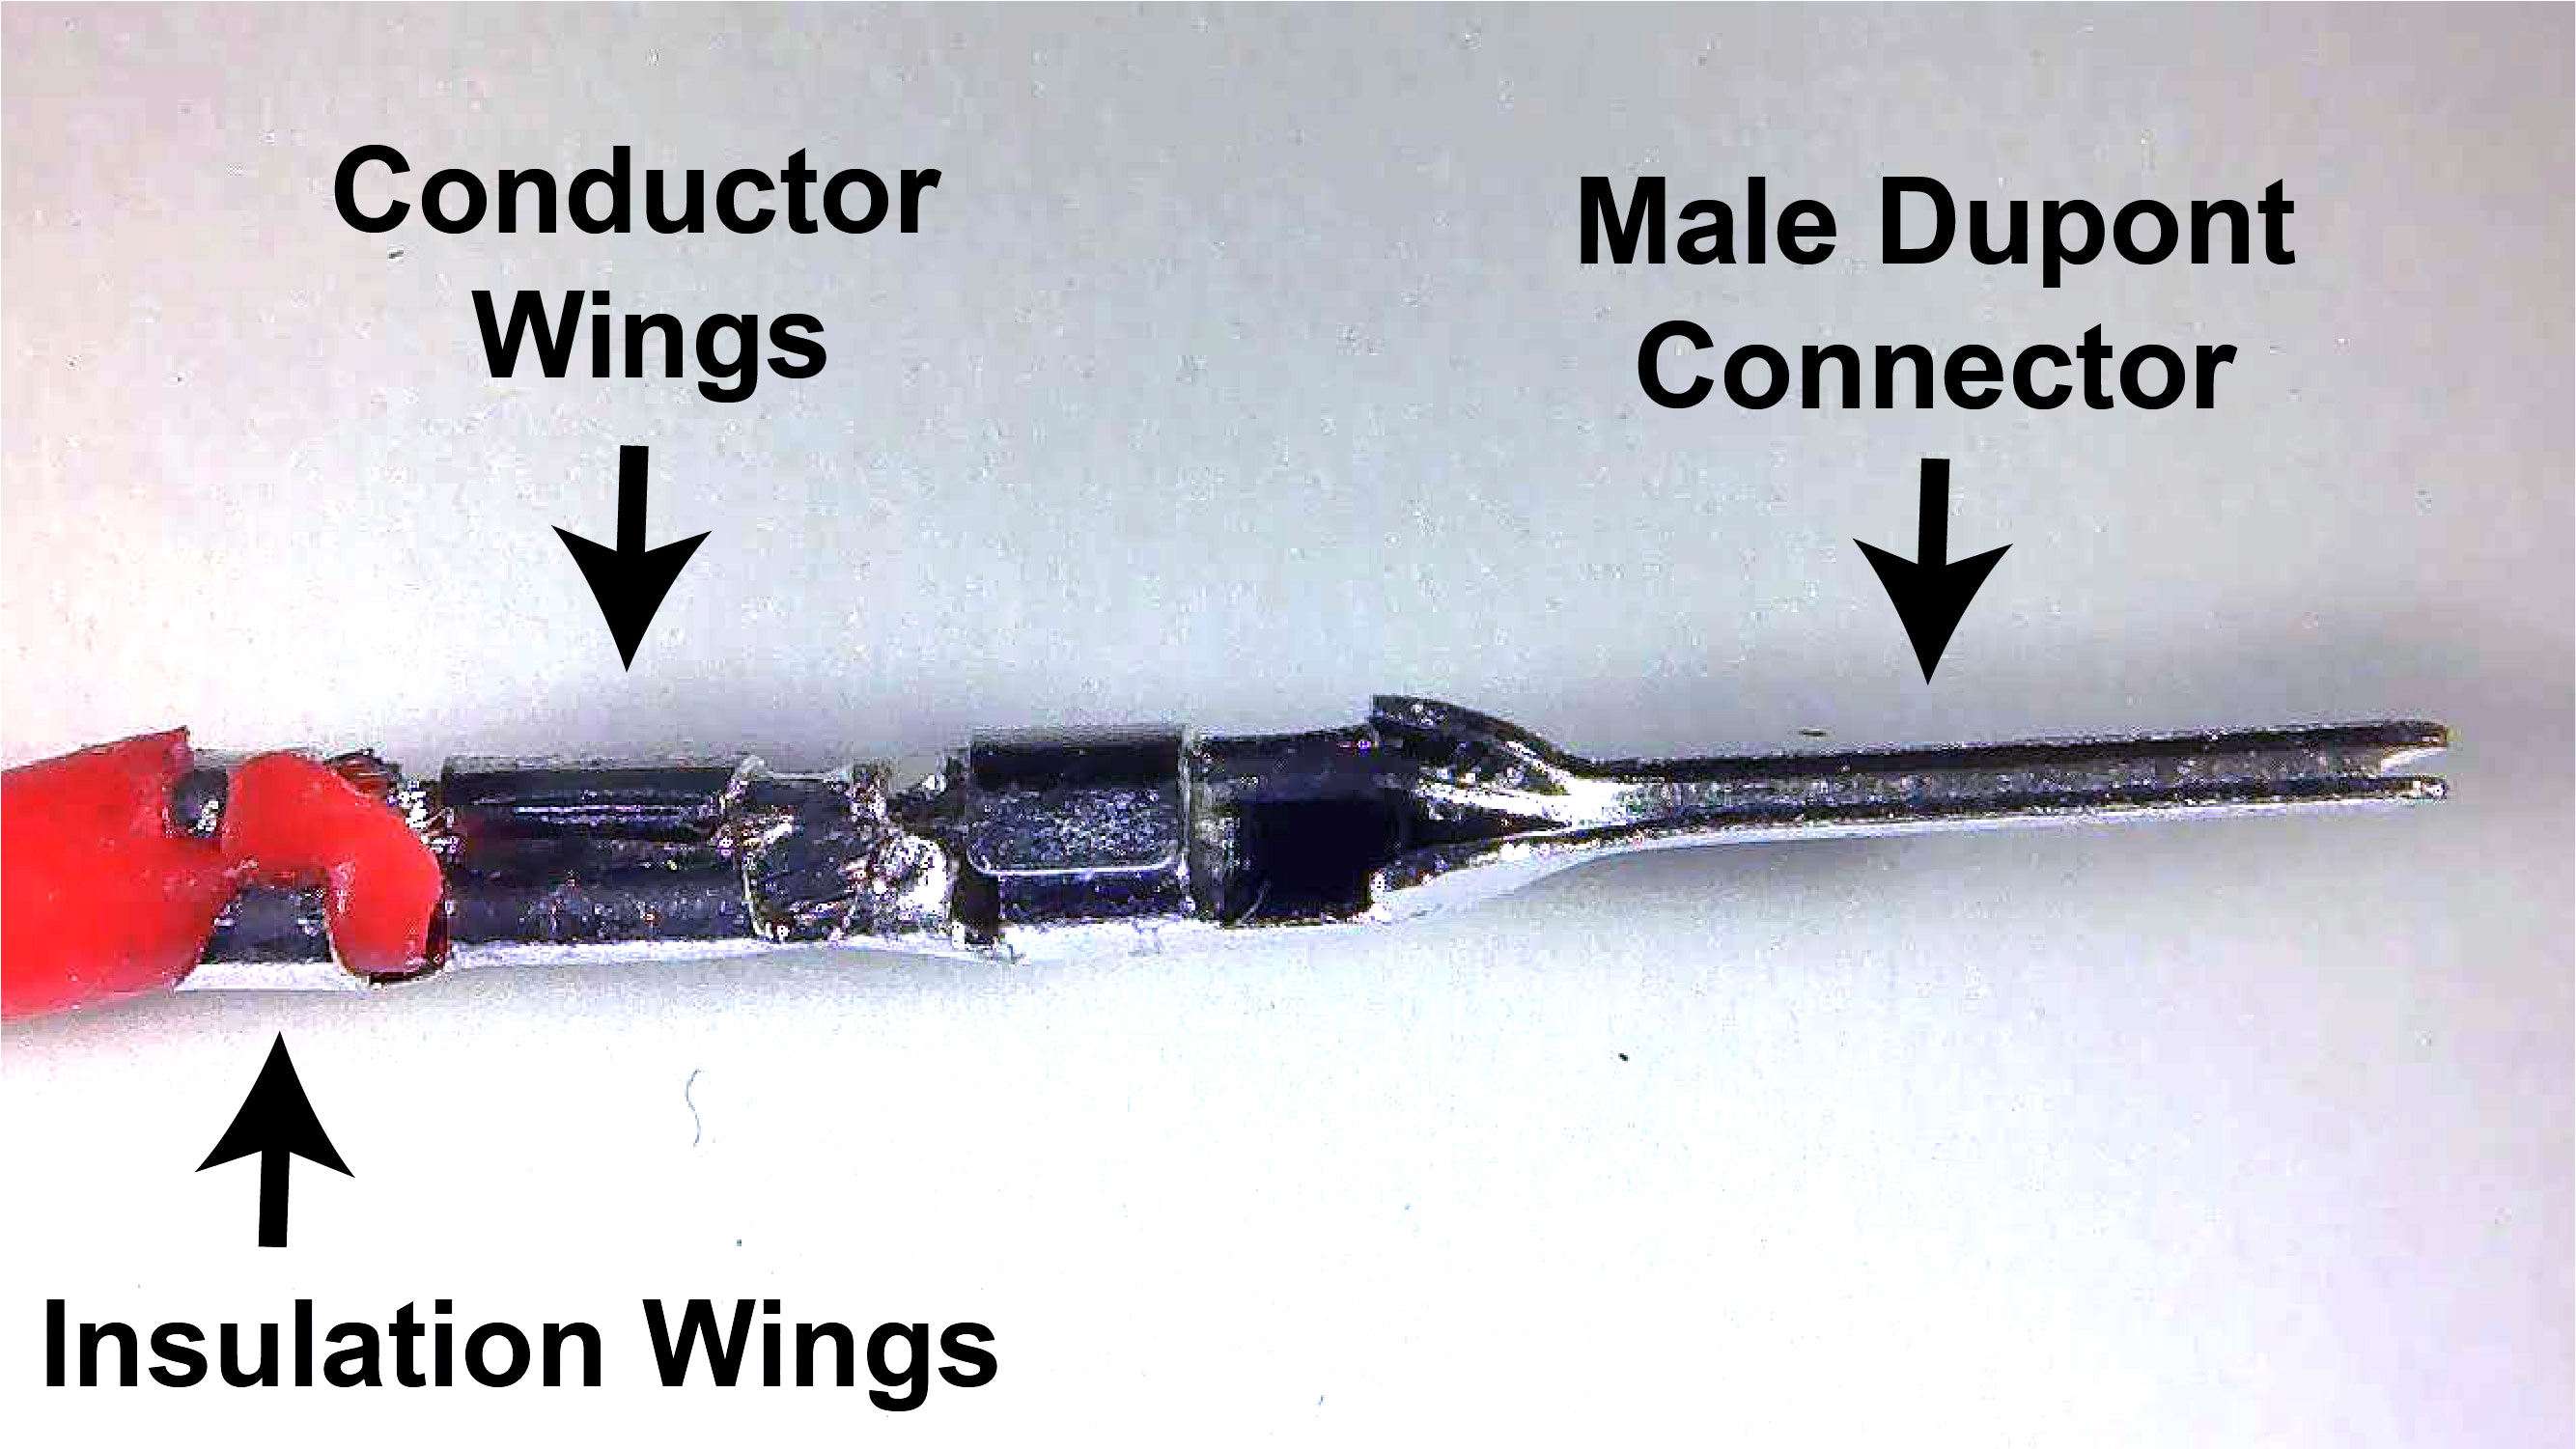
Dupont Crimping Tool Kit
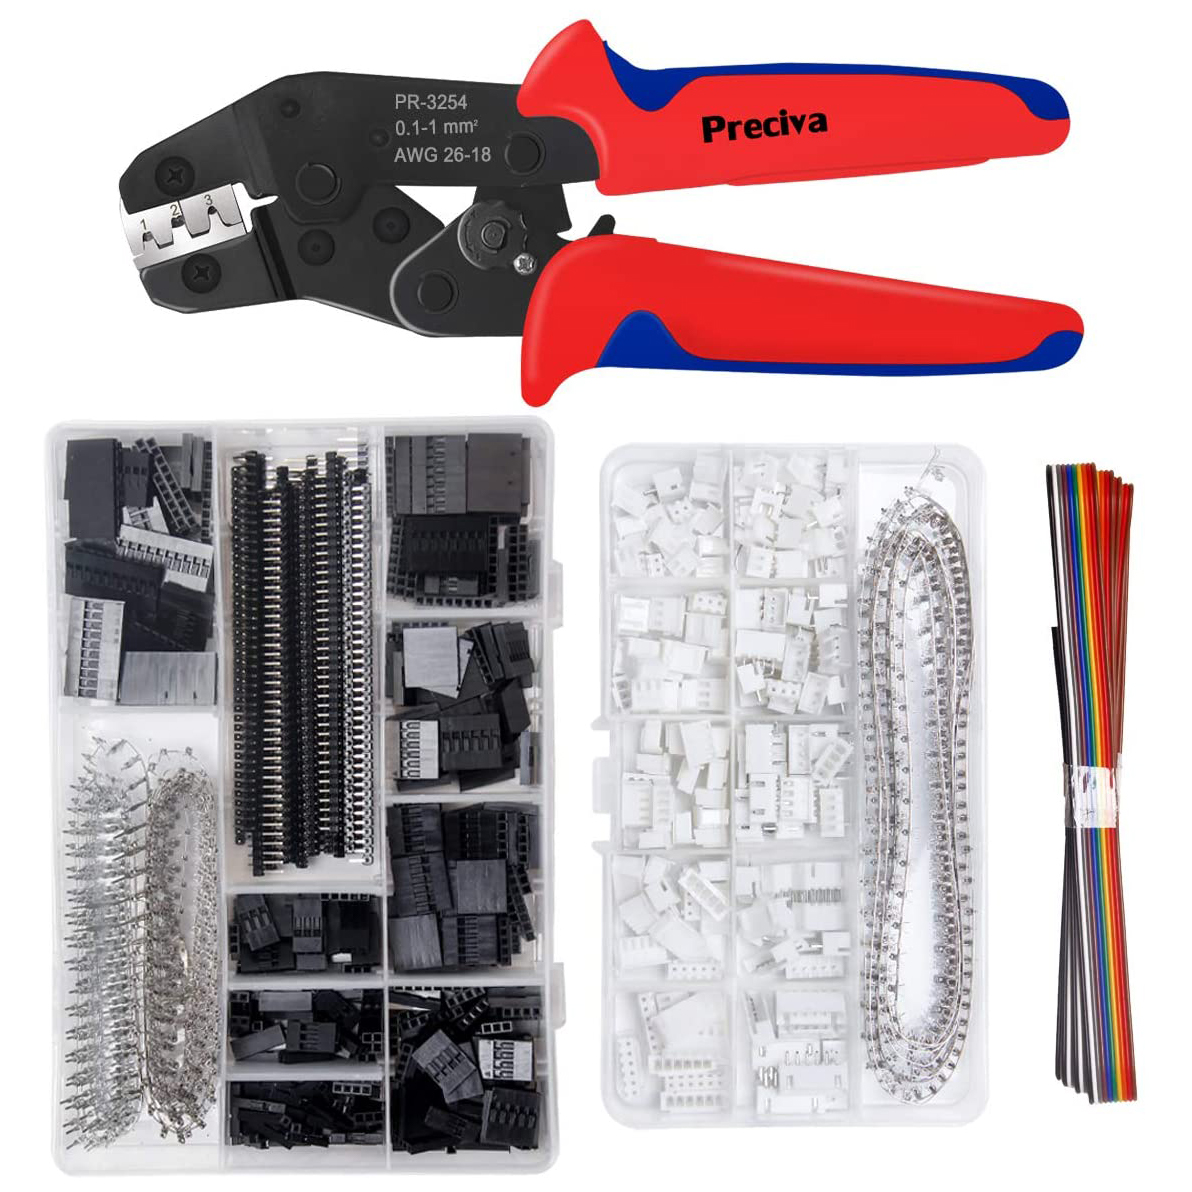
Connecting electrical components to a modern 3D printer’s controller board occurs either through a screw terminal or a Japan Solderless Terminal (JST) connector. JST connectors are small pieces of aluminum sheet metal that have been folded into a geometry with either a pin (male) or a hole (female) that wrap around a stripped wire. A crimping tool is required for installation of these connectors. This tool folds two sets of the connector’s wings around the bare wire and insulation to get a very strong and durable connection.
JST is an umbrella term for many different connectors that fall within this standard. The Dupont connector is one of the most popular types and is used commonly for 3D printer motherboards and other single-board microcontrollers (e.g., Arduino), so it is great to have a Dupont crimper and set of connector laying around. Here is the Crimper and connector kit that I own.
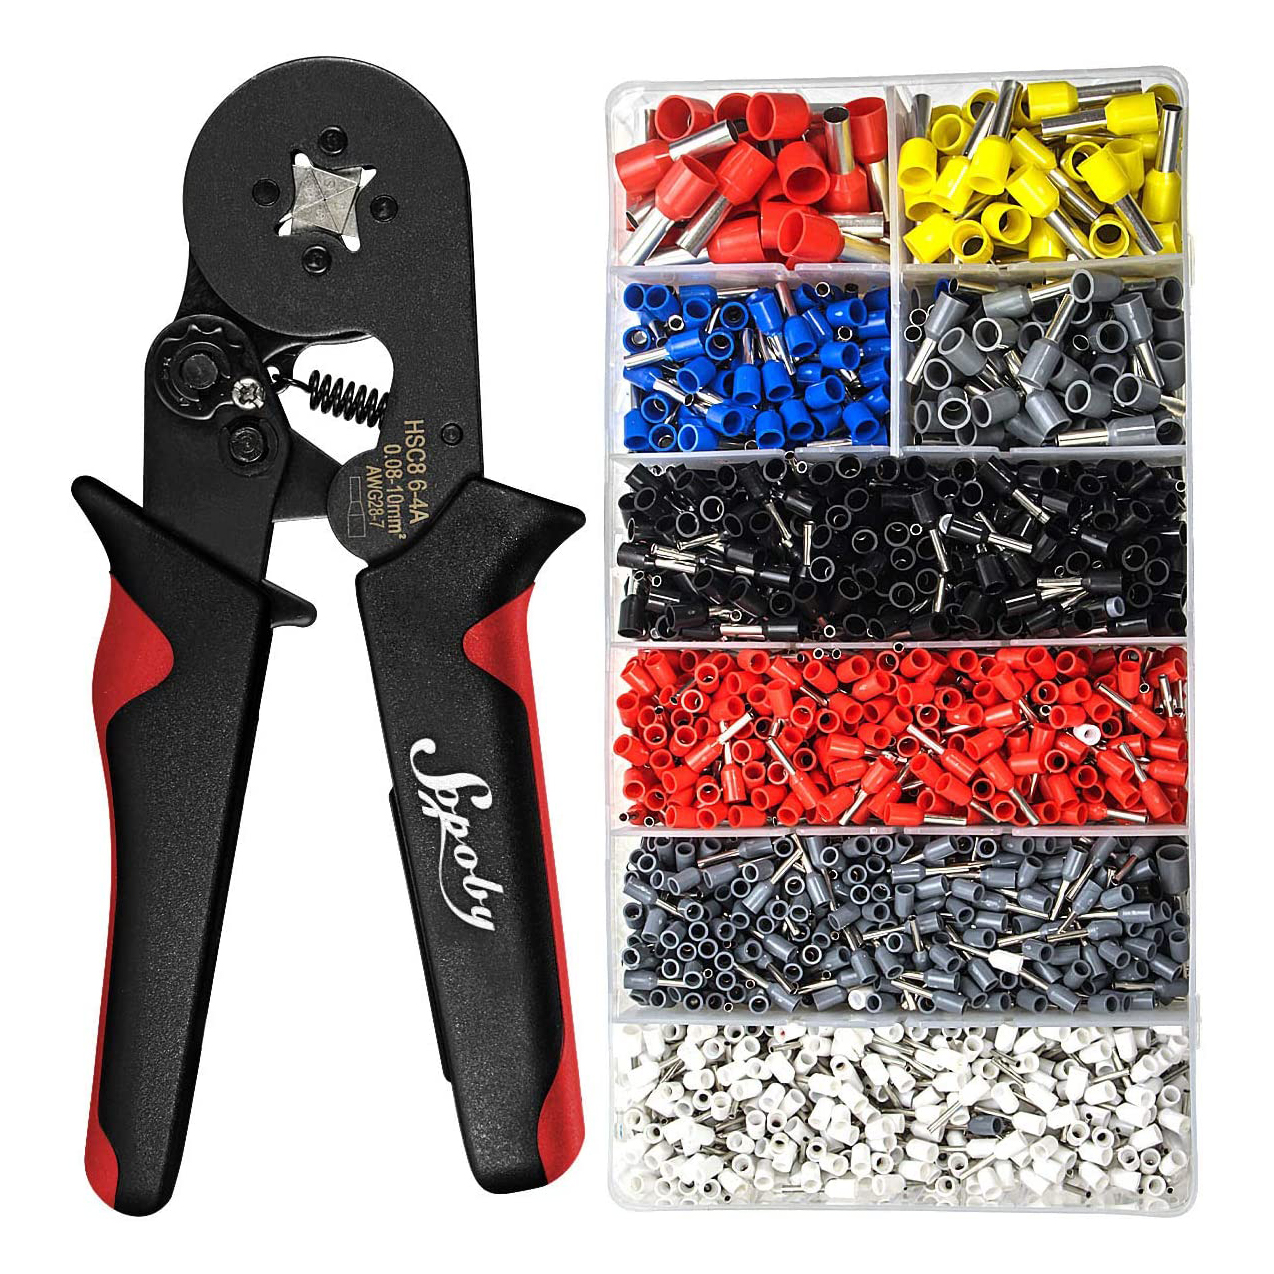
Ferrule Crimping Tool Kit
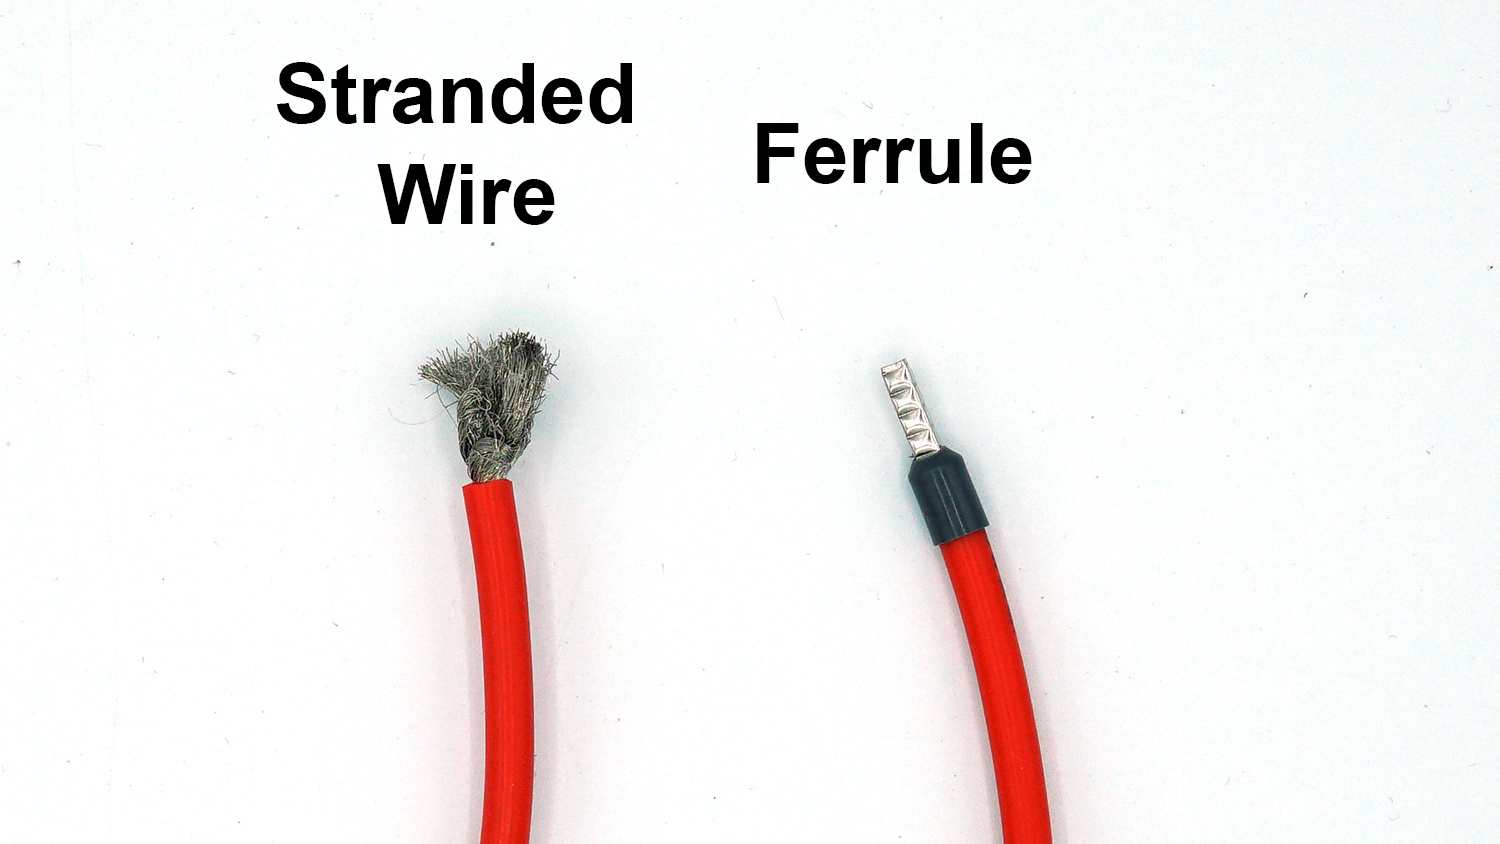
Stranded core wires are used to connect 3D printer electrical components to the controller board because they are more flexible than solid core wire. However, it is poor practice to shove these stranded wires into a screw terminal because it can be difficult to tell if all the strands are inside the terminal. If any of the strands are sticking out, then they may make contact with the neighboring terminal or pins, which is typically the opposite polarity. Trust me, I have fried a motherboard or two with improper management of stranded wires.
The correct procedure is to crimp on a ferrule to the end of a stranded wire. A ferrule basically turns a stranded wire into a solid core wire at its end. The ferrule also provides a better surface for the screw terminal to clamp down on, which minimizes intermittent connections or the possibility for the wire to completely fall out of the terminal. Here is the Ferrule Crimper and Connectors that I have in my toolbox.
Engineer's Square
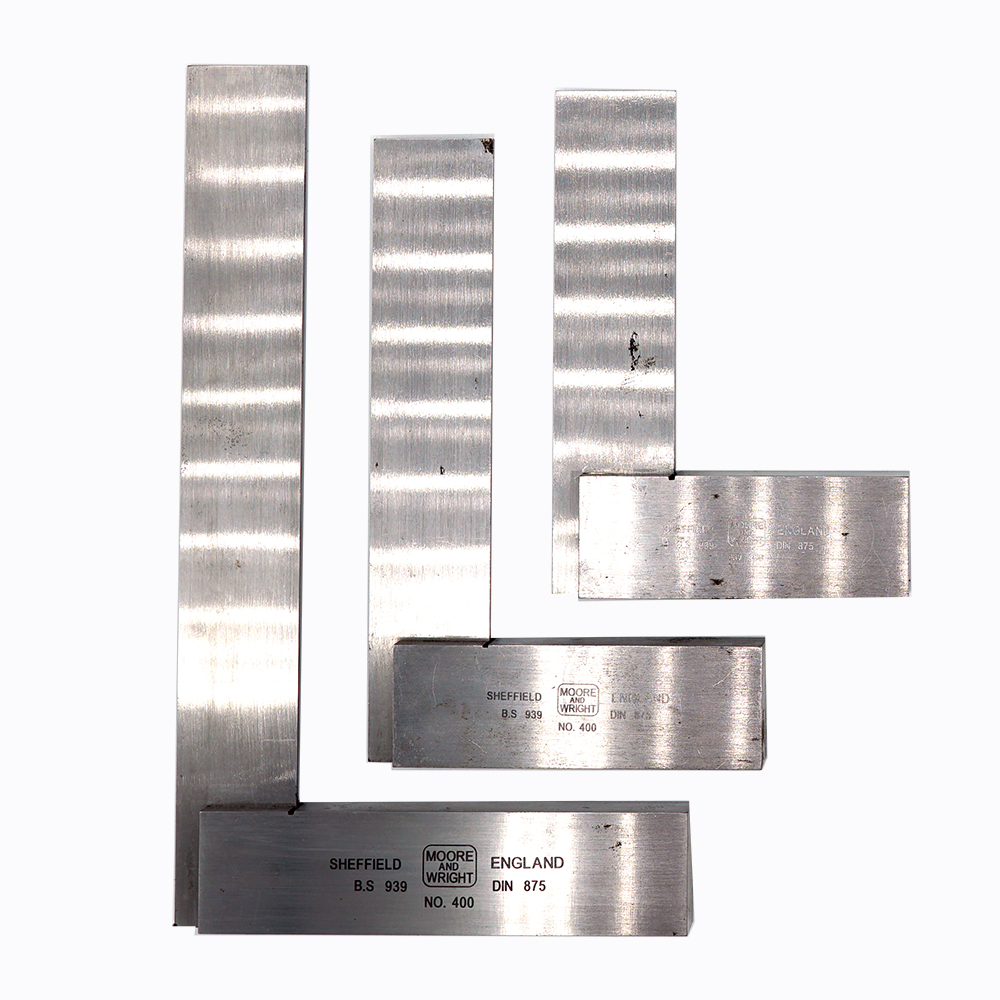
Squareness of the axes (i.e., being at right angles to each other) is critical for a properly functioning 3D printer. If your Z-axis is leaning over, then your calibration cube is going to be skewed. The easiest way to make sure that your printer’s frame and axes are aligned correctly is to use an engineer’s square. When the square is pressed up to a corner there should be no light passing through either edge. I own a couple different size squares, but I mostly use the 150mm (6”) and 75mm (3”) lengths.
Calipers and Measuring Tape
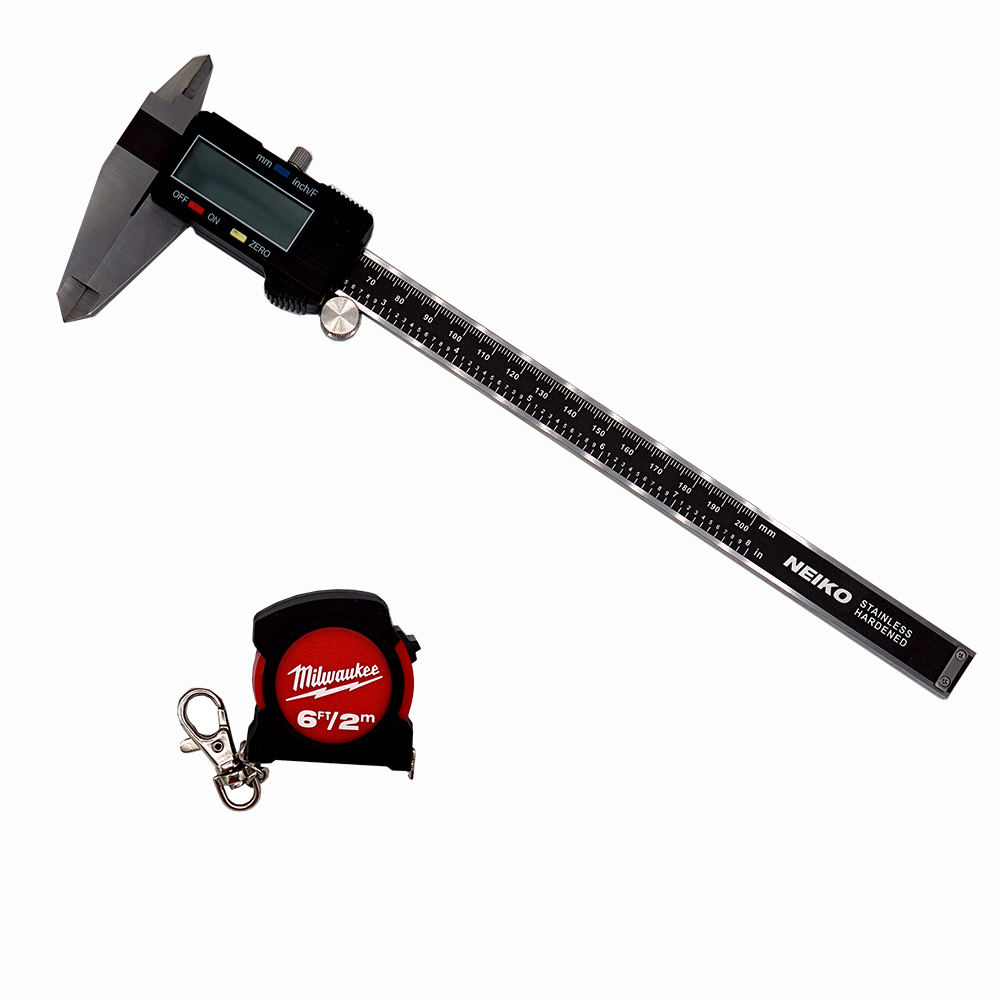
While not strictly necessary for 3D printer building, calipers are great for accurately measuring small distances. I use the affordable but reliable NEIKO digital calipers to check distances between components and the dimensional accuracy of calibration prints.
If your DIY 3D printer design uses varying lengths of aluminum extrusion, then you will need to measure and cut the pieces. My Milwaukee 6’/2m is my favorite tape measurer and it fits in my pocket. All 3D printer designs are in metric, so for my American friends this tape can be used for both metric and freedom unit projects.